Digital withdrawal function - Textalk Abicart
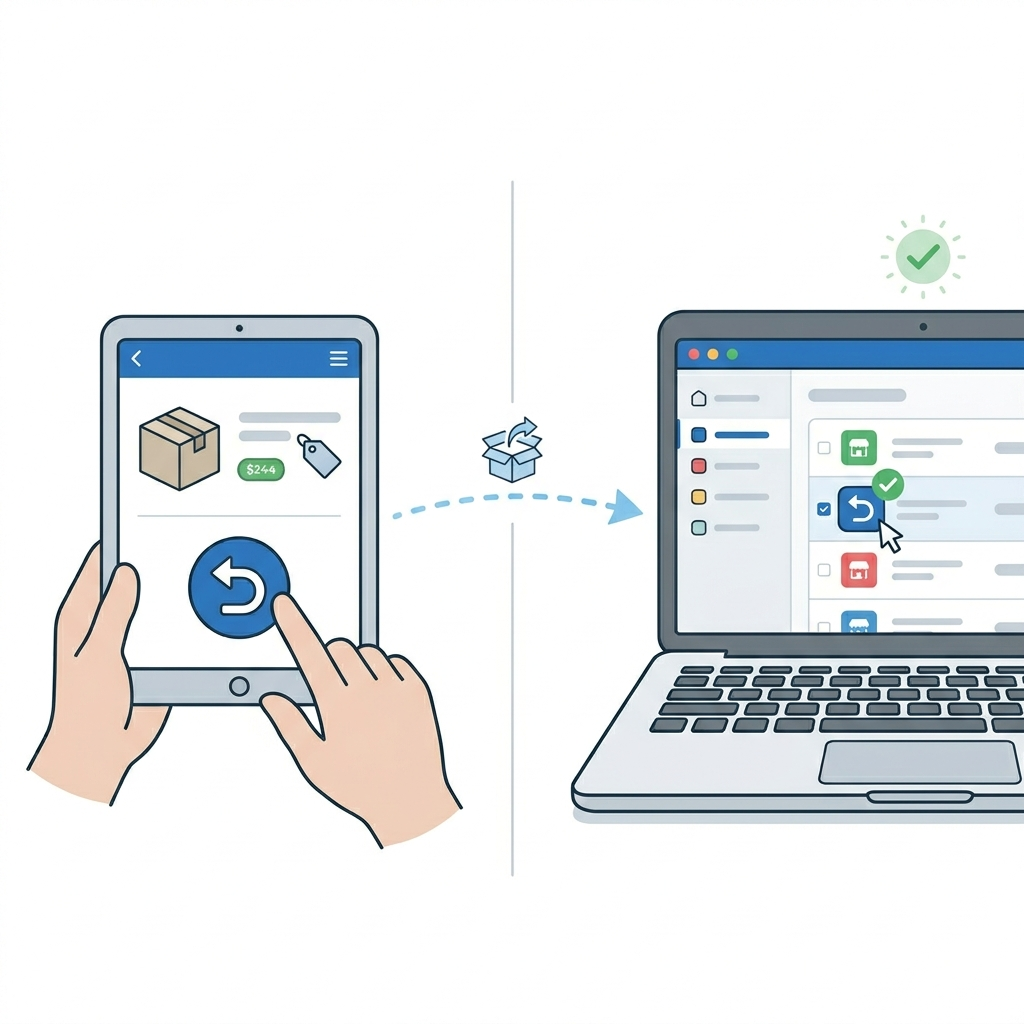
On June 19, 2026, new amendments to the Distance Contracts Act (DAL) will enter into force. The biggest change is the requirement for a digital withdrawal function - popularly known as the 'undo button'.
The aim of the law is to strengthen online consumer protection and counteract so-called 'dark patterns' (designs that make it difficult for the customer to cancel or change something). In short: it should now be as easy for a customer to cancel a purchase online as it was to complete it.
New Legal Requirement: The "Withdrawal Button" in E-commerce
On June 19, 2026, new amendments to the Distance Contracts Act (DAL) will enter into force. The biggest change is the requirement for a digital withdrawal function - popularly known as the 'undo button'.
The aim of the law is to strengthen online consumer protection and counteract so-called 'dark patterns' (designs that make it difficult for the customer to cancel or change something). In short: it should now be as easy for a customer to cancel a purchase online as it was to complete it.
A new legal requirement means that online stores must provide customers with a simple, digital way to exercise their right of withdrawal - without having to call or send a manual email.
Important: Deadline June 19
If your online store lacks this feature after June 19, it may be considered a violation of the Marketing Act. This could result in penalties and a significant extension of the customer's right of withdrawal period.
What does this mean for you as an e-commerce retailer?
- Clear and easily accessible feature: You must provide a clearly placed feature (e.g., in "My Account" or via a direct link in the order confirmation) where the customer can indicate that they wish to exercise their right of withdrawal.
- Immediate confirmation: When a customer submits a cancellation request, the system automatically sends them a receipt of confirmation immediately.
- Unchanged cancellation period: The right of withdrawal itself remains unchanged - the 14-day cancellation period still applies to goods and services covered by the law. Only the way the customer notifies the store is being simplified.
Step 1 - Enable the Withdrawal Form in Your Store
The first step is to make the withdrawal form visible and accessible to your customers. You can do this via the built-in footer link, or by creating your own links in the menu or on other pages.
Option A: Enable a link in the footer
Supported theme versions
This setting is available in: Fabrikk 1.6, Nordic, Hadje, Bountiful, Emporium, Trailblazer, and Brew 1.1, as well as Azalea 1.2.
Recommendation: If your store uses an older theme version, we strongly recommend upgrading. The latest theme versions are optimised for modern web technology, giving your store better performance, faster load times, and stronger SEO.
- Go to Appearance → Themes → Edit the active theme → Content → Footer.
- Scroll down to the "Link to Right of Withdrawal Form" setting.
- Select the On option. If you want to change the default link text, edit the field directly below.
- Click Save.
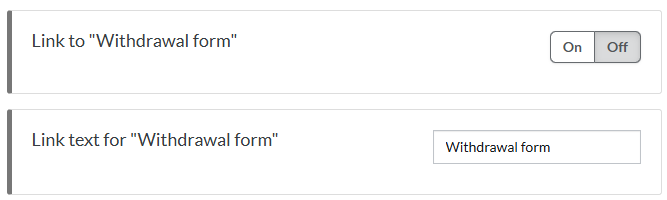
Once enabled, the link appears at the bottom left of the store, below the store's address information.
If you do not have an address field in your footer, that is alright - you can still add the link as custom HTML text in your footer.
If you are using custom HTML in all four footer columns, you can create a manual link to the withdrawal page by following these steps:The link will then appear in the footer.
- Go to Appearance → Themes → Edit → Content → Footer.
- Add the link text for the withdrawal link in any HTML block.
- Then ollow option B
Option B: Create your own link on a page
If you want to link to the form from other places in the store - for example, from the "Terms & Info" page - you can create a regular text link.
- Go to Pages → System Pages → Cancel Purchase. Copy the address in the URL field.
In a multi-store system, the system page is located in the sub-store.
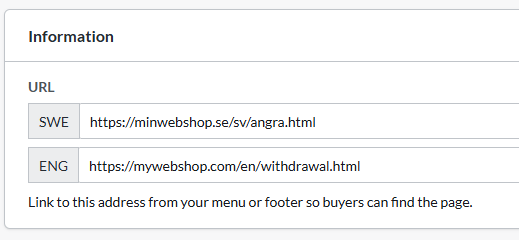
- Navigate to the page where you want to place the link - for example, Pages → System Pages → Terms & Info.
- Type the text the customer should click, for example "To the cancellation request form." Select the text with your mouse and click the link icon in the toolbar.
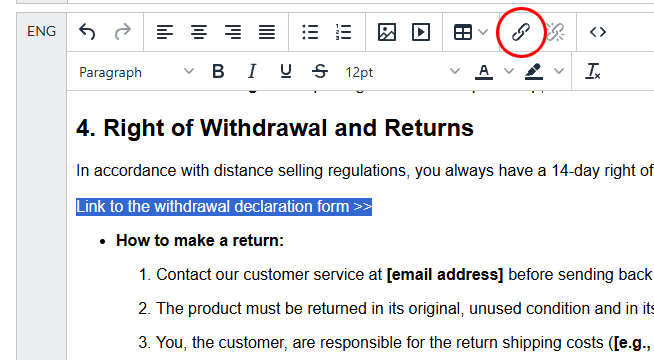
- Paste the URL into the "URL" field and click save in the link dialog.
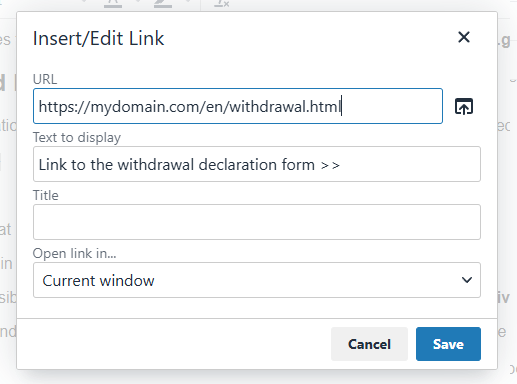
- Click Save again to save the page.
Option C: Add a link to the menu
- Go to Pages → System Pages → Cancellation Request. Copy the address in the URL field at the top of the page.
- Navigate to the menu in the theme: Appearance → Themes → Edit the active theme → Content → Menu.
In some themes, such as Fabrikk, the menu is located under Content → Header.
- Scroll to the bottom of the page to "Menu Items."
- Click "Add," select "Custom Link," and paste the URL into the field below.
- In the "Link Title" box, enter the name you want the link to have in the menu.
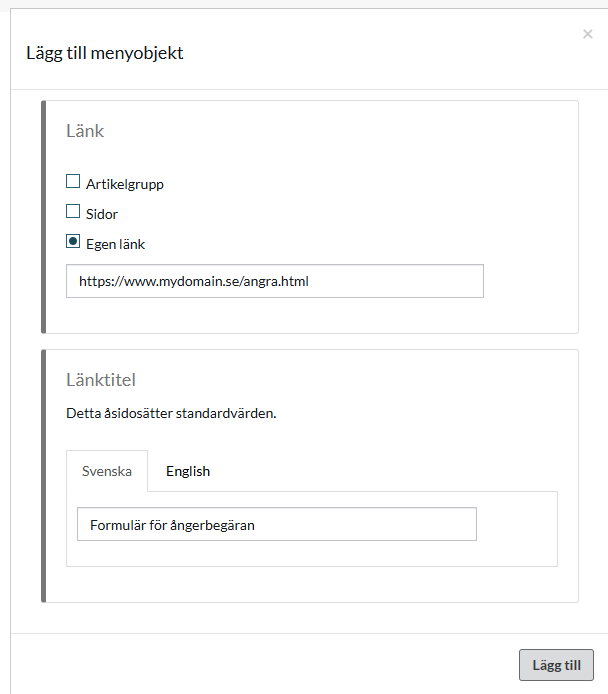
- Click "Add" and then the save button in the theme.
Step 2 - What the Customer Experience Looks Like
Once the form is live, this is the process your customers will go through when they want to cancel a purchase.
1. The customer navigates to the withdrawal form.
They enter their order number and the email address associated with the order.
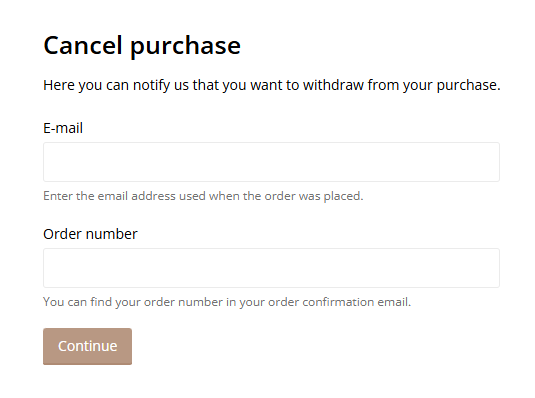
2. The customer submits their request.
Once the system has verified that the order exists in the store, a new page appears where the customer can write a message and submit their request.
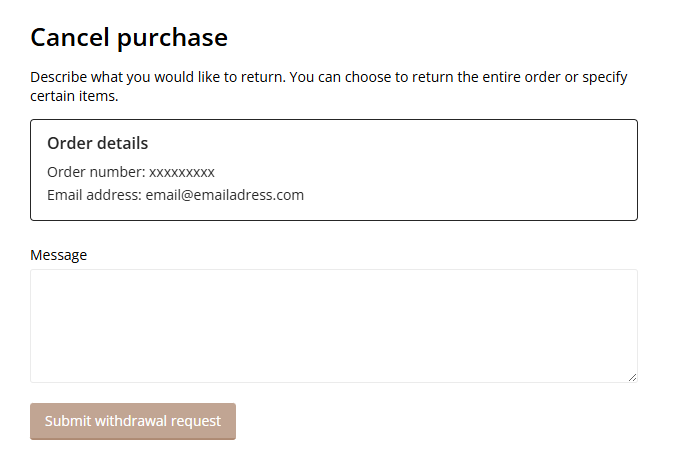
3. The customer confirms via email.
After clicking "Submit Request," an email is sent asking the customer to confirm their request. Once confirmed, the case is forwarded to your store automatically.
Step 3 - Managing Incoming Withdrawal Requests
Once requests start coming in, you can manage them all from one place in the admin panel.
Go to Orders and the tab Withdrawal Requests. All incoming requests from your customers are collected here. New, unprocessed requests are automatically assigned the status New. To sort the list, filter by: All, New, Approved, or Denied.
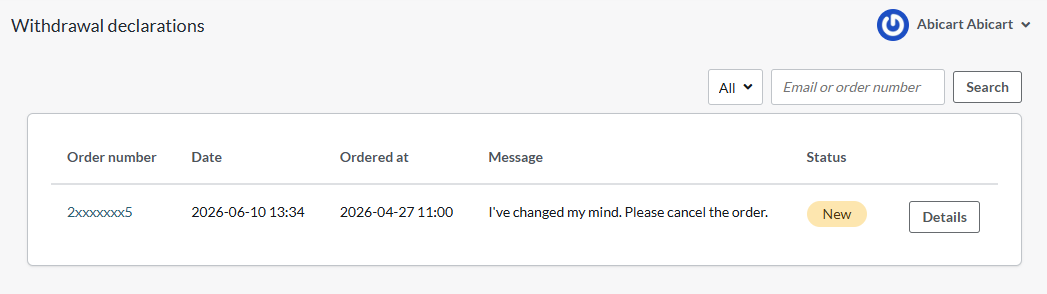
Click "Details" to view a detailed overview of each return request.
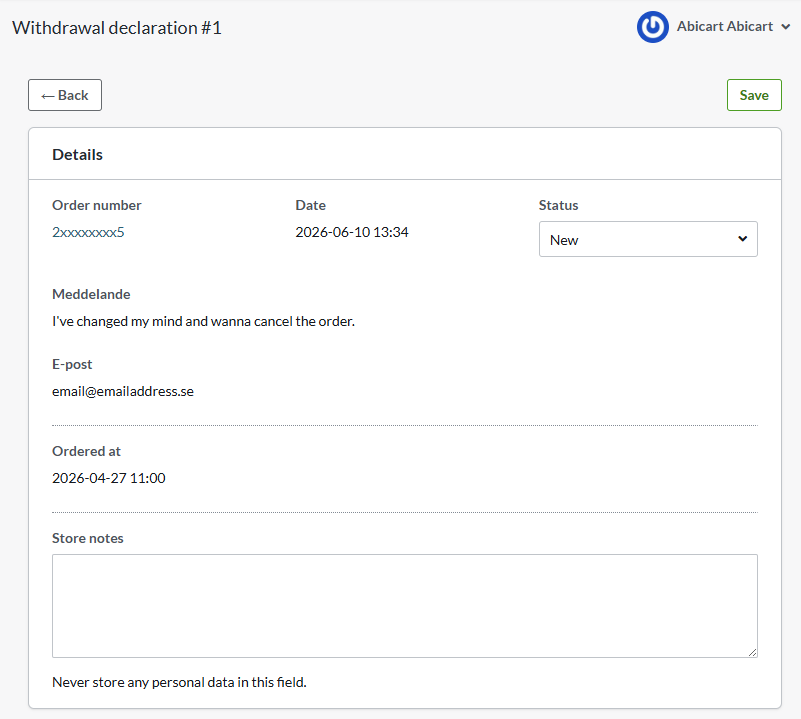
The order cannot be modified directly in this view - the page only displays the customer's return request. To adjust or cancel the order itself, click the order number to go to the order page.
Once you have reviewed the request, mark it as Accepted or Rejected.
E-post
Emails to the customer are sent from the email address specified in the ‘Order Confirmation Sender’ field (Settings >> Email)
The email notification for your shop will be sent to the email address specified in the ‘Order confirmation copies’ field (Settings >> Email)