
Feed for Google Shopping. The feed can be found under Settings>External links>Product feeds.
What is Google Shopping?
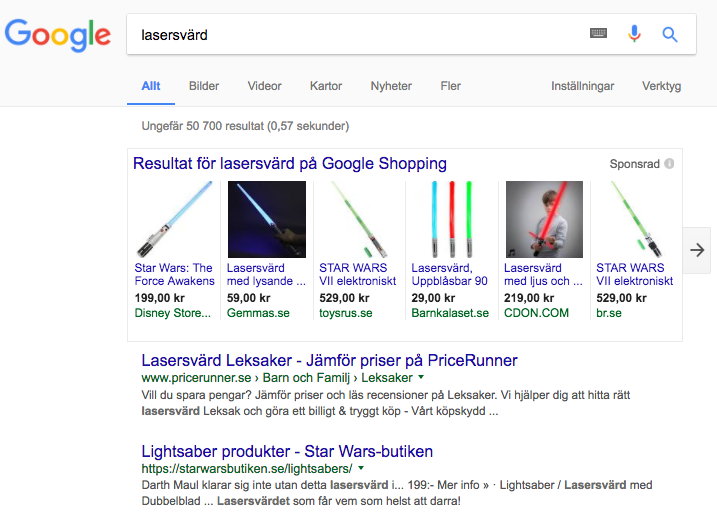
Google Shopping works much like AdWords, but unlike AdWords text ads, the search results display both image, price and product details, making it easier for visitors to compare products before buying.
This is what Google Shopping looks like in search results:
Things to consider when it comes to Google Shopping:
- Google Shopping is included in all subscriptions at no extra cost.
- You need to have anSSL certificate (https://) in your store to use Google Shopping.
- You need an Adwords account to create a Google Shopping campaign. Read more about this further down in this article.
- Only themain product is included in the file - not the customer's choice.
What characteristics must be filled in on the product?
For a product to be included in the feed, the following properties must be filled in:
- item number
- product name
- description and/or introductory text
- product group
- price
- Brand name* or GTIN
- Google Taxanomi
* activate brand under Assortment -> Settings -> Product attributes
Google Taxonomy
For a product to be included in the file, it needs to have a Google category (taxonomy). The category can be set both on a product group and on individual products.
Setting the taxonomy on a product
Go to Products -> select a product, edit -> in the "Categorization" box on the right is Google Taxonomy.
Here's how to set category on your product groups
Go to Products -> Product groups -> select product group, edit -> under General there is Google Taxonomy.
For example, type in "clothing" in the search bar and choose the category that fits best. You can also set a category at an entire product group / subgroup and choose that the products in that group should inherit the category (then you do not have to go into each individual product):
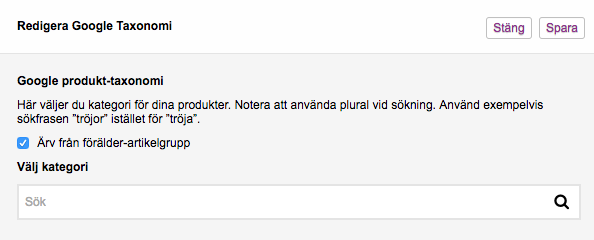
You can't create your own Google categories, everything is taken from Google. You must therefore choose one of the existing ones.
Price file/Feed
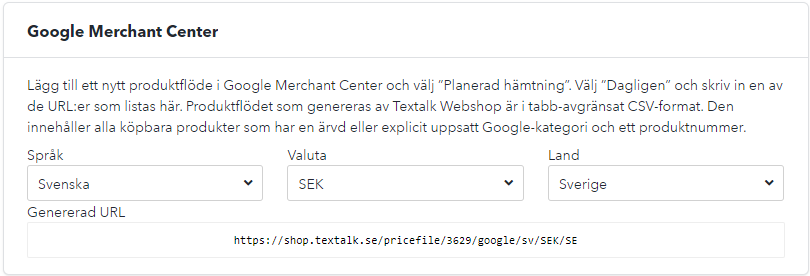
You can find the Google Shopping feed under Settings -> External links -> Product feeds.
Each language and currency gets its own price file (feed):
Verify your store
You can verify your store in two ways. Through Search Console or through Meta tags. Below you can see how to go about it.
Verify your store through Search Console
Fill in information about your store and verify your URL so Google understands that you are the owner. Otherwise, your products will not be visible.
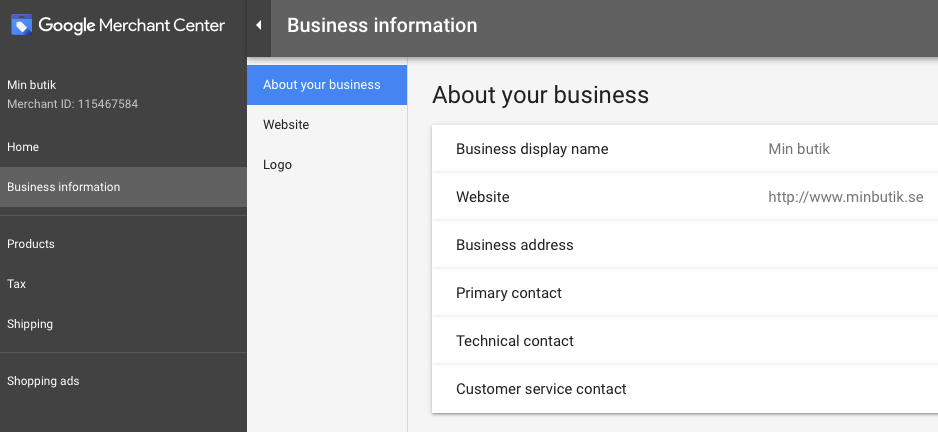
About your business -> Here you fill in information about your store:
Website -> Here you verify your store:
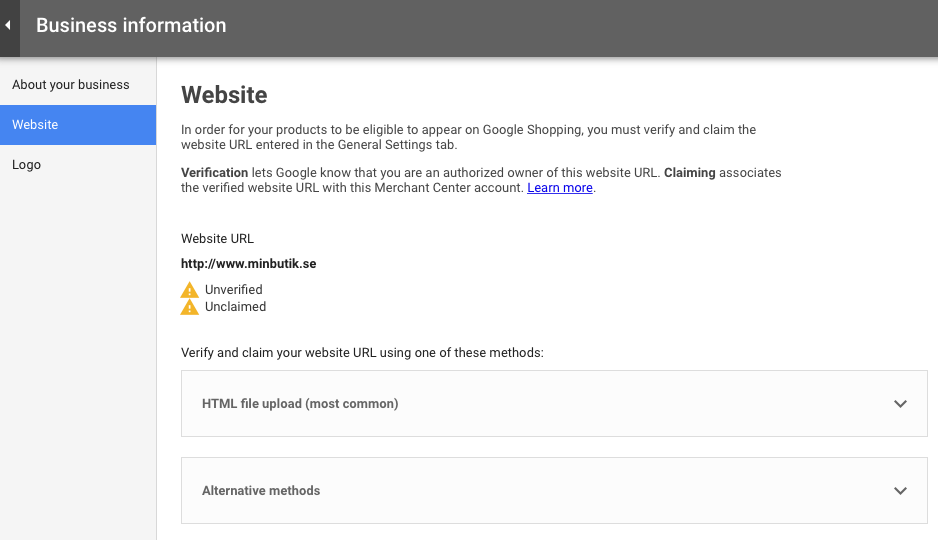
Select"Alternative methods":

HTML tag" and check"HTML tag":
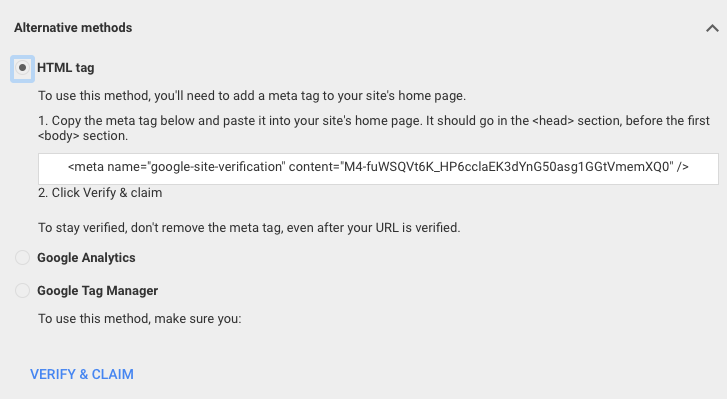
Copy the code from the Merchant Center and paste it into the store theme.
Only the code after content (what is inside the quotation marks) should be pasted into your store theme. If the whole code is included, delete everything except what is inside the last quotation marks:

You paste the code here:
Appearance -> Themes -> select a theme, edit -> Extensions -> Google -> Google Search Console
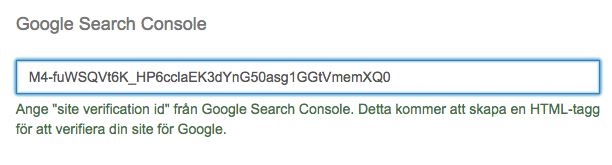
Once you've pasted the code into your theme, it takes about 12 hours for Google to read it. Wait 12 hours and then go back to Google Merchant Center. Click on "verify & claim" to verify that you are the owner of the site:
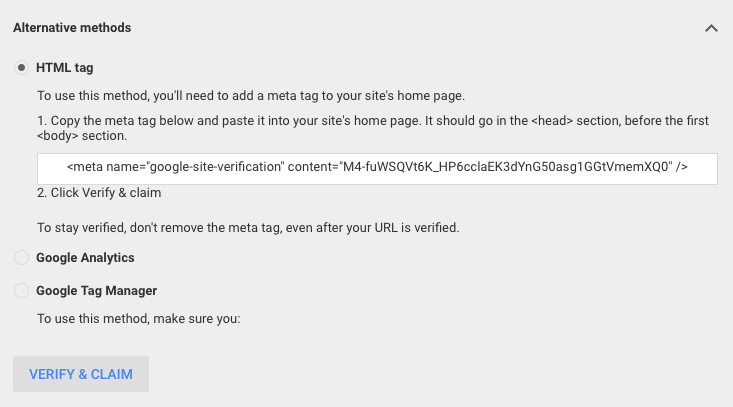
Verify via Meta Tags
If you already have a code entered in the Google Search Console field, you can enter the code from the Merchant Center in "Meta tags" instead.
You enter the code here:
Appearance -> Themes -> select a theme, edit -> Extensions -> Meta tags
Insert the full code from Merchant Center:

Once you paste the code into your theme, it takes about 12 hours for Google to read it. Wait 12 hours and then go back to Google Merchant Center. Click "verify & claim" to verify that you are the owner of the site:
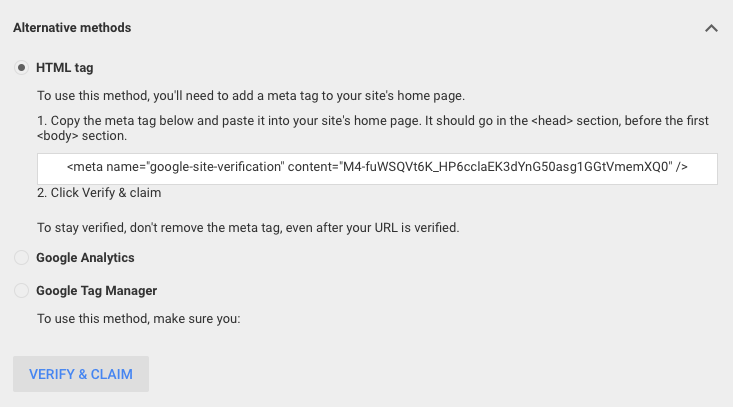
Register a product feed in Merchant Center
Now it's time to upload the products in Merchant Center.
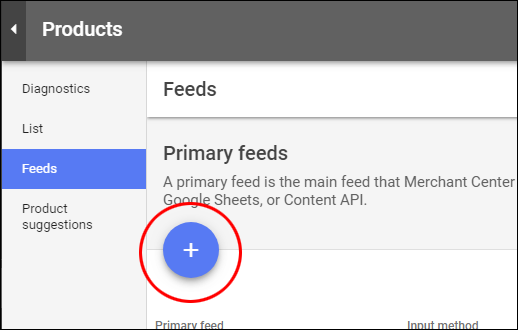
Log in to Google Merchant Center and then click on "Products" and "Feeds".
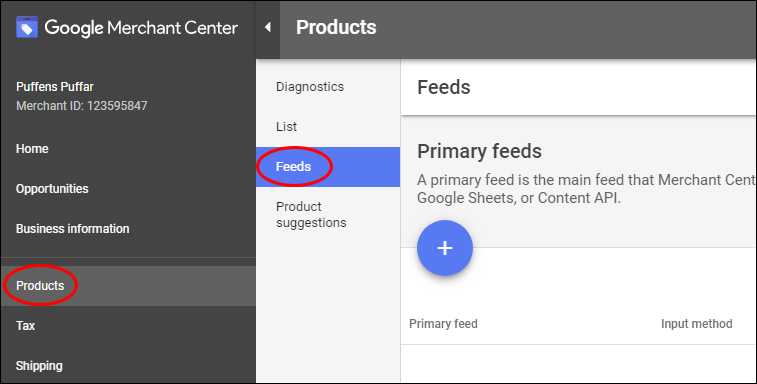
Then click on the blue plus button.
This will take you to "Basic information".
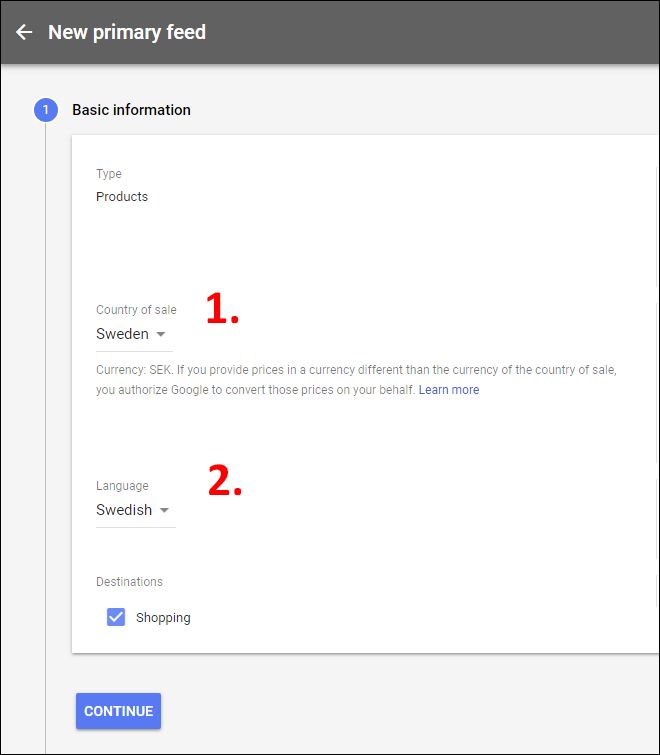
- Select the country you want to target your sales to. In this example we have chosen Sweden.
- Select the language in which the product information should be displayed.
- Then click on "Continue".
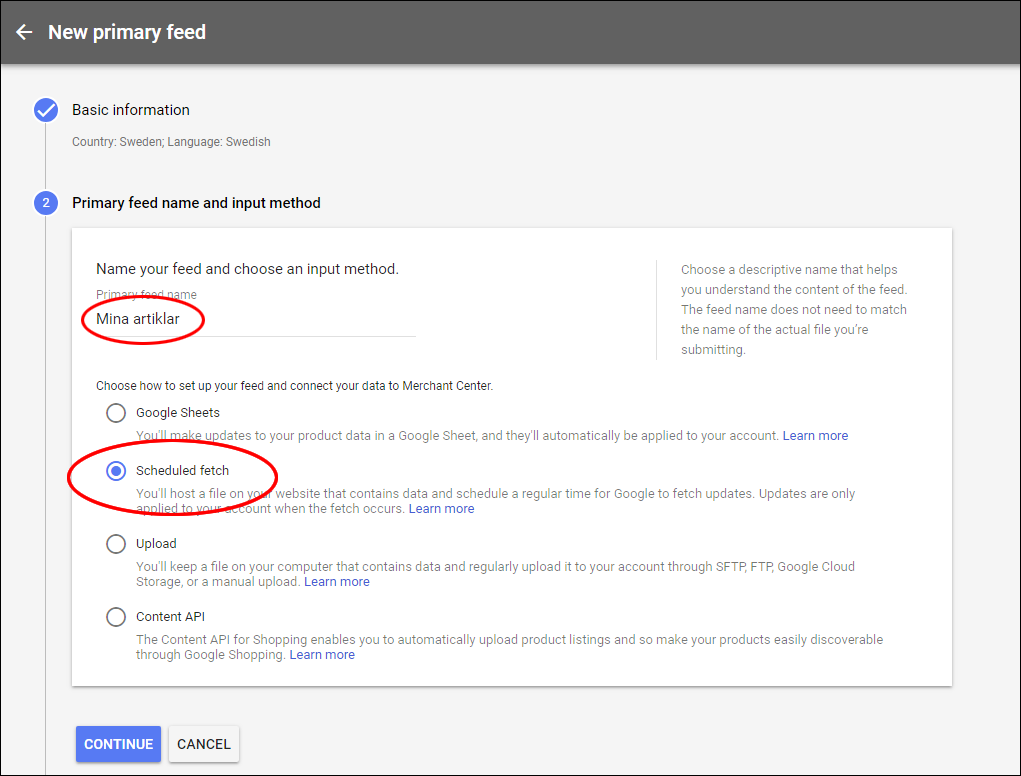
Enter a name for the file and in this example we have specified "My items".
Then check "Scheduled fetch" and then click "Continue".
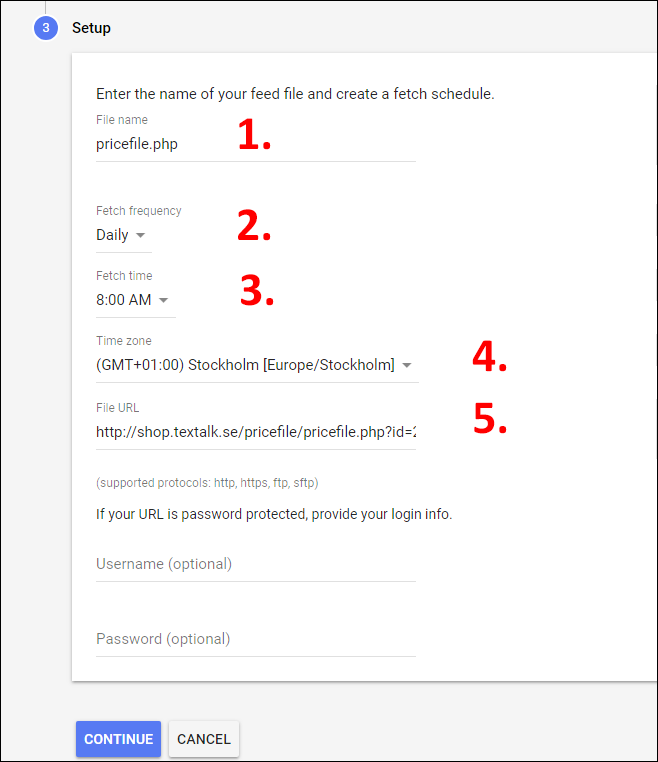
- Enter the name of the feed and you can enter anything, in this example we enter pricefile.php. If you have several different feeds, you can name them pricefile1.php, pricefile2.php, pricefile3.php, etc.
- Specify how often Google should update the file. You can choose between daily, once a week or once a month. In this example, we have chosen to update the file every day.
- Specify what time the file should be downloaded. In this example, we have chosen 08:00.
- Specify the time zone. In this example we have chosen Swedish time, GMT+1.
- Select language, currency and country (if you do not want to include shipping fees in the feed, do not select any country) and then copy the URL to the feed. You can find it in the store under Settings -> External links -> Product feeds. See image.

Then click on "Continue".

Now everything is ready and the feed we created is now displayed under Products -> Feeds in Merchant Center.
Then just be patient and wait as it can take up to three business days before the feed will be approved and activated by Google.
Link Merchant Center and AdWords
In order to create campaigns, you need to link your Merchant Center account with your AdWords account. If you don't have an AdWords account, you can create one here:
How to link Merchant Center with AdWords:
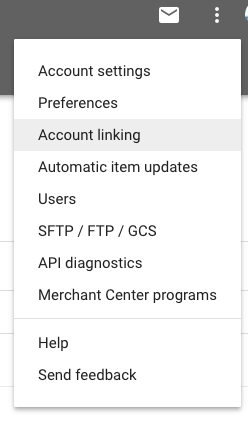
In the top right corner of Google Merchant Center, there arethree dots. Click on these and select "Account linking":
Click on "Link account" under "Your AdWords account":
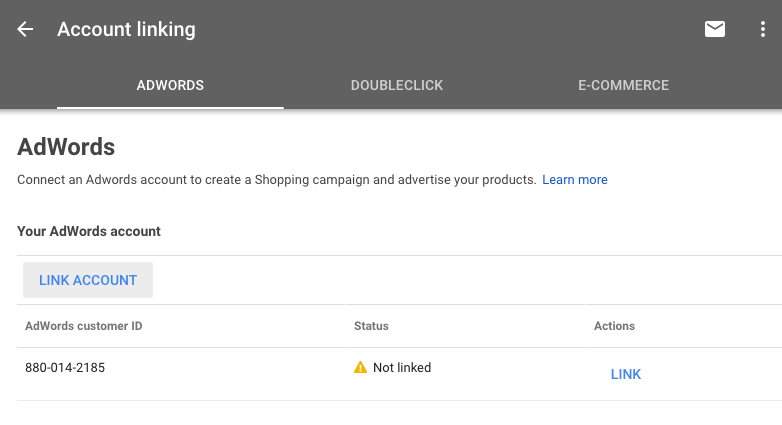
Now you've linked Merchant Center to AdWords and are ready to create a campaign!
Create a campaign
You can create a campaign in both Merchant Center and AdWords. If this is the first time you are creating a campaign, you can do this in Merchant Center.
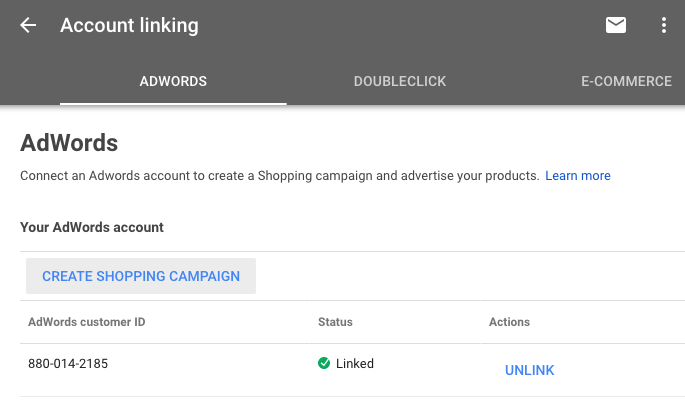
Once you have linked Merchant Center and Adwords, click on "Create shopping campaign":
Name your campaign and select the same country as you did when you uploaded your price file. If the campaign is aimed at Swedish customers, select Sweden.
Enter your budget and click "Create".
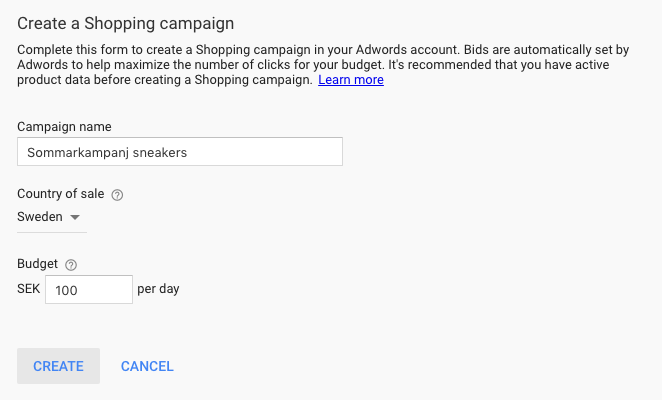
Now you can see your campaign in your AdWords account.
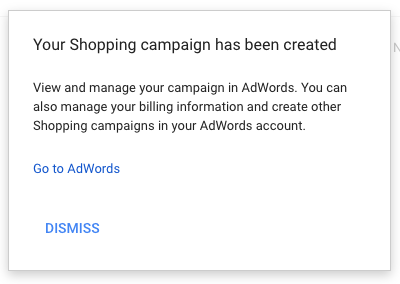
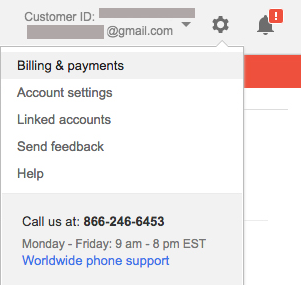
Don't forget to fill in your billing details in AdWords. Click on the gear in the top right corner of your AdWords account and select "Billing and payments":