


Multi-shop system
-
Plan and get started with a multi-store system
27 Nov 2025
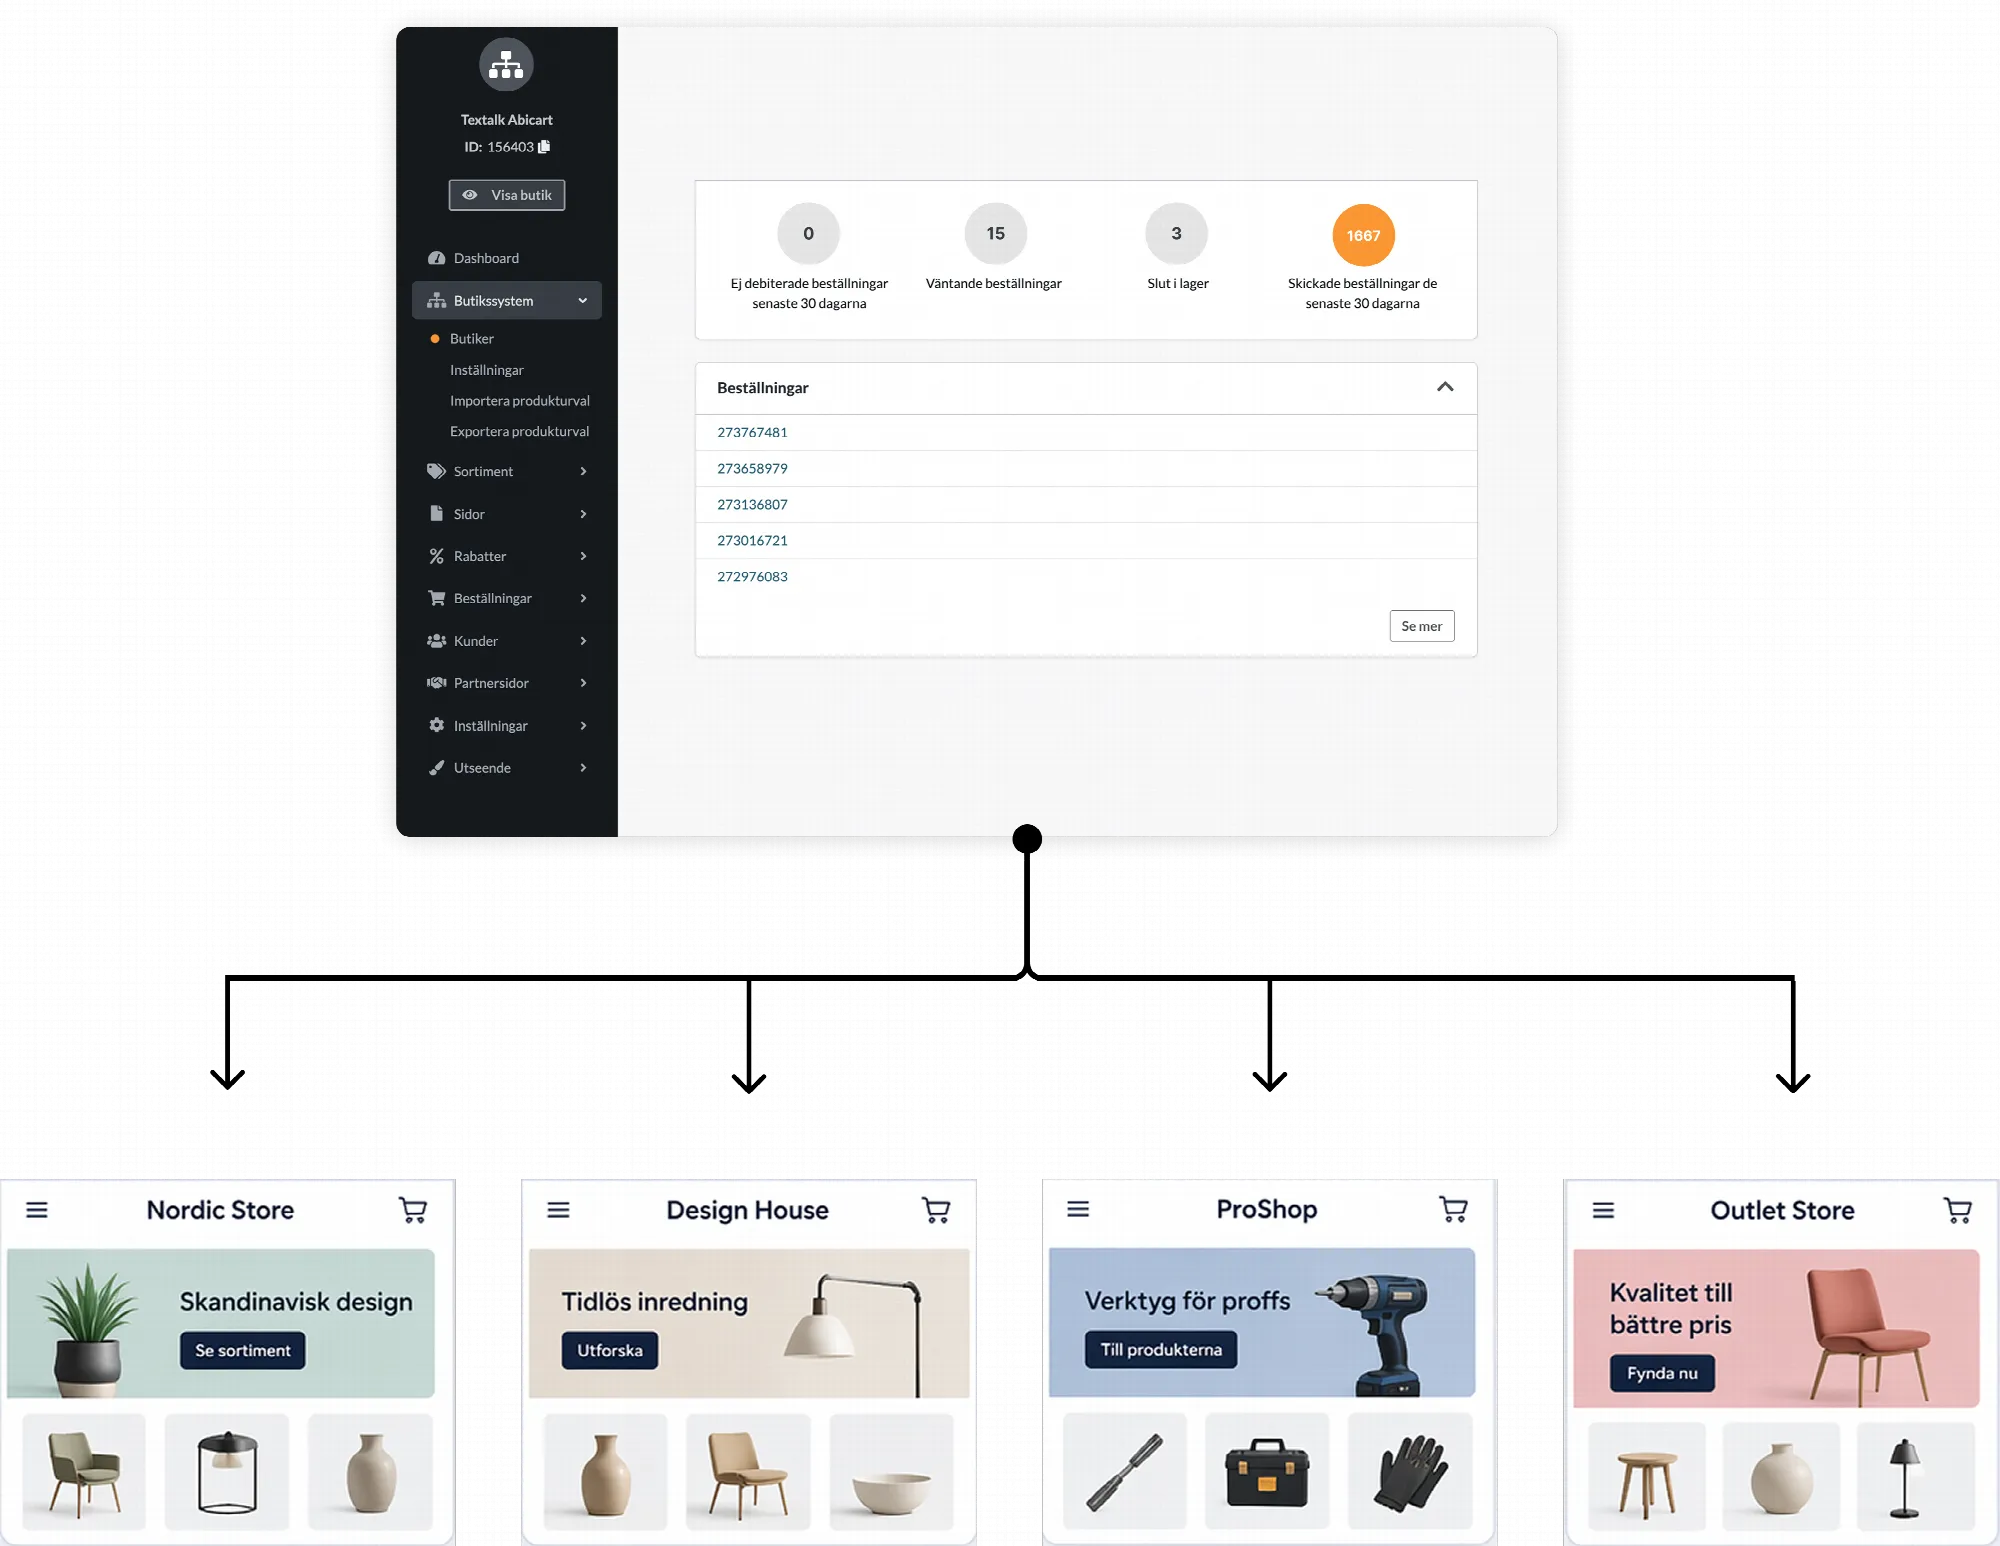
Gather multiple stores for the same company in a common system and adapt each sub-store to its market. This guide is for companies planning or administering a multi-store system in Abicart Pro. Sub-stores have separate settings but share central data with the main store. The feature is intended for multiple stores within the same company, not as a solution for separate legal entities. 1. Choose between languages, customer groups, and sub-stores Multiple languages: is suitable when the same store needs to be presented in multiple languages. Language, currency, and the language's web address are not the same as a separate sub-store.Customer groups and price lists: can be sufficient for, for example, different customer prices in a shared store. Control which customers can see each product range and price; a general discount should not be used as a substitute for customer-specific prices.Sub-stores: are suitable when you need separate store views with their own themes, domains, or selections of products, payment methods, and shipping methods. Choose based on what actually needs to be different. An extra language does not automatically require a new sub-store, and a new domain does not automatically create a multi-store system. 2. Plan before support activates the feature The activation cannot be undone by turning off the feature. Existing standalone stores cannot be automatically merged into a multi-store system. Contact support before you order or move content if you already have multiple stores. Describe which markets and customer groups each sub-store will serve.Determine the product range, pricing structure, languages, currencies, domains, and theme for each sub-store.Review payment agreements, shipping terms, and which integrations will be used in each store.Request a cost estimate for Pro, the desired number of sub-stores, and any add-ons.Contact support for activation and agree on how existing data and integrations should be handled. 3. Configure and check each sub-store Select the correct store in the admin panel before editing. The sub-store can have its own theme and domain name, as well as a selection of the shared product range and available payment and shipping methods. Some settings are shared or inherited from the main store. Therefore, check if a field applies to the entire system or just the selected store before changing it. Follow the multi-store system's setup guide once the structure is decided. Then, check each customer view: correct domain, language, currency, visible products, customer prices, payments, and shipping options. Shared administration does not mean that accounting, order exports, or an external integration will automatically be correctly divided. Check the store connection, order tagging, inventory responsibility, and export flow with the relevant integration before the sub-store goes live. 4. Follow up on subscriptions and sub-stores Check which sub-stores and add-ons are included when the subscription is renewed, and read the order summary's period, price, and VAT before confirming. Hiding a store or stopping its use is not a cancellation. Follow the subscription's cancellation process if a part is to be terminated. Quick start Determine if languages or customer groups are sufficient, or if you need sub-stores.Plan each store's product range, prices, and integrations.Confirm costs and activation with support before making the change.Configure and check each sub-store separately. Subscription and costs Multi-store systems require Pro. The cost is affected by the number of sub-stores and ordered add-ons. The current agreement and order summary apply; do not assume that a sub-store is free of charge because it is administered from the same account.
-

Add new product group to be displayed in the sub-store (Multi-store system)
27 Nov 2025
When you create a new product group at the top level of your multi-store system, you need to choose to include it in the product selection of your sub-store. If you do not check the product group in the sub-store product selection, it will not be visible to the customer.This is how you do it:First create the new product group (Link to the product group manual)1) Go to Store System >> 2) Stores >> Properties of the sub-store you want to display the product group in 3)4) Click on Product selection5) Check that the product group should be visible in the store6) SaveNote! If you have a customer login in any of the stores, you also need to edit product selections for the customer groups that should have access to the product group.Link to the manual for multi-store systems.
-

Plan and configure a multi-store system
27 Nov 2025
Plan multiple storefronts for one business with a shared core product range and controlled differences between the stores. This guide is for store owners who will use Abicart's multi-store system, also called multishop. The feature requires Abicart Pro and activation. It's a choice of store structure, not just an extra domain or a translation. 1. Decide if a multi-store system is suitableA top level collects products and shared information, among other things. One or more sub-stores display selected parts to customers. The top level does not function as a regular public sub-store.Sub-stores can have different domains, themes, and product selections.Payment and shipping methods can be shared, selected from common methods, or unique according to the system's settings.A shared structure doesn't mean all prices, texts, and settings must always be the same. Document what is shared and what applies per sub-store. The system is intended for one company. Do not use the same multi-store system for multiple separate legal entities that need their own contract and accounting flows. If the need is only for different prices or payment terms for resellers, customer groups in a regular store might be a simpler alternative. 2. Confirm scope and agreements before activationContact customer service and review which sub-stores, domains, payment agreements, integrations, and languages are needed. Confirm the current cost and renewal terms for both the top level and sub-stores in the offer or My subscription. Do not assume that every extra sub-store, integration, or service agreement is free of charge just because the top level has Pro. Activation cannot be reverted to a regular store through a standard setting. Existing standalone stores cannot simply be merged into a multi-store system. Therefore, plan the structure and any potential migration before the feature is activated. Sub-stores that should no longer be displayed can be hidden; do not assume they can be deleted or that hiding them cancels a subscription. See Abicart's current subscription information and the agreed scope for commercial terms. Older or individual agreements may differ. 3. Create and manage sub-storesWhen the feature is activated, Store system appears in the left menu. Open Store system → Stores for sub-stores and their properties.Always check which level you are working on. Common product changes should not be confused with a selection or a local setting in a sub-store. 4. Select products in each sub-storeCreate and maintain the basic product range at the top level under Catalogue → Products.Open Store system → Stores → Properties for the intended sub-store. Select Product selection and which product groups to include. Save and check the visible product range. Removing a product from a sub-store's selection is not the same as deleting the common product. Check the affected sub-stores before making common changes to product numbers, stock, or price. 5. Choose how to share payment methodsOpen Store system → Settings and check the system's mode for payment methods.Common methods: the top-level methods are used in the sub-stores.Selection of common methods: each sub-store selects which of the top-level methods to use.Separate methods per store: the methods are configured in each respective sub-store. For selection: open the sub-store's Properties.Select the Payment methods tab and select the intended methods.For separate methods: select Switch to store and configure them under Settings → Payment methods in the correct sub-store. A technically available method does not mean that the supplier agreement automatically covers all domains or sub-stores. Check the agreement connection, currency, country, and customer type before using the checkout. 6. Select delivery methodsCommon delivery methods are created at the top level under Settings → Shipping and delivery. Open Store system → Settings to choose how they are used.If each store should have a selection, select Each store has a selection of the store system's delivery methods. Then open the correct sub-store's Properties.Select the Delivery methods tab and select the methods that should be available there. 7. Check each store before openingReview the domain, active theme, language, product selection, prices, inventory, payment methods, and delivery methods for each sub-store. Check the order flow and intended integration. Shared basic information is not a guarantee that all local choices and external agreements are correct. Track sales for the correct sub-storeSelect Switch to store for the sub-store you want to track and open Orders. Define the period with the search parameters and read Summary for that selection. Check that you are not at the top level, where orders from multiple sub-stores can be included. Use the same store, period, selection, and currency basis when you compare or export results. A shared inventory balance does not show which sub-store created a sale. Quick startConfirm that a shared company and shared basic structure are suitable.Determine the top level, sub-stores, and agreements before activation.Select products, payment, and delivery methods per store.Check each domain and customer flow before the store is opened. SubscriptionThe multi-store system requires Pro and activation. The number of sub-stores, price, renewal, and integration add-ons follow the current offer and agreement. A hidden sub-store is not automatically terminated commercially.