


Themes
-

Connect Google Ads conversions to your store
27 Nov 2025
Measure purchases from Google Ads with the right conversion action, purchase value, and consent. This guide is for administrators with access to the store's active Diversity theme and the correct Google Ads account. Choose either the theme's built-in Google Ads connection or a well-thought-out Tag Manager installation for the same purchase. Do not follow both flows in parallel without checking what is being counted. 1. Choose what to count as a purchase A conversion is an action you have chosen to measure, such as a completed order. Conversion tracking is needed to link purchases to ads, not to distinguish all organic traffic from paid traffic in general. Check existing purchase actions before creating a new one. If the same purchase is sent both directly to Google Ads and via an imported Analytics conversion or Tag Manager, you must decide which one to use as the primary bidding goal. A common order ID does not automatically merge different conversion actions. 2. Get the correct send_to value from Google Ads Open the conversion settings in the correct Google Ads account.Select or create a website conversion for purchases. Specify that different values should be used for different conversions.Open the tag setup and the purchase action's event snippet.Get the entire value after send_to: it contains an ID with the prefix AW- and a label after the slash, for example AW-123456789/AbCdEfGh. Google changes the location of menus. The images show an older interface and help you recognize the choices for website, purchase, and event snippet; follow the features above in your current account. 3. Add the value to the active theme Go to Appearance → Themes and open the active Diversity theme for editing.Open Add-ons → Google.Find Google AdWords Conversions.Paste only the full value AW-ID/label, without quotation marks or HTML code.Save and check the published store. Do not paste the entire event script in this field or an extra copy in the header. If the field is missing, check the active theme and theme version. TPL and custom implementations have a different installation flow. 4. Understand what value is sent The theme's built-in Google Ads connection sends the order's total amount including VAT, shipping, and any payment fees, the order's currency, and the order ID as transaction_id. The connection runs in the visitor's browser. It is not a server-based guarantee that every order will be registered in Google Ads. For purchases through the theme’s Tag Manager data layer, ecommerce.value is the merchandise subtotal excluding VAT; shipping and tax are separate. A custom tag can therefore send a different value from the built-in Ads connection. Choose the intended value basis and compare reports using the same definition. Do not change the store’s VAT settings to correct a reporting value. 5. Check consent and measurement Check the store's consent solution and Google Consent Mode settings before using advertising data.Use Google Tag Assistant to check the correct account, conversion label, and consent signals.Place a controlled test order according to your procedures if you need to verify the purchase event. Check that the correct action receives an event with the expected amount, currency, and order ID.Check Google Ads diagnostics after its normal reporting delay. A test of the tag is not a promise that the purchase will be attributed to an ad. Avoid duplicate scripts, duplicate primary purchase actions, and reloading the confirmation page as the only testing method. The absence of a registered conversion may be due to consent, browser protection, the wrong label, a lack of ad connection, or reporting delay. A payment refund does not automatically mean that a previously sent conversion is corrected in Google Ads. Quickstart Check existing purchase actions and choose a measurement path.Get the full AW-ID/label for the correct purchase action.Fill in Google AdWords Conversions in the active Diversity theme.Check consent, event, and value basis. Subscription and costs The Google settings in Diversity are not a separate Plus or Pro add-on. The fields depend on the active theme and version. Ad costs and Google account settings are separate from the Abicart subscription.
-
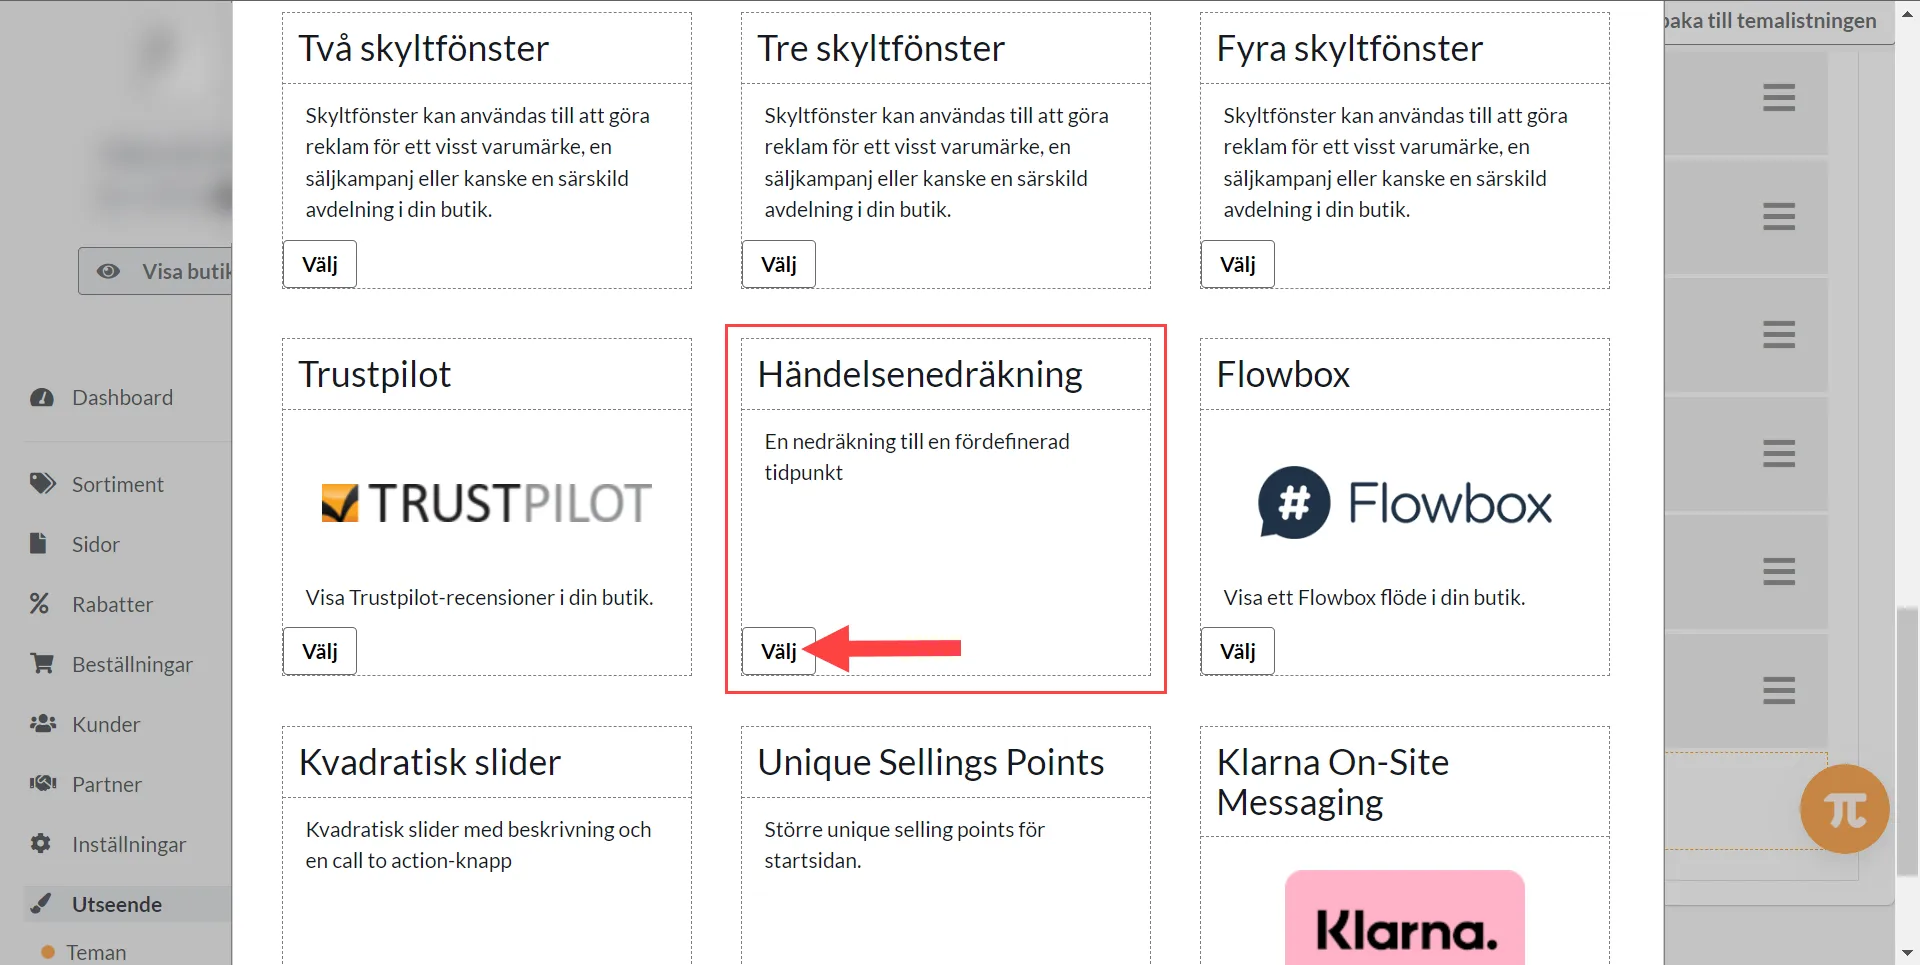
Event counting
27 Nov 2025
Here's how to do it: 1) Appearance >> Themes >> Edit Theme2) Home page >> Add Block >> Event counting3) Set the block >> Finished >> SaveTry our text banner in combination with the countdown. The text banner is visible on every page while the countdown is only visible on the home page.
-

Text banner
27 Nov 2025
Activate a text banner in the theme that appears at the top of all pages.What is a text banner?A text banner is a field you can activate at the top of the page where you can enter a text to inform about something, such as a temporary offer, free shipping or something else. You can also add a button and link it to a page, product or product group.How does the text banner work?A visitor can choose to remove the text banner by clicking on the checkbox at the far right. This choice is saved in the visitor's browser and the banner will not be shown again. To see the banner again, you need to clear your browser's cookies.Activate the text bannerYou activate the text banner in the theme under Settings -> Themes -> edit the active theme and then go to the tab "Add-ons" -> Text banner. Click "On".Main textA field to enter optional text.In this example we have free shipping on all products that have a special price and enter a text informing about this.Button textYou can choose to have a button that links to a page, product or product group. Enter a text to be displayed on the button.LinkChoose where the button should link to, a page, product or product group. In this example, we want to link to our own page that shows all products with special prices. Check "Pages" and then select the "Discounts" page.Background color for text bannerSelect the background color by clicking on the color box on the right.Color of the button in the text bannerSelect the color of the button by clicking on the color box on the right.Don't forget to save when everything is done. Then just preview and display the banner at the top of the shop.
-

Create, edit, and disable the store's pop-up windows
27 Nov 2025
Use a clear dialog for things like newsletters or information and control when the visitor sees it.This guide applies to Diversity themes that have Add-ons → Pop-up dialog, for example, Bountiful. The theme's dialog settings can be used in Go, Plus, and Pro; newsletter dispatches and customer login have their own subscription terms. Check the active theme and dialog type before following the steps. 1. Identify the right type of boxA cookie query, customer type/VAT dialog, login, shopping cart box, and an external marketing tool can look similar but are not always controlled in the same place. Check the text and when the box is displayed before changing a setting. An informational pop-up does not replace proper cookie consent. 2. Select and edit the dialog in the active themeOpen Appearance → Themes. Identify the active theme for the correct store or sub-store and select Edit.Select Add-ons → Pop-up dialog / Pop-up dialog.Select the intended option, for example Subscribe to newsletter, Log in or Custom. The options may differ between themes and versions. For a newsletter box: check the text above the email field and the message after registration. These texts may also be used where the same registration function appears elsewhere in the theme. A post-registration message that displays a discount code does not create the discount and does not make the code personal. If you offer a code, the discount must exist with the correct conditions in the store's discount feature. A common code written in the dialog can be shared; do not promise a unique, single-use code per person unless you use a separate solution that actually creates and limits such codes. 3. Set when a custom dialog is displayedThe custom HTML dialog in Bountiful has the following display methods when the corresponding component is used:Immediately on the visitor's first page view.After a specified number of seconds.On intent to leave, based on mouse movement out of the window. This is not a reliable mobile gesture.When visiting a specified URL. Only select settings that are actually displayed for the selected dialog type. There is no general rule that allows all dialogs to be displayed after scrolling or with the same delay. Enter the title and content in the relevant languages. 4. Save and check the entire visitSave in the correct theme and check the regular store, not just another theme's preview.Try a clean visitor mode and the intended display condition. A saved "already shown" value may prevent the box from being displayed again.Check that the dialog can be closed, that the text and buttons fit on mobile, and that keyboard users can proceed.If a form is used, test its error and confirmation messages. A 'thank you' message alone doesn't prove that a newsletter has been sent. For the custom dialog, a content change can cause it to be shown again to visitors. Therefore, test with a new session when troubleshooting and avoid creating multiple competing popup installations. 5. Disabling the popup correctlyOpen the active theme → Add-ons → Popup dialog and select Disabled under Purpose of the dialog box. Save. For the custom HTML dialog, no dialog is shown when the content is missing in the current language; this should not be used to unintentionally leave other languages active. Check all languages after the change.If the box still remains: check that you edited the active theme and if the box comes from an external script or another dialog function. Do not turn off cookie consent to get rid of a newsletter popup. Avoid large boxes that block content on mobile. Choose a reasonable time and make it easy to close. Appearance and behavior need to be checked together; a certain dialog type is no guarantee of an unchanged search ranking. QuickstartIdentify the correct box, store, and active theme.Select the dialog type and write the text in the correct language.Set the display conditions supported by that specific type.Save and test the display, closing, and form in a clean browsing session. SubscriptionThe popup setting is available for supported Diversity themes in Go, Plus, and Pro. Customer login and Abicart's newsletter mailings are part of Plus/Pro; displaying your own HTML block does not activate these features. External services may have their own agreements and costs.
-

Add a menu item
27 Nov 2025
In "Automatic menu OFF", menu items are added manually under Appearance >> Themes.Here's what you do:1) Go to Design >> Themes >> Edit >> Menu2) Menu item >> Add >> Find the menu item >> AddChoose between, product group, pages or own link3) Save with the green button on the top right. 4) Done!
-

Edit theme (Home page)
27 Nov 2025
Good to know!Settings in themes may differ depending on the theme you have chosen. Add a theme There are currently 8 different themes to choose from, all with different designs.Add the one that suits you best. 1. go to Appearance in the left menu2. click on Themes3. Select the Theme Templates tab4. Add: Select the theme you want to use in your store. Demo: Here you get a glimpse of what the theme might look like.Learn more: Click here to get some extra information about the theme. Under the tab My themes you will find your added themes, this is also where you edit them. Editing a theme You can create copies of a theme. Perfect if you want to experiment, or if you want to have seasonal themes. To edit a theme, click on the pencil on the right. Content of the themes Under the tab Content you choose how each page should look and function in the store. For example, what information your Footer should display or how you want your Menu to function. You create your start page by adding different blocks.You can change the position of the blocks by dragging and moving them. Always finish by clicking on Save Remember to save! Once you have made changes to a tab, you must always save before moving on to the next one. Style Under the tab Style you choose the colors and fonts you want in the store.You also upload your logo and choose how you want the store images to be cropped.If you know CSS, you have the opportunity to add this under Custom CSS.CSS is a code language that we use in Abicart. Tip!When choosing a logo, choose one without a background.Click below for a more detailed description of the logo.Manual - Add and edit your logo Additions Under the tab Add-ons you will find some goodies.This is where you connect analytics tools to the store. You edit functions that are linked to the theme, for example Cookies or Text banner and under Own content in HEAD you can add your own code.
-

Add a logo to your webshop
27 Nov 2025
One of the easiest ways to make your shop more personal is to add your own logo that is visible in the shop. The logo is added to the theme that you use in the shop, go to: Appearance->Themes->Click on "edit" on the active theme->Click on the "Style" tab. Upload your logo here or add your shop name in text if you don't have a logo: You have the possibility to adjust the proportions based on the logo you upload, if you have a square image you choose 1:1 in proportion while for a more rectangular image you need e.g. 5:1. Click here for more information about proportions.You can set the maximum width of your logo to prevent it from being too large or too small: Under Appearance->Logo you can also add a logo. The logo you add there is only visible in documents you can extract from your orders, such as receipts and packing slips.