


Other articles by Andreas
-
Two-Factor Authentication (2FA)
14 Aug 2026
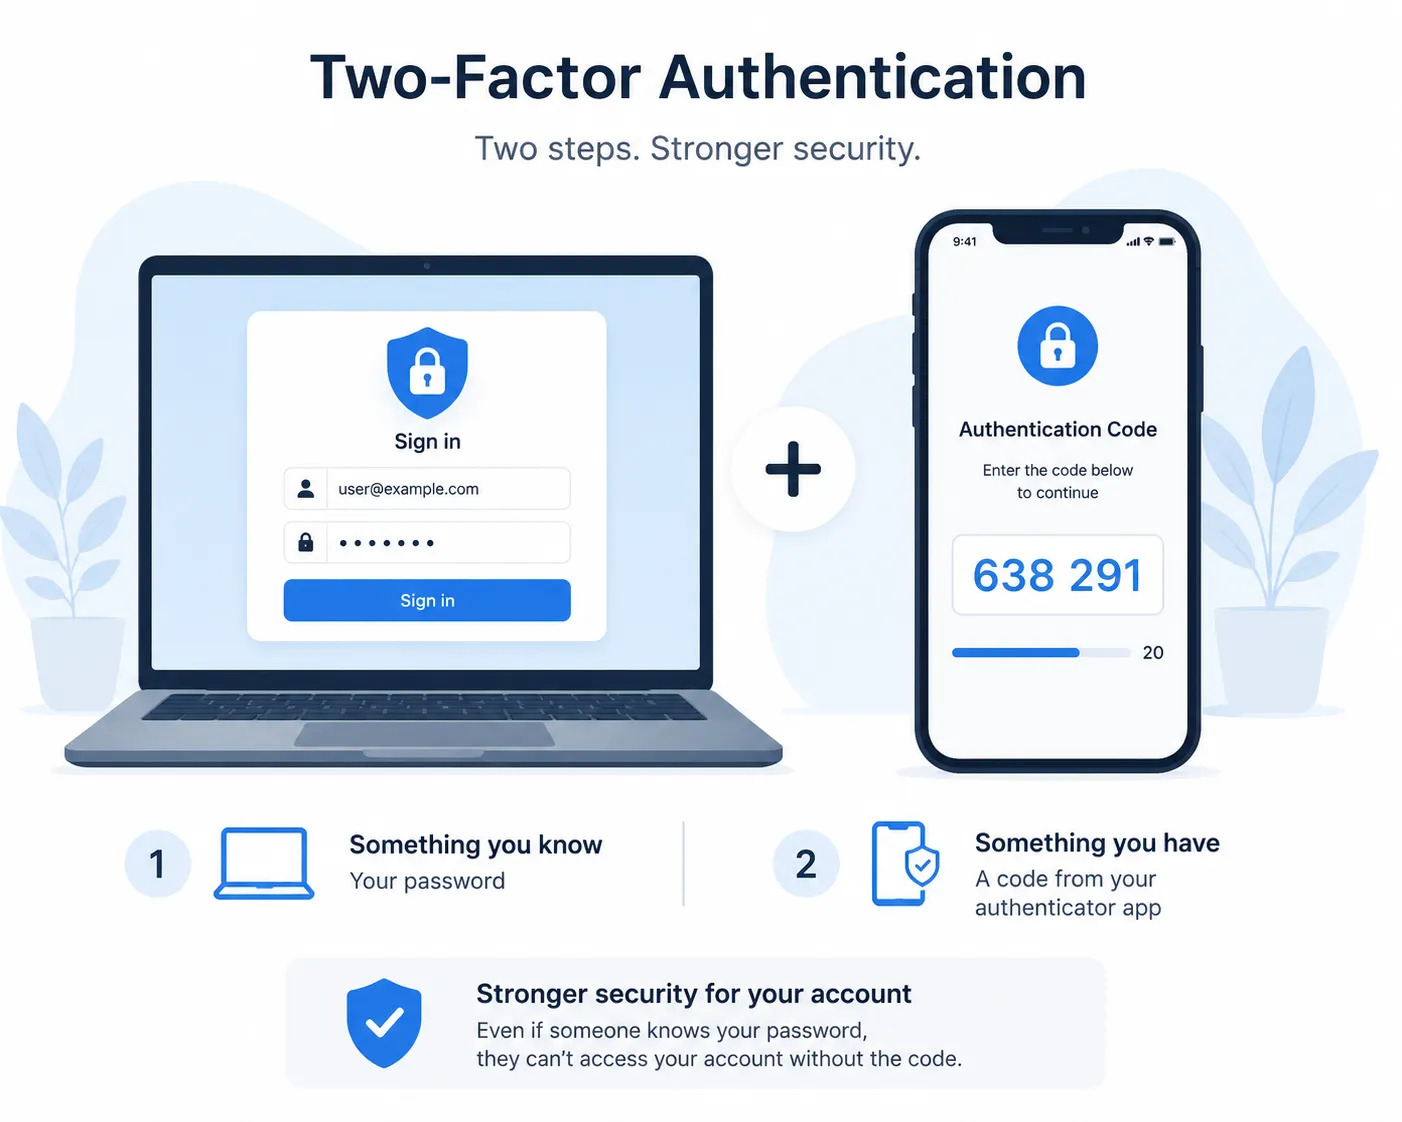
Abicart Admin · Account Security Set up two-factor authentication (2FA) Two-factor authentication (2FA) adds an extra layer of security to your Abicart admin login. Normally, you sign in with your username and password. With 2FA turned on, you'll also enter a one-time 6-digit code from an authenticator app on your phone. This means that even if someone gets hold of your password, they still can't sign in without the code from your authenticator app. Setup time About 2 minutes Cost Included, free Works with Any standard authenticator app Protects Your admin login only On this page Why turn this on Before you start Setting it up Signing in afterwards Recovery codes Turning it off Benefits & limitations Questions Why turn this on Passwords leak. They get reused across sites, guessed, phished, or picked up in a breach that has nothing to do with Abicart. Two-factor authentication means a leaked or guessed password isn't enough on its own: the person signing in also has to produce a six-digit code that refreshes every 30 seconds on your phone. If you manage payments, customer data, or store settings from your admin account, 2FA adds important protection if your password is ever compromised. Before you start You'll need: A phone with an authenticator app installed, such as Google Authenticator, Microsoft Authenticator, Authy, 1Password, or Bitwarden. Any standard authenticator app works Your current Abicart username and password. Setting it up Go to My Profile in your admin menu, then find the field Security. 1 Click Enable 2FA A setup window opens with a QR code generated just for you. 2 Scan the QR code Open your authenticator app and add a new account by scanning the code on screen. Can't scan it, for example because you're on the same device as the camera you'd need? Click Show text key to reveal a text code you can type into the app by hand instead. 3 Enter the 6-digit code from your app Your app will now be showing a rotating 6-digit number. Type the current one into the setup window and click Verify & Activate. This confirms your authenticator app is set up correctly. 4 Save your recovery codes Once activated, Abicart shows you eight recovery codes. Copy them somewhere safe. A password manager or a printed note in a locked drawer both work well. These are your only way in if you ever lose your phone. 5 Tick I have saved these codes and close The close button stays disabled until you confirm you've stored the codes. Once you close this window, the codes won't appear automatically again, but you can still view your remaining codes later from the same Security card. Signing in afterwards Regardless of which sign-in method you choose, you won't be fully signed in until your password or email sign-in link has been verified. You'll land on a page asking for Authentication Code. Enter the current number from your app and click Verify. You have 15 minutes. If you don't finish entering your code within 15 minutes of your password check, the verification page expires and you're sent back to start the login again. Recovery codes Recovery codes are your backup plan for a lost, stolen, or wiped phone. You get eight when you first activate 2FA, and each one works exactly once. Using one to sign in On the verification screen, click I lost my device / Use recovery code. The code field switches to accept a recovery code instead of an app code. Enter one of your saved codes and it's consumed. That same code won't work a second time. Viewing your remaining codes Go back to My Profile → Security at any time and click View Recovery Codes to see the codes you have left. Because you can view your recovery codes here, make sure you keep your Abicart login secure. Running low? There's no button to top up your remaining codes on their own. If you're down to one or two, turn 2FA off and back on to generate a fresh set of eight. Turning it off From My Profile → Security, click Disable 2FA. You'll be asked to confirm your current password before it switches off. This stops someone who's merely sitting at your already-open session from quietly disabling your protection. Benefits & limitations An honest look at what this feature gives you, and where it still has room to grow. Benefits ✓Blocks logins from a leaked, reused, or guessed password: the attacker still needs your phone. ✓Works with authenticator apps you may already have installed; no new app to buy or learn. ✓No SMS involved, so there's nothing to intercept and no text message costs. ✓Covers both ways of logging in: password, and the passwordless "Quick login" email link. ✓Recovery codes mean a lost phone doesn't mean a lost account. ✓Free, and takes about two minutes to turn on. ✓Your 2FA details are encrypted before they're stored, not kept as plain text. Limitations to know about –No "remember this device" option yet: you'll enter a code every time you log in, even on your own computer. –If you lose your phone and your recovery codes, there's no in-product recovery path. You'll need to contact Abicart support to have 2FA reset on your account. –Each admin turns 2FA on for their own login individually; there's no shop-wide setting yet for an owner to require it for staff accounts. –Codes depend on your phone's clock being accurate. If your phone's date and time have drifted, valid codes may be rejected. –Doesn't apply to your shop's storefront, only to the admin login your staff use to manage the store. Questions Which authenticator apps can I use? Any app that supports TOTP (the standard behind most authenticator apps) works: Google Authenticator, Microsoft Authenticator, Authy, 1Password, Bitwarden, and most password managers with a built-in authenticator. Can I add the same account to more than one device? Yes. During setup, you can scan the same QR code (or type the same text key) into an app on a second phone or tablet, so you have a backup code generator. Abicart doesn't need to know about this; it's a property of how the underlying code standard works. My code keeps getting rejected. What's wrong? The most common cause is your phone's clock being out of sync, since codes are time-based and only valid for about 30 seconds. Check that your phone's date and time are set automatically, then try the next code that appears. I lost my phone and can't find my recovery codes. What now? Contact Abicart support through your usual channel. They'll verify your identity and reset 2FA on your account so you can log back in and, if you'd like, set it up again on a new device. Does this affect my shop's customers at checkout? No. This protects the admin login your staff and owners use to manage the store. It has no effect on how shoppers create accounts or check out on your storefront. Can I make 2FA mandatory for my staff? Not yet. Each person with an admin login enables 2FA for their own account from their own My Profile page. There's currently no owner-level setting that enforces it across every staff login. Locked out? If you can't get in and don't have a working recovery code, email hello@abicart.se rather than repeatedly guessing codes.
-
Withdrawal Button in E-commerce 2026 – New Legal Requirements | Abicart
16 Jun 2026
On 19 June 2026, new rules under the Distance Contracts Act will come into effect. For many online retailers, this change introduces a new requirement to provide a digital cancellation function, often referred to as a return button.The purpose of the legislative change is to strengthen consumer protection and make it just as easy to exercise the right of withdrawal online as it is to make a purchase.If you operate an online store that sells to consumers, you need to ensure that your store complies with the new requirements before the legislation comes into force. What is a digital withdrawal function? The digital withdrawal function is a new legal requirement that allows consumers to notify a retailer online that they wish to exercise their right of withdrawal.Until now, many online retailers have required customers to contact customer service by phone or email to cancel a purchase. Under the new rules, consumers must be able to do this through a clear and easily accessible digital function.The term "withdrawal button" is often used because the function should be easy to find and use, without unnecessary barriers or additional steps. Why are these new rules being introduced? The legislative change is part of a broader effort to strengthen consumer rights in e-commerce.In recent years, regulators and lawmakers have focused on so-called dark patterns – design practices that make it difficult for users to cancel subscriptions, withdraw from purchases, or exercise their legal rights.The aim of the new rules is therefore to create a more transparent and consumer-friendly online shopping experience where customers can easily exercise their right of withdrawal. Which online retailers are affected? The new rules apply to businesses that sell to consumers (B2C).If your online store serves private consumers, you will be required to provide a digital withdrawal function.Pure B2B stores, where sales are made exclusively between businesses, are not covered by the new requirement.If you sell to both businesses and consumers, you should assume that the rules apply to the consumer-facing part of your business. What must an online store provide after 19 June 2026? To comply with the new legal requirements, your online store must provide:A clear digital withdrawal functionCustomers must be able to notify you easily that they wish to withdraw from a purchase without having to contact customer service manually.Easy accessThe function should be easy to find, for example via: My Account Order confirmation emails Information pages The website footer The navigation menu Automatic confirmationWhen a customer submits a withdrawal request, an acknowledgement of receipt should be sent automatically.Documented case handlingThe store must be able to receive and manage withdrawal requests in a structured manner. Will the withdrawal period change? No. The statutory 14-day withdrawal period remains unchanged.What changes is how customers can notify you that they wish to exercise their right of withdrawal. The process must become simpler and more accessible online. What happens if an online store does not comply? If an online store does not provide a digital withdrawal function after the legislation comes into effect, it may be considered a breach of consumer protection and marketing regulations.Depending on the circumstances, this may result in: Regulatory scrutiny by the relevant authorities Sanctions An extended withdrawal period for the customer For this reason, all online retailers are encouraged to review their processes and technical setup well in advance of 19 June 2026. How the digital withdrawal function works in Abicart Abicart includes support for the new digital withdrawal function.Customers enter their order number and the email address used for the purchase. Once the information has been verified, they can submit a request to exercise their right of withdrawal.After the customer confirms the request, it is forwarded to the store and registered in the administration panel, where it can be handled by store staff.Store administrators can then: View incoming withdrawal requests Add internal notes Approve or reject requests Navigate directly to the related order How to activate the withdrawal function in Abicart To comply with the new requirements, you need to ensure that the withdrawal form is visible and accessible to your customers.In the latest theme versions, the link can be enabled directly through the theme settings.If you are using an older theme, you can instead add a custom link in places such as: The footer The navigation menu Terms & Information pages Customer service pages Step-by-step guide We have created a comprehensive guide that explains: How the withdrawal function works How to manage incoming requests How to enable the footer link How to add the link to menus and information pages What you need to check before 19 June 2026 Read the guide to the digital withdrawal function in Abicart Frequently asked questions about the withdrawal button Is the withdrawal button a legal requirement? Yes. From 19 June 2026, online retailers selling to consumers must provide a digital function that allows customers to notify them that they wish to exercise their right of withdrawal. Does the legislation also apply to B2B businesses? No. Businesses that sell exclusively to other businesses are not covered by the new requirement. Must customers be able to withdraw directly from their order history? No. The legislation does not require a specific placement, but the function must be clear, visible, and easily accessible. Do customers still need to contact customer service? No. The purpose of the legislation is to allow customers to initiate a withdrawal request digitally without having to call or send a manual email. When do the new rules take effect? The new rules come into force on 19 June 2026. Need help activating the withdrawal button? If you have any questions about the digital withdrawal function, the right of withdrawal, or the new e-commerce requirements, we're here to help. Contact our support team through the chat in your admin panel.
-
Digital withdrawal function
9 Jun 2026
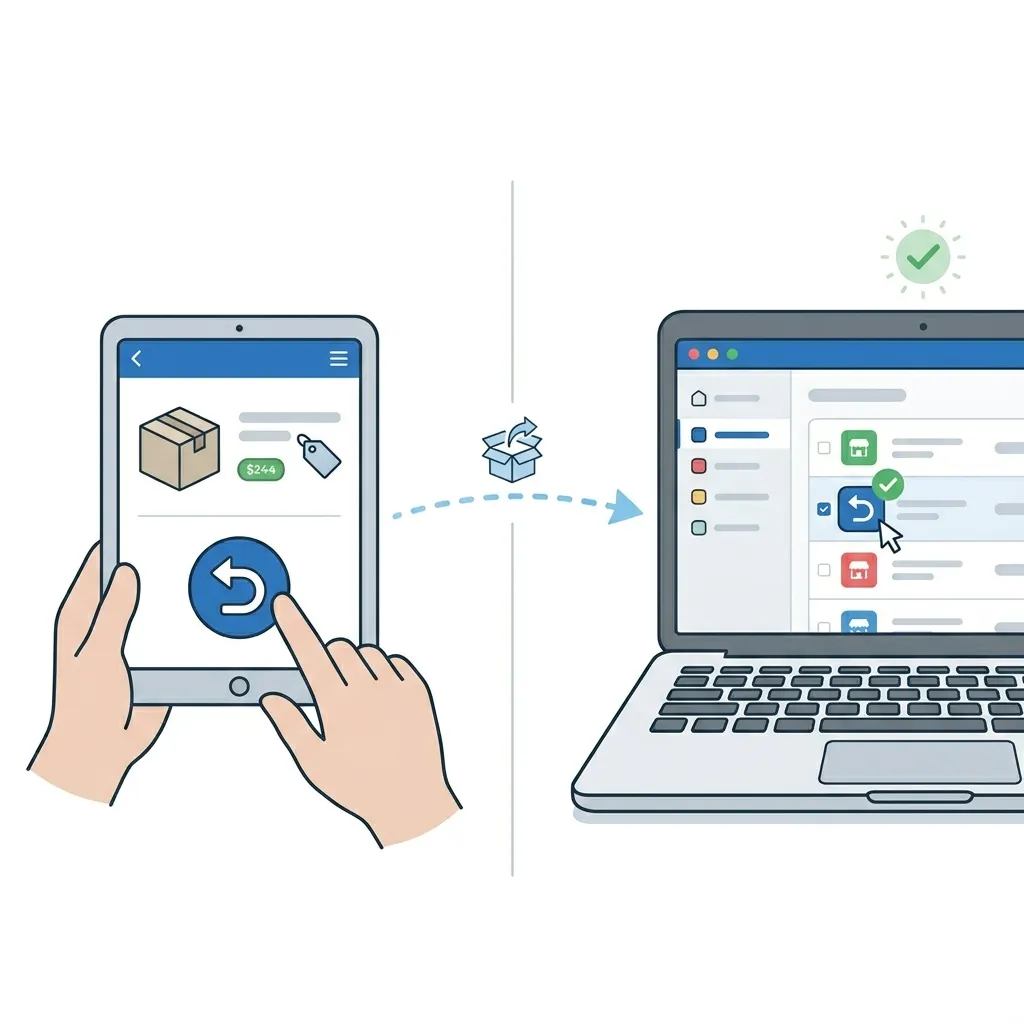
On June 19, 2026, new amendments to the Distance Contracts Act (DAL) will enter into force. The biggest change is the requirement for a digital withdrawal function - popularly known as the 'undo button'. The aim of the law is to strengthen online consumer protection and counteract so-called 'dark patterns' (designs that make it difficult for the customer to cancel or change something). In short: it should now be as easy for a customer to cancel a purchase online as it was to complete it.New Legal Requirement: The "Cancel Button" in E-commerce On June 19, 2026, new amendments to the Distance Contracts Act (DAL) will take effect. The most significant change is the requirement for a digital cancellation feature —commonly known as the “cancel button.” The purpose of the law is to strengthen consumer protection online and combat so-called “dark patterns” (designs that make it difficult for customers to cancel or change a purchase). In short: it should now be just as easy for a customer to cancel an online purchase as it was to make it. A new legal requirement means that online stores must provide customers with a simple, digital way to exercise their right of withdrawal—without having to call or send a manual email. Important: Deadline June 19,If your online store lacks this feature after June 19, it may be considered a violation of the Marketing Act, which could result in penalties and a significant extension of the customer’s cancellation period. What does this mean for you as an e-retailer? Clear and easily accessible feature: You must provide a clearly placed feature (e.g., on “My Account” or via a direct link in the order confirmation) where the customer can indicate that they wish to exercise their right of withdrawal. The customer should not have to call or send a manual email. Immediate confirmation: When a customer clicks to cancel their purchase, the system must automatically send a confirmation (a receipt) to the customer immediately. Unchanged cancellation period: The right of cancellation itself remains unchanged—the 14-day cancellation period still applies to goods and services covered by the law. It is only the way customers can notify the store of their decision that is being simplified. The Importance of Complying with the Law: If your online store lacks this feature after June 19, it may be considered a violation of the Marketing Act, which could result in penalties and a significant extension of the customer’s cancellation period. Step 1 - Enable the cancellation form in your store The first step is to make the cancellation form visible and accessible to your customers. You can do this via the built-in footer link or by creating your own links in the menu or on other pages. Option A: Enable a link in the footer Supported theme versionsThis setting is only available in Fabrikk 1.6, as well as in Nordic, Hadje, Bountiful, Emporium, Trailblazer, and Brew 1.1, and Azalea 1.2.Recommendation: If your store is using a theme version older than Fabrikk 1.6, Nordic/Hadje/Bountiful/Emporium/Trailblazer/Brew 1.1, or Azalea 1.2, we strongly recommend that you upgrade. The latest theme versions are optimized for modern web technology, which gives your store significantly better performance, faster load times, and stronger SEO (search engine optimization). Go to Appearance → Themes → Edit the active theme → Content → Footer. Scroll down to the “Link to Right of Withdrawal Form” setting. Select the “On” option. If you want to change the default text for the link, you can do so in the field directly below. Click Save. Once the link is enabled, it will appear at the bottom left of the store, below the store’s address information. If you don’t have an address field in your footer, that’s okay—you can still add the link as custom HTML text in your footer. If you’re using custom HTML in all four columns of the footer, you can create a manual link to the cancellation page by following these steps: Go to Appearance → Themes → Edit → Content → Footer. Add the link text for the cancellation link to any HTML block. Then follow Option B. The link will then appear in the footer. You can follow the same steps in your other stores as well. Option B: Create Your Own Link on a Page If you want to link to the form from other places in the store—for example, from the “Terms & Info” page—you can easily create a regular text link. Go to Pages → System Pages → Cancel Purchase. Copy the address listed in the URL field. Note that in a multi-store system, the system page is located in the sub-store. Navigate to the page where you want to place the link, for example, Pages → System Pages → Terms & Info. Type the text that the customer should click on, such as "To the cancellation request form. " Select the text with your mouse and click the link icon in the toolbar to paste your URL. Paste the link to the cancellation form into the “URL” field and save. Then click Save again so that the page saves the changes. Option C: Add a link to the menu Go to Pages → System Pages → Cancellation Request. Copy the address listed in the URL field at the top of the page. Then navigate to the theme menu: Appearance → Themes → Edit Active Theme → Content → Menu. In some themes, such as Fabrikk, the menu is located under Content → Header. Scroll to the bottom of the page to “Menu Items.” Click “Add, ” select “Custom Link,” and paste the link to the cancellation form into the field below. In the “Link Title” field, enter the name you want the link to have in the menu. Click “Add” and then the Save button in the theme. Step 2 - Here’s what it looks like to the customer Once the form is active, this is the process your customers go through when they want to cancel a purchase. 1. The customer navigates to the return form.To return an item, the customer goes to a dedicated page for the right of return. There, they enter the order number and associated email address. 2 . The customer submits their request.Once the system has verified that the order is in the store, a new page appears where the customer can write a message and submit their request. 3 . The customer confirms via email.Once the customer has clicked “Submit Request,” an email is sent asking them to confirm their request. As soon as this is done, the case is forwarded to the store. Step 3 - Manage Incoming Return Requests When cases start coming in, you can manage them all in one place in the admin panel. Under “Orders” and the “Return Requests” tab, all incoming requests from your customers are collected. New, unprocessed requests are automatically assigned the “New” status. To easily sort the list, you can filter your requests by status: “All,” “New,” “Approved,” or “Denied.” Click “Details” to view a detailed overview of each return request. Note that the order cannot be modified directly in this view. The page only displays the customer’s return request—here, you manage the case status and can add your own notes. If the order needs to be adjusted or canceled, this is done on the order page. Click the order number to go there. Once processing is complete, mark the request as 'Accepted' or 'Denied.' The customer is not automatically notified when the status changes. You must therefore always contact the customer and inform them of the decision manually via your email client. Email An email regarding the created case is sent to the customer from the email address specified in the "Order Confirmation Sender" field (Settings >> Email) The email notification to your store is sent to the email address specified in the "Order Confirmation Copies" field (Settings >> Email)
-
Disturbances and system status
22 May 2026
To make it easier to keep up to date with any disruptions and planned maintenance, we always publish up-to-date status information on our status page.Our status page:https://status.abicart.se/ There you can see: Ongoing disruptions Planned maintenance History of previous incidents Real-time status of our services If you are experiencing problems, we recommend that you first visit the status page to see if there is any known impact on the system. You can also subscribe to updates to receive information via email or notifications when new incidents are reported or resolved. We always work to provide as much advance notice as possible of any disruptions and continuously update the status information during ongoing incidents.
-
Shipping label
21 May 2026
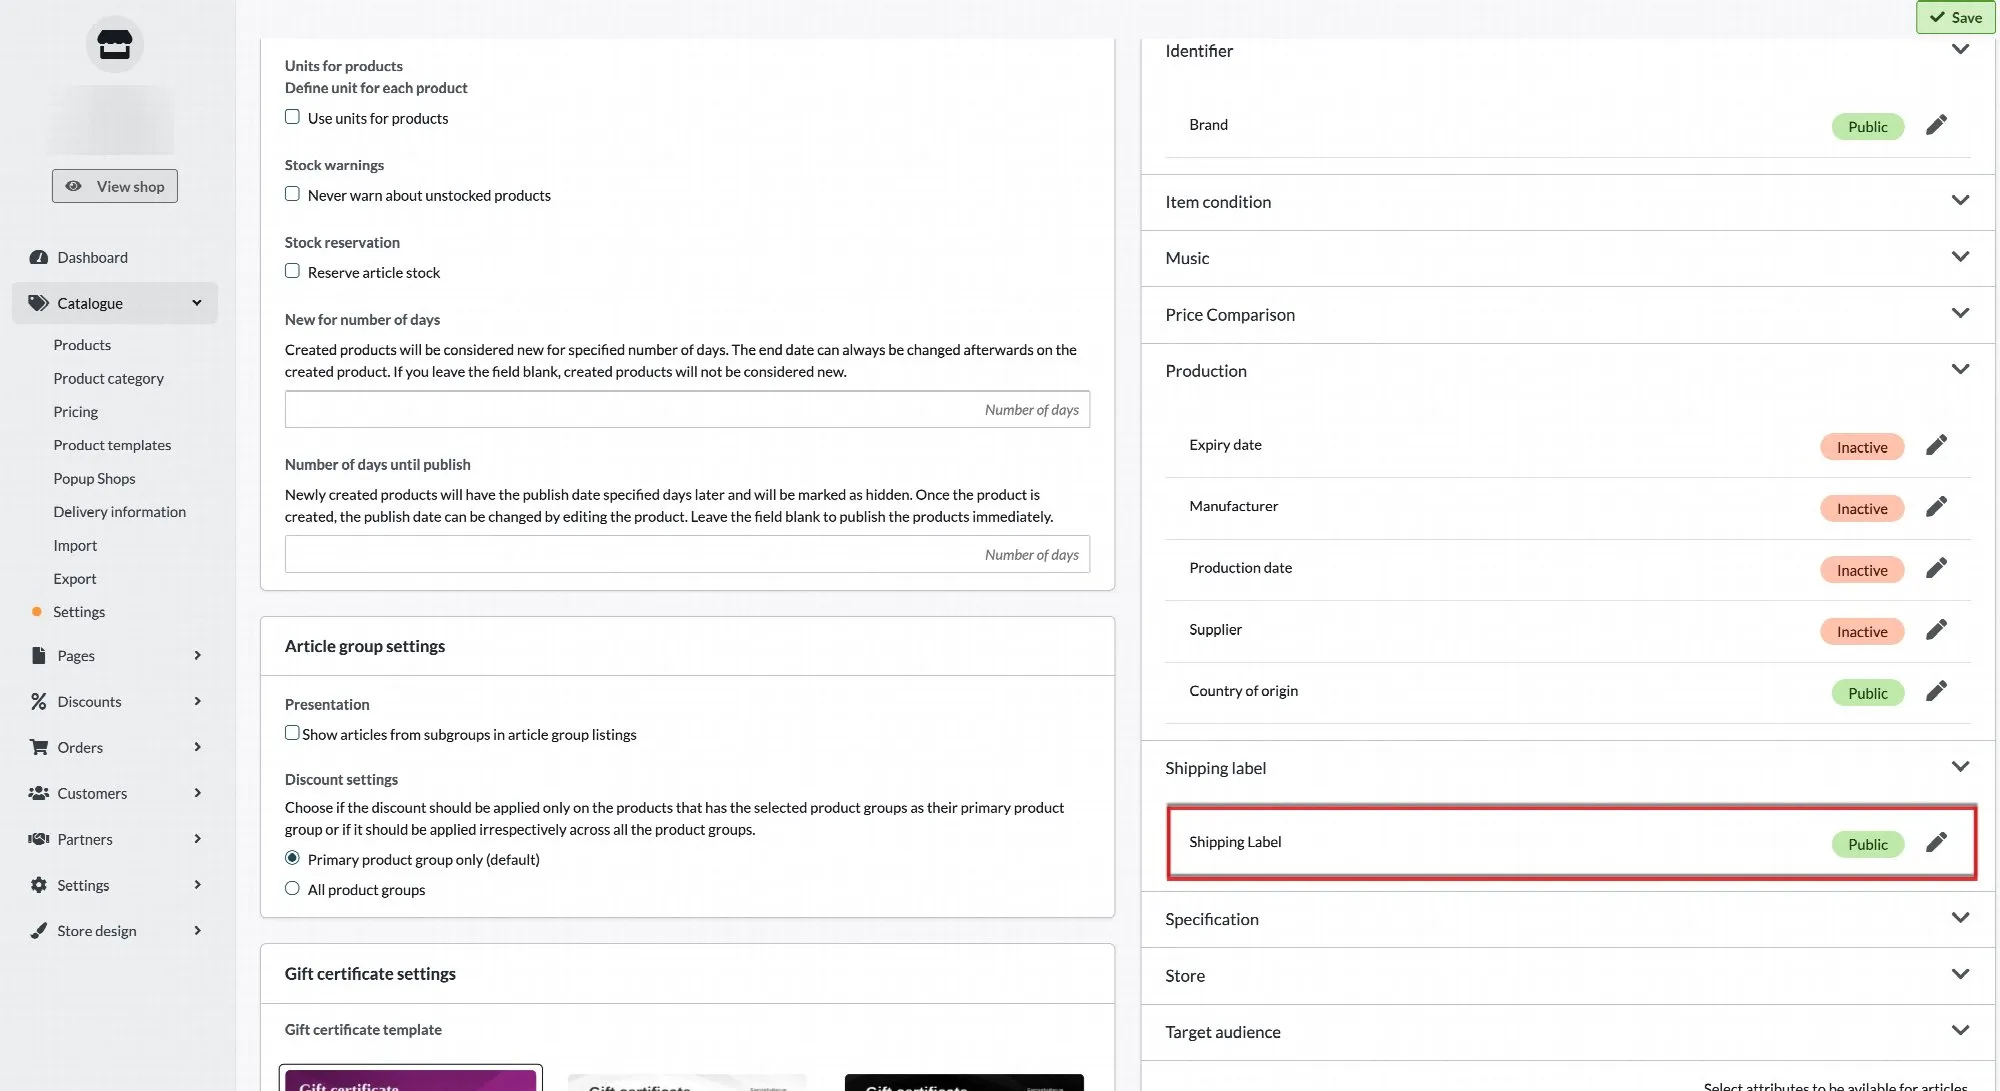
Shipping Label The shipping_label attribute allows you to group products together in order to set up specific shipping rates in Google Merchant Center. The information entered in this field is not visible to customers. You can use shipping labels to categorize products - for example as oversized, perishable, or free shipping. This is an optional field, used exclusively for Google Merchant Center integration. Setting up the Shipping Label attribute 1. Enable the attribute Go to Assortment → Products → Product Settings. In the panel on the right, locate the Product Attributes section. Scroll down until you find the Shipping Label heading. Select the option Include in product feed and click Save. Note: The option to mark the field as private will hide it from customers, but to send the value to Google you must select the product feed option. 2. Add a shipping label to a product Go to Assortment → Products and open the product you wish to edit. Scroll to the bottom-right of the product page. You will find the Shipping Label field, where you can enter the desired label value. 3. Export to Google Merchant Center Once a shipping label has been added to a product, the value will be included in your Google product feed automatically. In Google Merchant Center, you can then use this label under Products → Delivery & Returns to configure shipping rules based on the label. If you have any questions, please contact customer support.
-

Setting Up a New Language
13 Apr 2026
This guide explains how to add and configure a new language in your Abicart store covering translations, domain setup, shipping, VAT, and product feeds. Finnish is used as the example throughout, but the same steps apply to any language. Follow the steps in order. Steps 1 and 2 must be completed before the remaining settings become available in your store.1. Activate Language and Currency Begin by enabling the new language and adding its corresponding currency. Once activated, additional localization settings will appear throughout your store administration. Activate the language Navigate to: Settings → Languages Locate the language you want to add and set it to active. If you do not want the language to be visible to store visitors yet, set it to Hidden — the language fields will still be available in your administration panel. Add the currency Navigate to: Settings → Currency Select Add currency and choose the appropriate currency for the target market (for example, EUR for Finland). 2. Translate Your Store The recommended approach for translating store content is to export all texts to a file, complete the translations, and re-import. This covers the majority of your translation in a single operation. Export content for translation Navigate to: Settings → Languages → Export Configure the export options: Translate from - Select your current primary language (the language content is written in). File format - XLXS recommended. It opens directly in Microsoft Excel or LibreOffice Calc. Data to include - Select all content types: Articles, Article groups, Delivery methods, Payment methods, Delivery information, Article template, Own pages, and Theme. Click Export. The file is downloaded to your computer. Complete translations in the file Open the file in a spreadsheet application. It contains three columns: Column A (key) - Internal identifier. Do not edit. Column B (content) - Source language text. Column C (translation) - Enter your translations here. Leave columns A and B unchanged. Important: Do not make changes to your store between export and import. Translation strings are matched by their key values. Modifying store content before importing the translated file may cause mismatches. Import the translated file Navigate to: Settings → Languages → Import Select the target language, choose the translated file from your computer, and click Import. If importing a CSV file, ensure: The file is saved with UTF-8 character encoding. The delimiter is set to comma. For full documentation on this process, see: https://www.abicart.com/support/assortment/import-and-export/translations-exportimport-texts-in-multiple-languages 3. Configure Shipping and VAT Each market requires its own shipping methods and tax rates. These must be configured correctly before the new language is made publicly available. Add a shipping method Navigate to: Settings → Shipping Select Add shipping method and configure an option applicable to the target country. Add the VAT rate Navigate to: Settings → VAT Add the correct VAT rate for the target country. Consult the local tax authority for the applicable rate. 4. Email Content and Other Texts If your store uses customised transactional email templates — such as order confirmations, shipping notifications, or invoices — these must be translated separately. Translate email templates Navigate to: Settings → Documents → Email Content Add a translated version of each template for the new language. Other texts Some content, such as discount names, is managed within its own section and must be translated manually. The export/import workflow described in Step 2 covers all standard storefront and theme content. 5. Add a Language-Specific Domain You can associate a separate domain with each language. For example, Finnish customers could be served from a .fi domain while your primary store uses .se. Register the domain Navigate to: Settings → Domain & SEO → Domain Enter the new domain address and save. Connect the domain to the language Navigate to: Settings → Domain & SEO → URL Settings A section for each activated language is shown. Select the domain you registered from the drop-down for the relevant language. Note: This step can be completed at any point after Step 1. The domain assignment does not affect the translation or shipping configuration. Make sure to have the language set to “active” before this step. 6. Create Language-Based Product Feeds If you advertise on Google Shopping or Meta (Facebook/Instagram), you can generate a separate product feed for each language and currency. Navigate to: Settings → External Connections → Product Feed Select the target country, currency, and file format. The system generates a feed URL for that language and currency combination. Use this URL when configuring your feed in Google Merchant Center or Meta Commerce Manager. Note: Ensure the correct currency is selected. An incorrect currency selection will result in wrong prices being displayed in your advertising campaigns. Checklist Before Launch Use this checklist to confirm all steps have been completed before making the new language available to customers. Language activated under Settings → Languages Currency added under Settings → Currency Translations exported, completed, and imported Shipping method configured for the target country VAT rate configured for the target country Email content translated (if using custom templates) Domain registered and connected to the language (if applicable) Product feed generated for the language/currency (if applicable)
-
Change domain in live webshop
10 Apr 2026
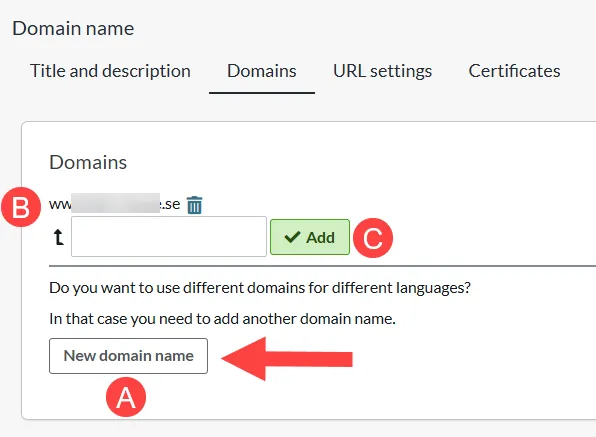
This manual shows you how to change the domain of a webshop that is already active (live). For example, if your online shop changes its name after a few years.Step-by-step: 1. you have purchased your new domain 2. point the new domain to Abicart according to this manual: Domain: Connect a domain to your webshop *Point the domain both with and without www. 3. insert the new domain under the old one and wait 24 hours.Settings >> Domains & SEO >> Domains >> New domain name >> Enter the domain >> Add >> Add www. domain as subdomain >> SaveNOTE!It may take 1-24 hours before the domain is correctly pointed (step 2) and you can continue with step 3. If it is not possible to add the domain immediately, wait 1 hour at a time until it is possible to add the domain as a subdomain. 4. After the new domain has been a subdomain for 24 hours , delete it from the list of subdomains and add it as a new domain name. 5. Go to URL settings and change the domain name for the store language >> save.Now set the new domain as the main domain. We go through how to do this in the linked manual.*Also edit the language prefix and suffix as desired. See the same manual as above. 6. Now put the old domain under the new domain: i) Go back to "domains" and copy your old domain and main domain and paste into a document.ii) Delete the old domains from the list in admin to be able to move them (delete subdomain first, then main domain)iii) Add the old domains as subdomains to the new domain name, one domain at a time (e.g. by copying the domains from the document where you just pasted them). See picture:A: New domain name - Here you enter your new domainB: Domain name - Your new main domainC: Add - Here you enter your subdomain. If the customer has a link with the subdomain, it will automatically redirect to the main domain. Once this is done, the redirection from the old domain to the new domain will happen automatically. So a customer clicking on an old link will be redirected to the same page with the new domain (if the page still exists). 7. what's left to do: - Contact any payment methods and inform them that you have changed domainThe same goes for any external tools, such as Google tools: update the service with your domain change.Then it's done!
-
Shipping and delivery: Pick up in store
2 Mar 2026
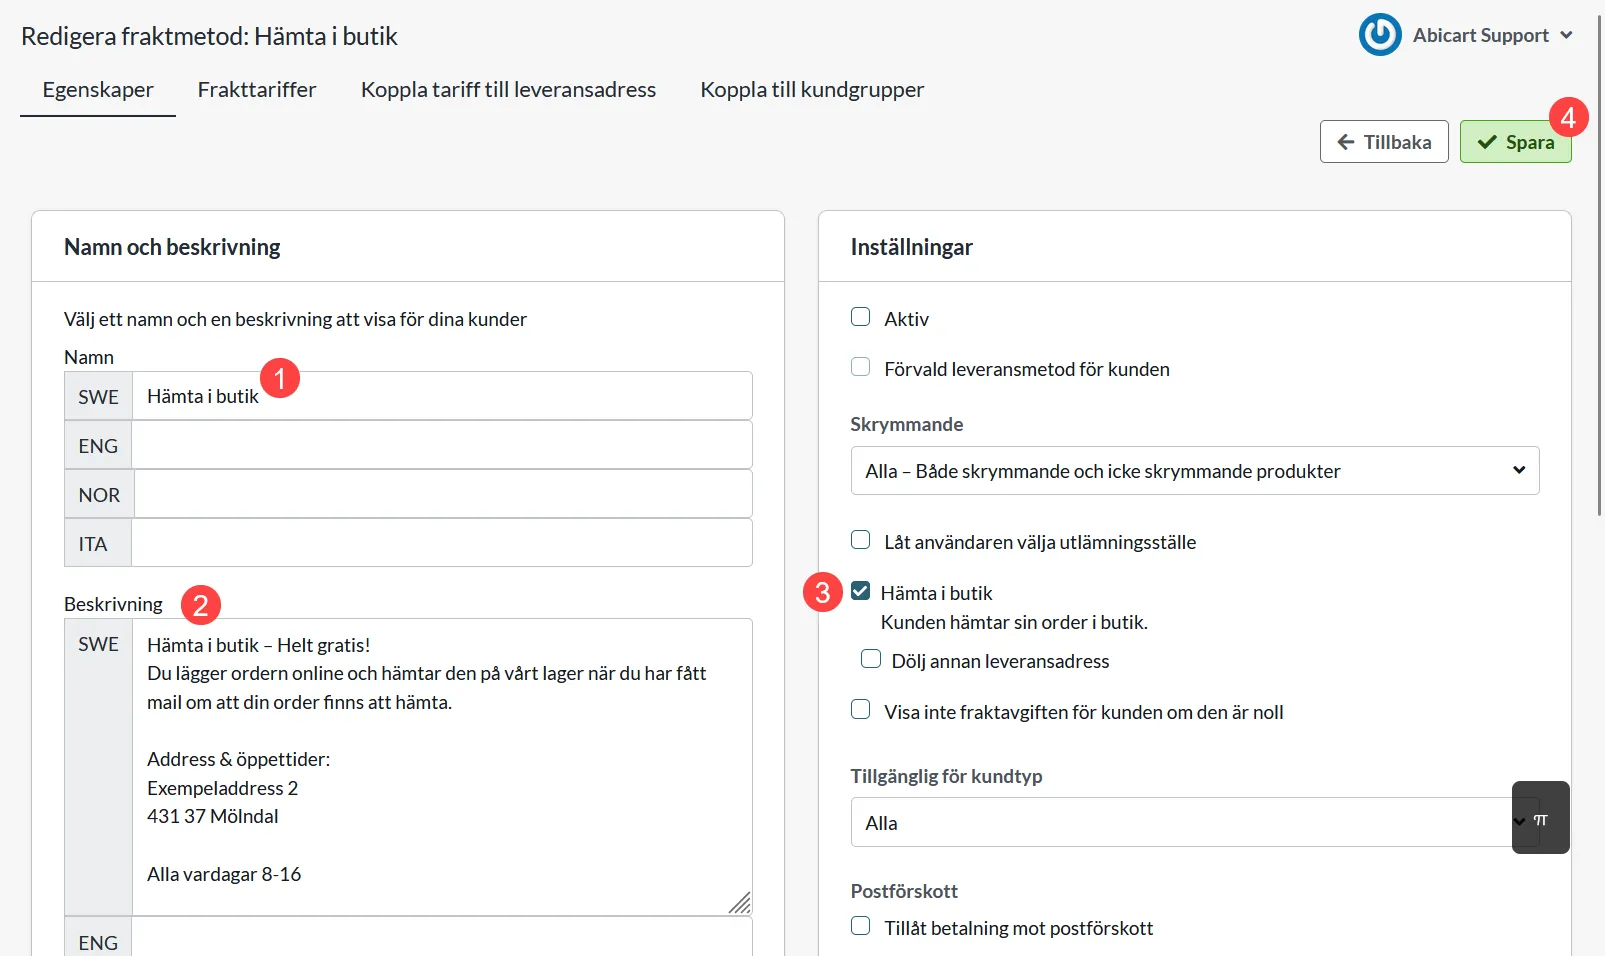
Create a delivery method for pickup in your physical storeBefore creating a shipping method, it's a good idea to watch our video guide and read this manual: Shipping and delivery: How do I create my shipping methods? Video guide Download in store Settings >> Shipping >> +New shipping method 1) Create a new shipping method and name it 2) Enter a description 3) Check the box "Pick up in store"Checking this setting is important as it excludes the delivery method from your product feed. Without this setting, misleading information about the free delivery method will be sent to Google. 4) Click on Add 5) Click on Shipping Tariffs >> Introduce new tariff 6) Name the tariff 7) Click on Add 8) Click on Link tariff to delivery address 9) Click on the arrow for countries within the EU* *If your store or warehouse for collection is located in a country other than the EU, select the section that lists the country. 10) Click on the country 11) Click on the tariff you recently created 12) Save Now you see that a country has an active tariff: 13) Click on Properties >> Check Active to activate the delivery method 14) Save Done!
-
June 2024 - Software updates
17 Feb 2026
We've fixed a number of things, added new features and improved performance to make your experience even better. Here are some of the highlights: Global Attributes: Updated Schema for Store Code and Address Fortnox: Added support to import/export all price lists Shipmondo: ServiceLocation for Klarna Shipping Assistant (KSA)
-
January 2025 - Software updates
17 Feb 2026
We've fixed a number of things, added new features and improved performance to make your experience even better. Here are some of the highlights: Product images: Support for unicode file names. Added support for more global attributes (category: music) New feature: Stock reservation. Read more >>
-
August 2025 - Software updates
17 Feb 2026
We've fixed a number of things, added new features and improved performance to make your experience even better. Here are some of the highlights: New language: Latvian New block on Dashboard showing unpaid orders.
-
Visma eAccounting fix
17 Feb 2026
Visma eAccounting fix
-
Qliro Checkout Now Available in Abicart – Boost Conversions | Abicart
26 Jan 2026
We are happy to present Qliro as a payment solution in Abicart.Qliro is a modern checkout built to increase conversion and create a smooth payment experience for your customers. With flexible payment options, fast checkout, and a focus on security, Qliro helps e-retailers sell more, without hassle. What does this mean for you as an Abicart customer? A proven and popular payment solution Smooth checkout adapted for today's e-commerce A solution that supports both growth and customer satisfaction Add Qliro Checkout to your webshop Go to Settings -> Payment methods -> Add new payment method. Step by step how to get started -> Want to know more about Qliro? Curious if Qliro is right for your store or want to know how to get started?We are happy to help you!Contact us and we'll tell you more ->Or book a demo directly with Qliro ->
-
Guide: how to sell children's clothes online
18 Dec 2025
Do you want to sell children's clothing online in your own webshop? Abicart is a complete professional e-commerce solution with hundreds of features that are perfect for you to succeed in selling children's clothing. It is completely free to try - and best of all - it is extremely affordable if you choose to subscribe to one of our versions.Start a webshop with us. Free demo for 30 days!Click here and start your webshop - Free demo! You'll be up and running in minutes!Free access to Abicart customer service.No connectionsSelling children's clothing in your own webshop can be a profitable business for those who have an interest in children's clothing and want to start an online store. By using Abicart as your e-commerce platform, you can create a professional and user-friendly webshop to sell your products.To use Abicart to sell children's clothing, you first need to create an account on the platform and choose the package that suits your needs. After that, you can easily create your own webshop by choosing one of the ready-made templates or customizing your own template using the tools that Abicart offers.Once your online shop is ready, you can start posting pictures and descriptions of your children's clothing. It is important to have a well-written product description and clear images that show the clothes in the best possible way. Abicart also offers tools to manage your inventory and create campaigns and offers.To promote your webshop, you can use social media and other online channels. Abicart also has a built-in feature to optimize your online shop for search engines, which can help you reach a wider audience and increase your sales.Once you've received an order from your online store, you can easily manage payments and shipping via Abicart's integrated payment and shipping options. Abicart also offers support for multiple payment methods and shipping options, making it easy for your customers to purchase children's clothing from your online store.To increase your sales, you can also offer different types of promotions and offers, such as discount codes and free shipping. It is also important to have an efficient customer service and fast delivery time to increase customer trust and loyalty to your webshop.In summary, with Abicart as your e-commerce platform, you can create a professional and user-friendly webshop for selling children's clothing online. With clear product descriptions, effective marketing and a smooth handling of payments and shipping, you can build a profitable business selling children's clothing.Katrin succeeds with her children's clothing webshop using the Abicart e-commerce platformKatrin had always been interested in fashion and had long dreamed of starting her own shop. After becoming a mother of twins, she realized that there was a great demand for high-quality children's clothing at competitive prices. She decided to take the plunge and start her own webshop to sell children's clothing online.Katrin chose Abicart as her e-commerce platform to create her webshop. She realized that Abicart was the best option to build a professional and user-friendly webshop that could meet the needs of her customers.With the help of Abicart, Katrin created a webshop that offered high quality children's clothing at competitive prices. She also used her knowledge of fashion and style to offer her customers the latest trends in children's clothing.Katrin was also careful to provide excellent customer service. She was always available to answer questions and help her customers with any problems. She also offered an easy return policy and fast delivery.By using Abicart, Katrin was also able to take advantage of features like search optimization and advertising to increase her online visibility and reach more customers. Over time, Katrin's webshop sales began to increase and she started to get more and more repeat customers.Katrin also realized that it was important to have an integrated solution for her physical store and her webshop. She could use Abicart's functions to manage orders and deliveries, making it easy to manage sales in both channels at the same time.Today, Katrin's webshop is one of the most popular destinations for customers looking for high-quality children's clothing at competitive prices. By using Abicart as her e-commerce platform, Katrin was able to create a professional webshop that met the needs of her customers and generated higher profits for her business.This ad is intended to inspire others to start their own webshop to sell children's clothing online. By using Abicart as your e-commerce platform, you can create a professional and user-friendly webshop that meets the needs of your customers. There are many advantages to selling children's clothing online in your own webshop, including greater market potential, lower start-up costs, increased customer loyalty and flexibility. By offering high-quality children's clothing at competitive prices and excellent customer service, you can build a loyal customer base and increase your online sales. If you are thinking of starting your own webshop to sell children's clothing, Abicart is the perfect e-commerce platform to help you succeed. Click here to start your online shop - Free demo!
-

Build a webshop for suits
18 Dec 2025
Do you want to sell suits online in your own webshop? Abicart is a complete and professional e-commerce solution with hundreds of features that are perfectly suited for you to succeed in selling suits. It's completely free to try - and best of all - it's extremely affordable if you choose to subscribe to any of our versions.Start a webshop with us. Free demo for 30 days!Click here and start your webshop - Free demo! You'll be up and running in minutes!Free access to Abicart's customer service.No card required
-

Build a webshop for bed frames
18 Dec 2025
Do you want to sell bed frames online in your own webshop? Abicart is a complete and professional e-commerce solution with hundreds of features that are perfectly suited for you to succeed in selling bed frames. It's completely free to try - and best of all - it's extremely affordable if you choose to subscribe to any of our versions.Start a webshop with us. Free demo for 30 days!Click here and start your webshop - Free demo! You'll be up and running in minutes!Free access to Abicart's customer service.No card required
-

Start an online store for movie posters
18 Dec 2025
Do you want to sell movie posters online in your own webshop? Abicart is a complete and professional e-commerce solution with hundreds of features that are perfectly suited for you to succeed in selling movie posters. It's completely free to try - and best of all - it's extremely affordable if you choose to subscribe to any of our versions.Start a webshop with us. Free demo for 30 days!Click here and start your webshop - Free demo! You'll be up and running in minutes!Free access to Abicart's customer service.No card required
-

Guide: how to sell aquariums online
18 Dec 2025
Do you want to sell aquariums online in your own webshop? Abicart is a complete and professional e-commerce solution with hundreds of features that are perfectly suited for you to succeed in selling aquariums. It's completely free to try - and best of all - it's extremely affordable if you choose to subscribe to any of our versions.Start a webshop with us. Free demo for 30 days!Click here and start your webshop - Free demo! You'll be up and running in minutes!Free access to Abicart's customer service.No connectionsSelling aquariums and accessories in your own webshop is a fascinating activity with a rich historical background.Build your product portfolio: aquariums have been around for thousands of years, from ancient cultures such as the Egyptians and Romans, to today's modern aquariums that come in different sizes and price ranges. Offering a wide range of aquariums and accessories in different price ranges and for different types of fish allows you to follow the rich history of aquarium keeping.Create an attractive webshop: a well-designed and user-friendly webshop is crucial to attract visitors and increase conversions. Make sure you have clear and informative product descriptions, high-quality product images and easy navigation for your customers.Offer a secure and smooth payment process: make sure your webshop has a secure payment gateway and that payments go smoothly and easily for your customers. This can increase customer confidence in your online store and help increase sales.Promote your webshop: use social media and other digital channels to promote your webshop and attract new customers.Offer customer support: make sure to offer easy and accessible customer support, either via email, phone or live chat. This can help solve any problems or questions your customers may have and build a strong relationship with them.By following these tips, you can create a successful aquarium and accessories webshop that can attract new customers and increase your sales over time. Good luck!
-
Get started selling caps online
18 Dec 2025
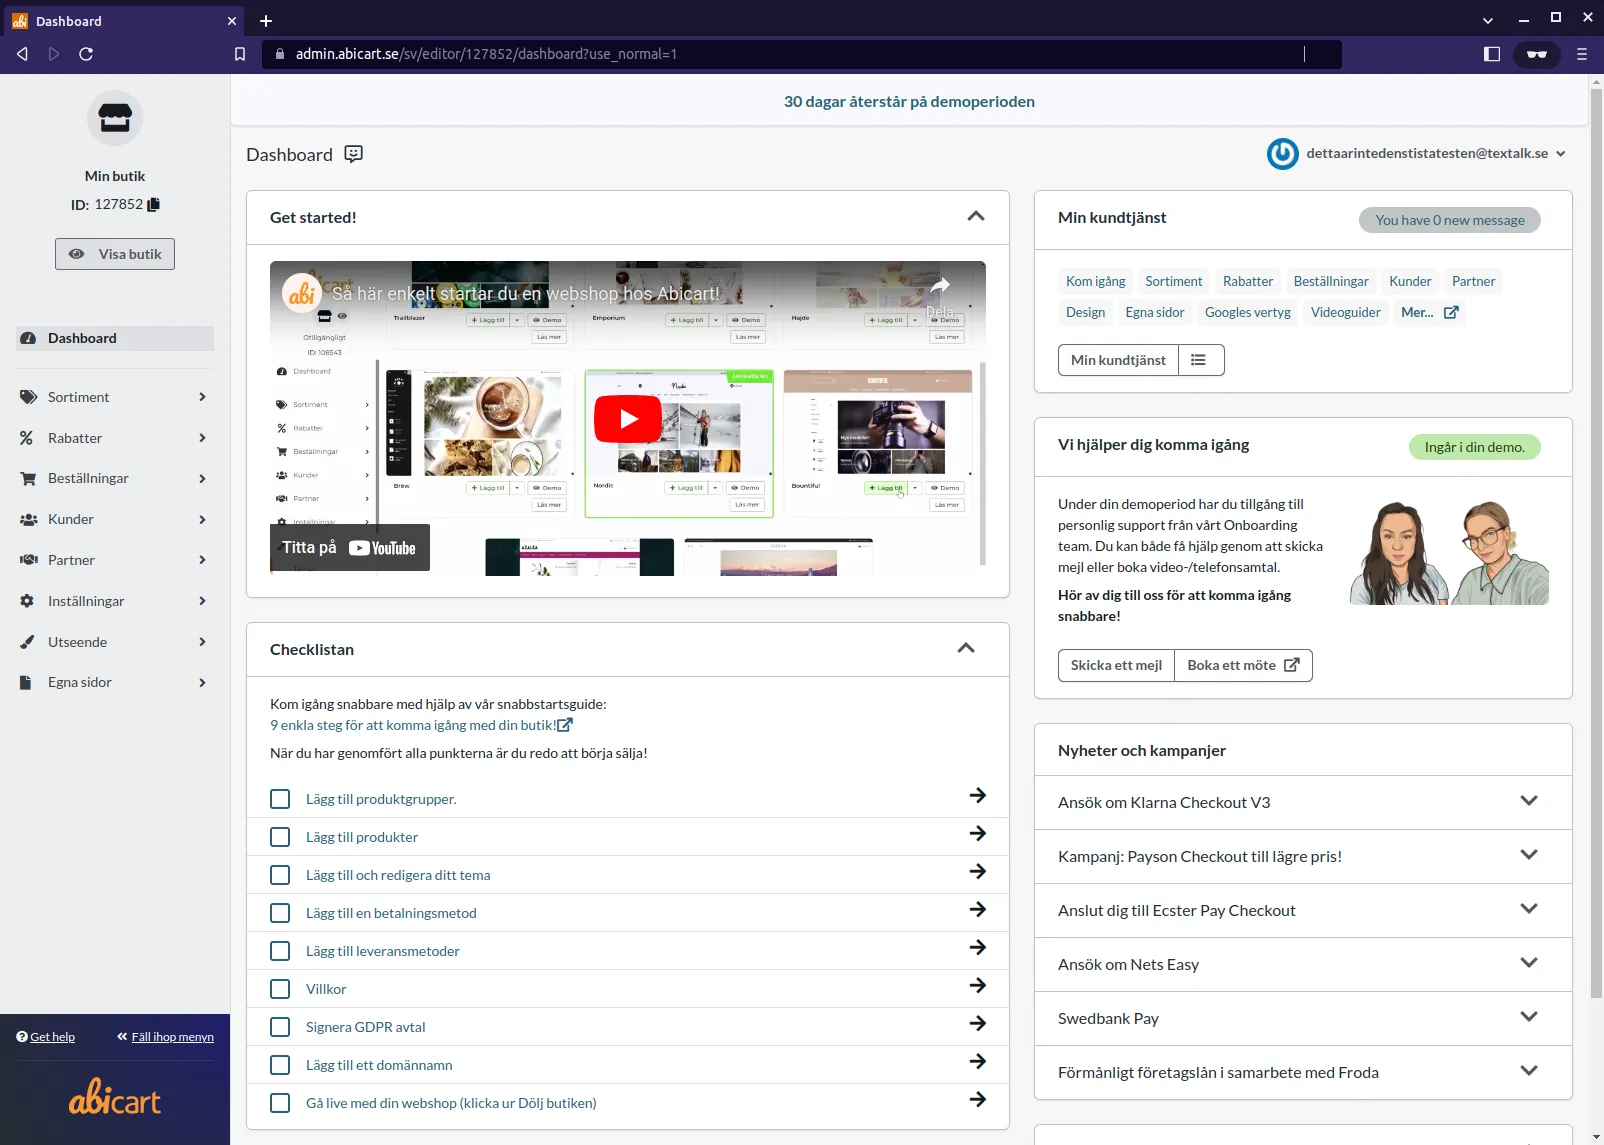
Do you want to sell caps online in your own webshop? Abicart is a complete and professional e-commerce solution with hundreds of features that are perfectly suited for you to succeed in selling caps. It's completely free to try - and best of all - it's extremely affordable if you choose to subscribe to any of our versions.Start a webshop with us. Free demo for 30 days!Click here and start your webshop - Free demo! You'll be up and running in minutes!Free access to Abicart's customer service.No card required
-
Sell surfboards online – how to get started
18 Dec 2025
Do you want to sell surfboards online in your own webshop? Abicart is a complete and professional e-commerce solution with hundreds of features that are perfectly suited for you to succeed in selling surfboards. It's completely free to try - and best of all - it's extremely affordable if you choose to subscribe to any of our versions.Start a webshop with us. Free demo for 30 days!Click here and start your webshop - Free demo! You'll be up and running in minutes!Free access to Abicart's customer service.No card required
-
Build a webshop for cleaning products
18 Dec 2025
Do you want to sell cleaning products online in your own webshop? Abicart is a complete and professional e-commerce solution with hundreds of features that are perfectly suited for you to succeed in selling cleaning products. It's completely free to try - and best of all - it's extremely affordable if you choose to subscribe to any of our versions.Start a webshop with us. Free demo for 30 days!Click here and start your webshop - Free demo! You'll be up and running in minutes!Free access to Abicart's customer service.No card required
-
Sell quilts online – how to get started
18 Dec 2025
Do you want to sell quilts online in your own webshop? Abicart is a complete and professional e-commerce solution with hundreds of features that are perfectly suited for you to succeed in selling quilts. It's completely free to try - and best of all - it's extremely affordable if you choose to subscribe to any of our versions.Start a webshop with us. Free demo for 30 days!Click here and start your webshop - Free demo! You'll be up and running in minutes!Free access to Abicart's customer service.No card required
-

Build a webshop for planners
18 Dec 2025
Do you want to sell planners online in your own webshop? Abicart is a complete and professional e-commerce solution with hundreds of features that are perfectly suited for you to succeed in selling planners. It's completely free to try - and best of all - it's extremely affordable if you choose to subscribe to any of our versions.Start a webshop with us. Free demo for 30 days!Click here and start your webshop - Free demo! You'll be up and running in minutes!Free access to Abicart's customer service.No card requiredSelling planners in your own webshop can be a very profitable business, especially if you have a niche target group that is interested in specific types of almanacs. Here are some tips to help you increase sales of almanacs in your webshop.Choose a niche: Think about the type of planners you want to sell and target a niche group. This can range from themes such as nature, cooking, gardening or hobbies to target groups such as students, entrepreneurs, mothers or pensioners. By having a clear target group and a clear message, you can attract the right customers and sell more calendars.Design and quality: to stand out from the crowd of planners on the market, it is important that your almanac has a stylish and attractive design. Hire a professional designer or use existing templates to create an attractive and easy-to-read layout. Also, remember to choose high-quality paper and a sturdy binding to ensure that your almanac is of high quality.Marketing: when your planners is ready to be sold, it's time to market it in a variety of ways. Use social media to reach out to your target audience and showcase your almanac's unique features. Create a blog post or video showcasing your almanac and giving tips on how to best use it. Also, send out newsletters to your email list and use paid advertising if it fits your budget.Your webshop as your main sales channel: it's best to use your own webshop as your main sales channel because you have full control over sales and can create your own brand experience. Use a reliable and secure e-commerce platform to build your webshop and make sure it is easy to navigate and use for your customers.Customer service: to create a loyal customer base, it's important that you provide good customer service. Respond quickly to questions and requests from your customers and make sure they are happy with their purchases. Also, send a personal greeting or thank you card to your customers after their purchase to show appreciation and build relationships with them.
-

Build a webshop for bows
18 Dec 2025
Do you want to sell bows online in your own webshop? Abicart is a complete and professional e-commerce solution with hundreds of features that are perfectly suited for you to succeed in selling bows. It's completely free to try - and best of all - it's extremely affordable if you choose to subscribe to any of our versions.Start a webshop with us. Free demo for 30 days!Click here and start your webshop - Free demo! You'll be up and running in minutes!Free access to Abicart's customer service.No card required
-
Guide: how to sell salt online
18 Dec 2025
Do you want to sell salt online in your own webshop? Abicart is a complete and professional e-commerce solution with hundreds of features that are perfectly suited for you to succeed in selling salt. It's completely free to try - and best of all - it's extremely affordable if you choose to subscribe to any of our versions.Start a webshop with us. Free demo for 30 days!Click here and start your webshop - Free demo! You'll be up and running in minutes!Free access to Abicart's customer service.No card required
-
E-commerce with mobiles: from idea to online store
18 Dec 2025
Do you want to sell mobiles online in your own webshop? Abicart is a complete and professional e-commerce solution with hundreds of features that are perfectly suited for you to succeed in selling mobiles. It's completely free to try - and best of all - it's extremely affordable if you choose to subscribe to any of our versions.Start a webshop with us. Free demo for 30 days!Click here and start your webshop - Free demo! You'll be up and running in minutes!Free access to Abicart's customer service.No card required
-

Start an online store for posters
18 Dec 2025
Do you want to sell posters online in your own webshop? Abicart is a complete and professional e-commerce solution with hundreds of features that are perfectly suited for you to succeed in selling posters. It's completely free to try - and best of all - it's extremely affordable if you choose to subscribe to any of our versions.Start a webshop with us. Free demo for 30 days!Click here and start your webshop - Free demo! You'll be up and running in minutes!Free access to Abicart's customer service.No connectionsSelling posters in your own webshop can be a lucrative business idea with several advantages. Here are some of them:Flexibility: by selling posters in your own webshop, you have complete control over the range and can easily change the range as needed. You can add new posters at any time and remove those that are not selling as well. This gives you the flexibility to adapt your range to demand and keep your webshop up to date with the latest trends.Higher profit margins: by eliminating middlemen and selling directly to customers, you can increase your profit margins. Instead of paying a third party to sell your products, you can take all the profit yourself. This gives you more control over your sales and allows you to make more money on every poster you sell.Larger customer base: by selling posters in your own webshop, you have the opportunity to reach a larger customer base. Your webshop can reach customers from all over the world and you can easily promote your products on social media and other platforms. This gives you the opportunity to sell more posters and expand your business.Better customer experience: by selling posters in your own webshop, you can offer a better customer experience. You can create a customised and user-friendly website, answer customer questions directly and provide personalised service. This allows you to build a loyal customer base and create a strong brand identity.Creative freedom: by selling posters in your own webshop, you can have full creative freedom over your products. You can create unique posters and give them a personal touch that sets them apart from the competition. This gives you the opportunity to stand out in the market and attract new customers.In conclusion, there are many advantages to selling posters in your own webshop. It offers flexibility, higher profit margins, a larger customer base, a better customer experience and creative freedom. If you want to start a webshop, selling posters can be a profitable and fun business to consider.
-
Start an online store for dresses
18 Dec 2025
Do you want to sell dresses online in your own webshop? Abicart is a complete and professional e-commerce solution with hundreds of features that are perfectly suited for you to succeed in selling dresses. It's completely free to try - and best of all - it's extremely affordable if you choose to subscribe to any of our versions.Start a webshop with us. Free demo for 30 days!Click here and start your webshop - Free demo! You'll be up and running in minutes!Free access to Abicart's customer service.No card required
-
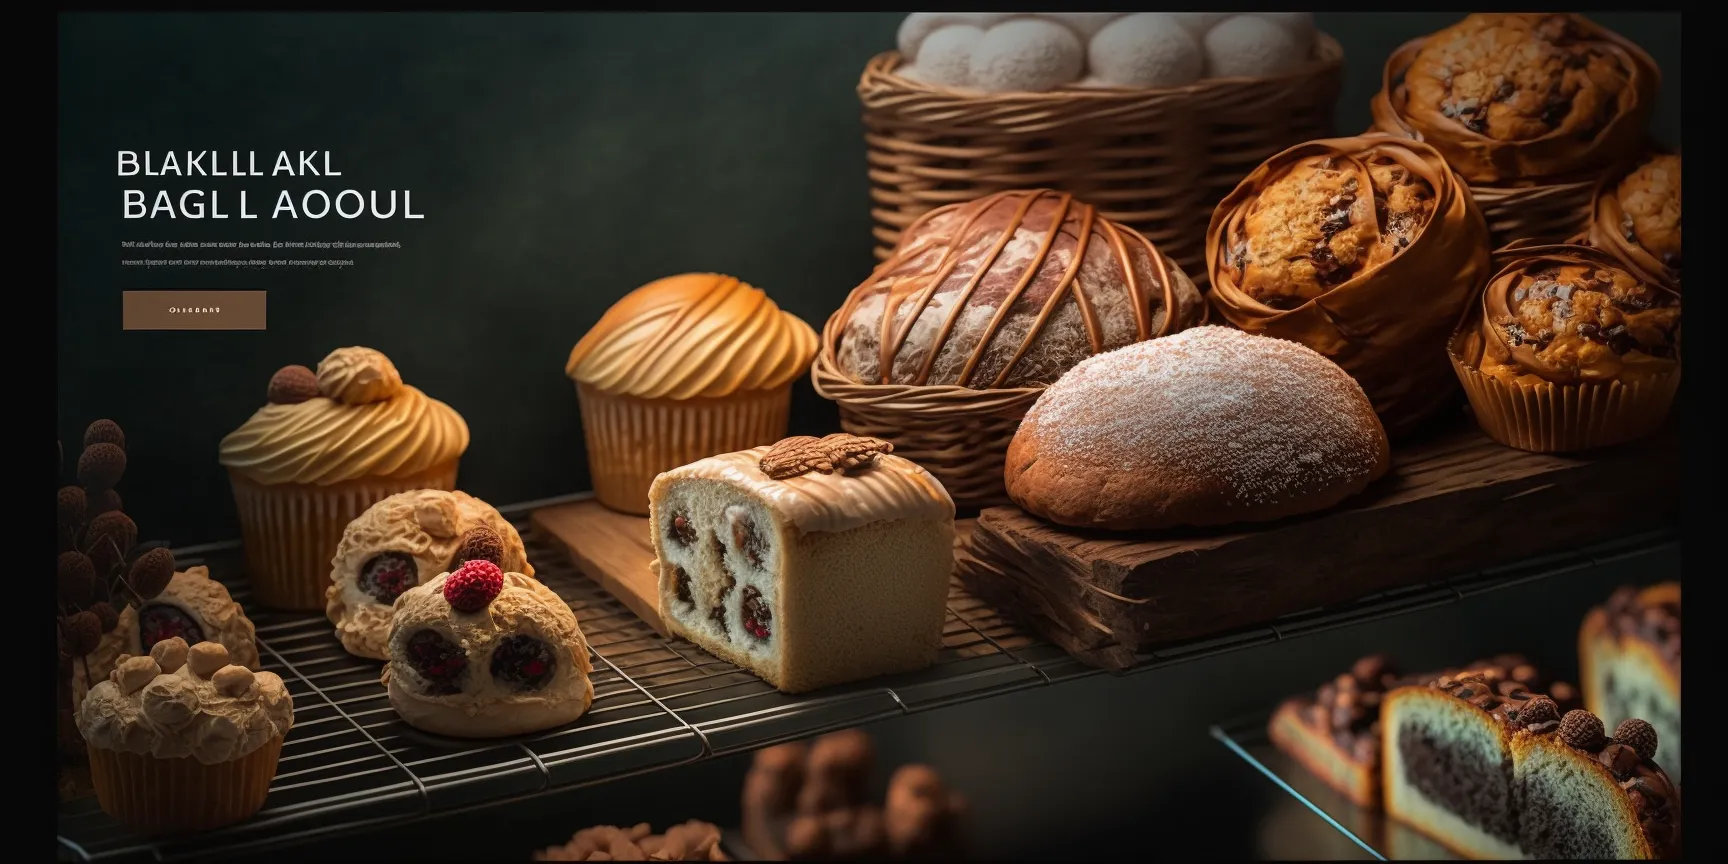
Sell baked goods online – how to get started
18 Dec 2025
Do you want to sell baked goods online in your own webshop? Abicart is a complete and professional e-commerce solution with hundreds of features that are perfectly suited for you to succeed in selling baked goods. It's completely free to try - and best of all - it's extremely affordable if you choose to subscribe to any of our versions.Start a webshop with us. Free demo for 30 days!Click here and start your webshop - Free demo! You'll be up and running in minutes!Free access to Abicart's customer service.No card requiredSelling baked goods in your own webshop can be a profitable business for those who have a passion for baking and want to sell their products online. By using Abicart as your e-commerce platform, you can create a professional and user-friendly webshop to sell your baked goods.To use Abicart to sell baked goods, you first need to create an account on the platform and choose the package that suits your needs. Then you can easily create your own webshop by choosing one of the ready-made templates or create your own template using the tools offered by Abicart.Once your webshop is ready, you can start uploading images and descriptions of your baked goods. It is important to have a well-described product description and clear pictures that show the baked goods in the best possible way. Abicart also offers tools to manage your inventory and create promotions and offers.To promote your webshop, you can use social media and other online channels. Abicart also has a built-in feature to optimize your webshop for search engines, which can help you reach a larger audience and increase your sales.Once you have received an order from your webshop, you can easily manage payments and shipping via Abicart's integrated payment and shipping options. Abicart also offers support for multiple payment methods and shipping options, making it easy for your customers to purchase baked goods from your webshop.To ensure that your baked goods reach the customer in good shape, it is important to have efficient shipping management and appropriate packaging. It is also important to offer different types of promotions and offers, such as discount codes and free shipping, to increase customer trust and loyalty to your webshop.In conclusion, with Abicart as your e-commerce platform, you can create a professional and user-friendly webshop to sell baked goods online. With clear product descriptions, effective marketing and a smooth handling of payments and shipping, you can build a profitable business to sell your baked goods.
-
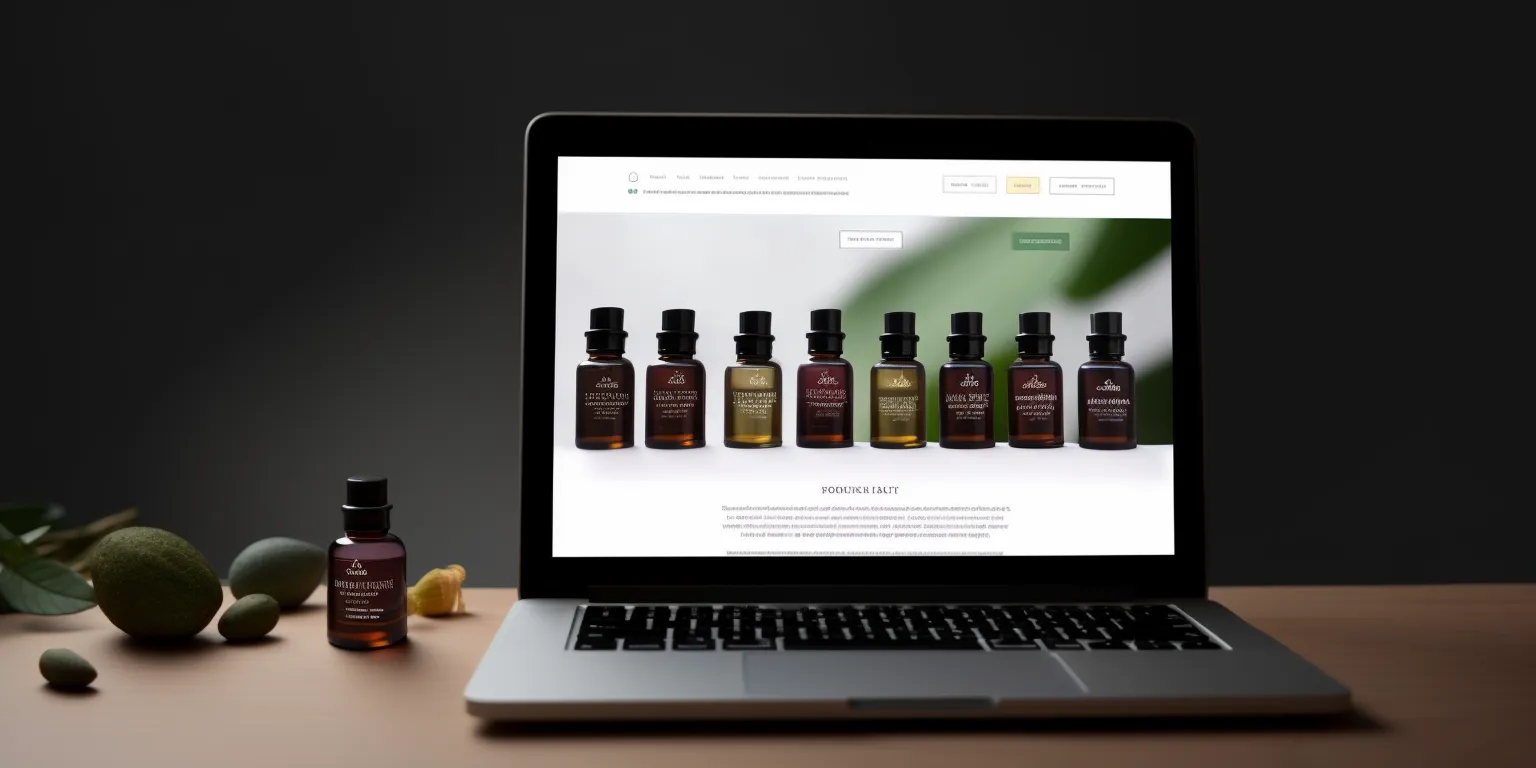
How to start a webshop selling essential oils
18 Dec 2025
Do you want to sell essential oils online in your own webshop? Abicart is a complete and professional e-commerce solution with hundreds of features that are perfectly suited for you to succeed in selling essential oils. It's completely free to try - and best of all - it's extremely affordable if you choose to subscribe to any of our versions.Start a webshop with us. Free demo for 30 days!Click here and start your webshop - Free demo! You'll be up and running in minutes!Free access to Abicart's customer service.No card required
-
Guide: how to sell rings online
18 Dec 2025
Do you want to sell rings online in your own webshop? Abicart is a complete and professional e-commerce solution with hundreds of features that are perfectly suited for you to succeed in selling rings. It's completely free to try - and best of all - it's extremely affordable if you choose to subscribe to any of our versions.Start a webshop with us. Free demo for 30 days!Click here and start your webshop - Free demo! You'll be up and running in minutes!Free access to Abicart's customer service.No card required
-

E-commerce with stamps: from idea to online store
18 Dec 2025
Do you want to sell stamps online in your own webshop? Abicart is a complete and professional e-commerce solution with hundreds of features that are perfectly suited for you to succeed in selling stamps. It's completely free to try - and best of all - it's extremely affordable if you choose to subscribe to any of our versions.Start a webshop with us. Free demo for 30 days!Click here and start your webshop - Free demo! You'll be up and running in minutes!Free access to Abicart's customer service.No card required
-

Sell books, e-books and audiobooks online – how to get started
18 Dec 2025
Do you want to sell books and e-books online in your own webshop? Abicart is a complete professional e-commerce solution with hundreds of features that are perfect for you to succeed in selling books and e-books. It's completely free to try - and best of all - it's extremely affordable if you choose to subscribe to one of our versions.Start a webshop with us. Free demo for 30 days!Click here and start your webshop - Free demo! You'll be up and running in minutes!Free access to Abicart's customer service.No card required
-
How to start a webshop selling games
18 Dec 2025
Do you want to sell games online in your own webshop? Abicart is a complete and professional e-commerce solution with hundreds of features that are perfectly suited for you to succeed in selling games. It's completely free to try - and best of all - it's extremely affordable if you choose to subscribe to any of our versions.Start a webshop with us. Free demo for 30 days!Click here and start your webshop - Free demo! You'll be up and running in minutes!Free access to Abicart's customer service.No card required
-
Sell comic books online – how to get started
18 Dec 2025
Do you want to sell comic books online in your own webshop? Abicart is a complete and professional e-commerce solution with hundreds of features that are perfectly suited for you to succeed in selling comic books. It's completely free to try - and best of all - it's extremely affordable if you choose to subscribe to any of our versions.Start a webshop with us. Free demo for 30 days!Click here and start your webshop - Free demo! You'll be up and running in minutes!Free access to Abicart's customer service.No card required
-
E-commerce with handmade crafts: from idea to online store
18 Dec 2025
Do you want to sell handmade crafts online in your own webshop? Abicart is a complete and professional e-commerce solution with hundreds of features that are perfectly suited for you to succeed in selling handmade crafts. It's completely free to try - and best of all - it's extremely affordable if you choose to subscribe to any of our versions.Start a webshop with us. Free demo for 30 days!Click here and start your webshop - Free demo! You'll be up and running in minutes!Free access to Abicart's customer service.No card required
-

How to start a webshop selling stock photography and images
18 Dec 2025
Do you want to sell stock photography and images online in your own webshop? Abicart is a complete and professional e-commerce solution with hundreds of features that are perfectly suited for you to succeed in selling stock photography and images. It's completely free to try - and best of all - it's extremely affordable if you choose to subscribe to any of our versions.Start a webshop with us. Free demo for 30 days!Click here and start your webshop - Free demo! You'll be up and running in minutes!Free access to Abicart's customer service.No card required
-

Why Personalization is the Key to E-commerce Success in 2024: Strategies and Tools for Online Stores
18 Dec 2025
Unlock the power of personalization in e-commerce to drive customer engagement and sales in 2024. Explore essential tools and strategies for creating tailored shopping experiences that resonate with your customers.Introduction: The shift towards Personalized Shopping ExperiencesIn 2024, personalization is no longer just a nice-to-have feature in e-commerce-it's a crucial component of a successful online store. With consumers expecting more tailored experiences, businesses that leverage personalization can significantly improve customer satisfaction, increase conversion rates and build long-lasting relationships with their customers.Personalization in e-commerce is all about delivering a shopping experience that is uniquely tailored to each customer based on their preferences, behaviours and previous interactions with your brand. In this blog, we'll explore why personalization is so crucial to ecommerce success in 2024, tools and strategies you can use to implement it, and how you can effectively leverage personalization to meet and exceed customer expectations.The Growing Importance of Personalization in E-commercePersonalization has become a driving force in e-commerce, mainly due to the increasing demand for more relevant and engaging shopping experiences. Here's why personalization is so important:Improved Customer ExperiencePersonalization helps create a more enjoyable and efficient shopping experience by presenting customers with the products and content that are most relevant to them. This reduces the time and effort customers need to spend finding what they are looking for, leading to higher satisfaction and loyalty.Increased conversion ratesPersonalized recommendations and targeted offers can significantly increase conversion rates. When customers feel understood and valued, they are more likely to make a purchase. Studies show that personalized product recommendations can increase conversion rates by up to 20%.Higher customer loyaltyPersonalization helps build stronger relationships with customers by offering consistent and relevant experiences across all touchpoints. This promotes loyalty and encourages repeat purchases. Customers are more likely to return to a store that consistently meets their individual needs.Improved Marketing EffectivenessPersonalized marketing campaigns, such as email marketing or targeted ads, are more effective because they speak directly to the interests and needs of the individual customer. This leads to higher engagement rates and better return on investment (ROI).Strategies for Implementing Personalization in Your Online StoreTo effectively implement personalization in your online store, it's important to develop a comprehensive strategy that addresses the different aspects of the customer journey. Here are some key strategies to consider:Collect and Analyze Customer DataThe foundation of personalization is data. Collecting data on customer behavior, preferences, and purchase history will enable you to better understand your customers and tailor your offers to their needs. Use tools like Google Analytics, CRM systems and customer surveys to gather valuable insights.Implement Personalized Product RecommendationsProduct recommendations are one of the most effective forms of personalization. By analyzing customer behavior, such as browsing history and previous purchases, you can offer relevant product suggestions. Implement recommendation engines on your website that dynamically display products based on individual customer data.Personalize the shopping experiencePersonalize different elements of the shopping experience, from the homepage to the checkout. For example, you can greet returning customers by name, display recently viewed items, or customize the layout of the homepage based on past interactions. Personalization can also include promotional banners, product sorting, and even the checkout process.Use Dynamic ContentDynamic content allows you to change the content of your website based on who is viewing it. This can include personalized banners, pop-ups, and product displays that adapt to customer data. Dynamic content ensures that each customer sees the most relevant information, improving their overall experience.Leverage Personalized Email MarketingEmail marketing remains one of the most effective channels for personalization. Use customer data to send personalized emails that include product recommendations, tailored offers and content relevant to their interests. Segment your email lists based on customer behavior, demographics and preferences to increase engagement.Offer Personalized Discounts and PromotionsTailor discounts and promotions to individual customers based on their purchase history and preferences. For example, you can offer a discount on a product they frequently buy or suggest complementary products with a bundle discount. Personalized offers can drive conversions and increase average order value.Incorporate AI and Machine LearningArtificial intelligence (AI) and machine learning (ML) play a crucial role in delivering real-time personalization at scale. These technologies can analyze large amounts of customer data and automatically deliver personalized experiences without manual intervention. Implement AI-powered tools that adapt to customer behavior in real-time to keep your personalization efforts current.Tools to Improve Personalization in E-commerceTo implement effective personalization, you need the right set of tools. Here are some key tools that can help you deliver personalized experiences:Recommendation enginesTools like Nosto, Dynamic Yield and Barilliance offer powerful recommendation engines that analyze customer behavior and provide personalized product suggestions in real time.Customer Relationship Management (CRM) SystemsCRM systems such as Salesforce, HubSpot and Zoho CRM help you manage customer data, track interactions and personalize communications across channels.Email marketing platformsEmail marketing platforms like Klaviyo, Mailchimp, and ActiveCampaign offer advanced segmentation and personalization features that allow you to send targeted email campaigns based on customer data.AI and Machine Learning toolsAI-powered tools like Bluecore, Optimove, and Algolia use machine learning algorithms to deliver personalized experiences at scale, from product recommendations to dynamic content.Personalization platformsComprehensive personalization platforms like Adobe Target and Monetate offer end-to-end solutions to personalize the entire customer journey, from the first interaction to post-purchase communications.How Abicart Can Help You Implement PersonalizationAbicart is committed to helping e-commerce businesses succeed by providing the tools and support necessary to implement effective personalization strategies. Here's how Abicart can help:Integrated Personalization Tools: Abicart offers built-in tools for personalized product recommendations, dynamic content, and personalized email marketing, making it easy to deliver tailored experiences to your customers.AI-Powered Features: Leverage the AI and machine learning capabilities within the Abicart platform to automatically adapt your store to individual customer preferences and behaviors.Comprehensive Data Analysis: Use Abicart's advanced analytics tools to collect and analyze customer data, enabling you to gain insights and drive your personalization strategy effectively.Flexible Customization: Abicart offers flexible customization options that enable you to personalize different elements of your store, from product pages to checkout flows, ensuring a unique experience for each customer.Conclusion: Personalization as a Competitive Advantage in 2024In 2024, personalization isn't just a trend-it's a necessity for ecommerce success. As customers continue to demand more relevant and engaging shopping experiences, businesses that invest in personalization will stand out from the competition, drive higher conversions, and build lasting customer loyalty.With the right strategies and tools, including those offered by Abicart, you can create a personalized shopping experience that resonates with your customers and prepares your business for long-term success in the ever-changing world of e-commerce.
-
Swedish e-commerce platforms
18 Dec 2025
-
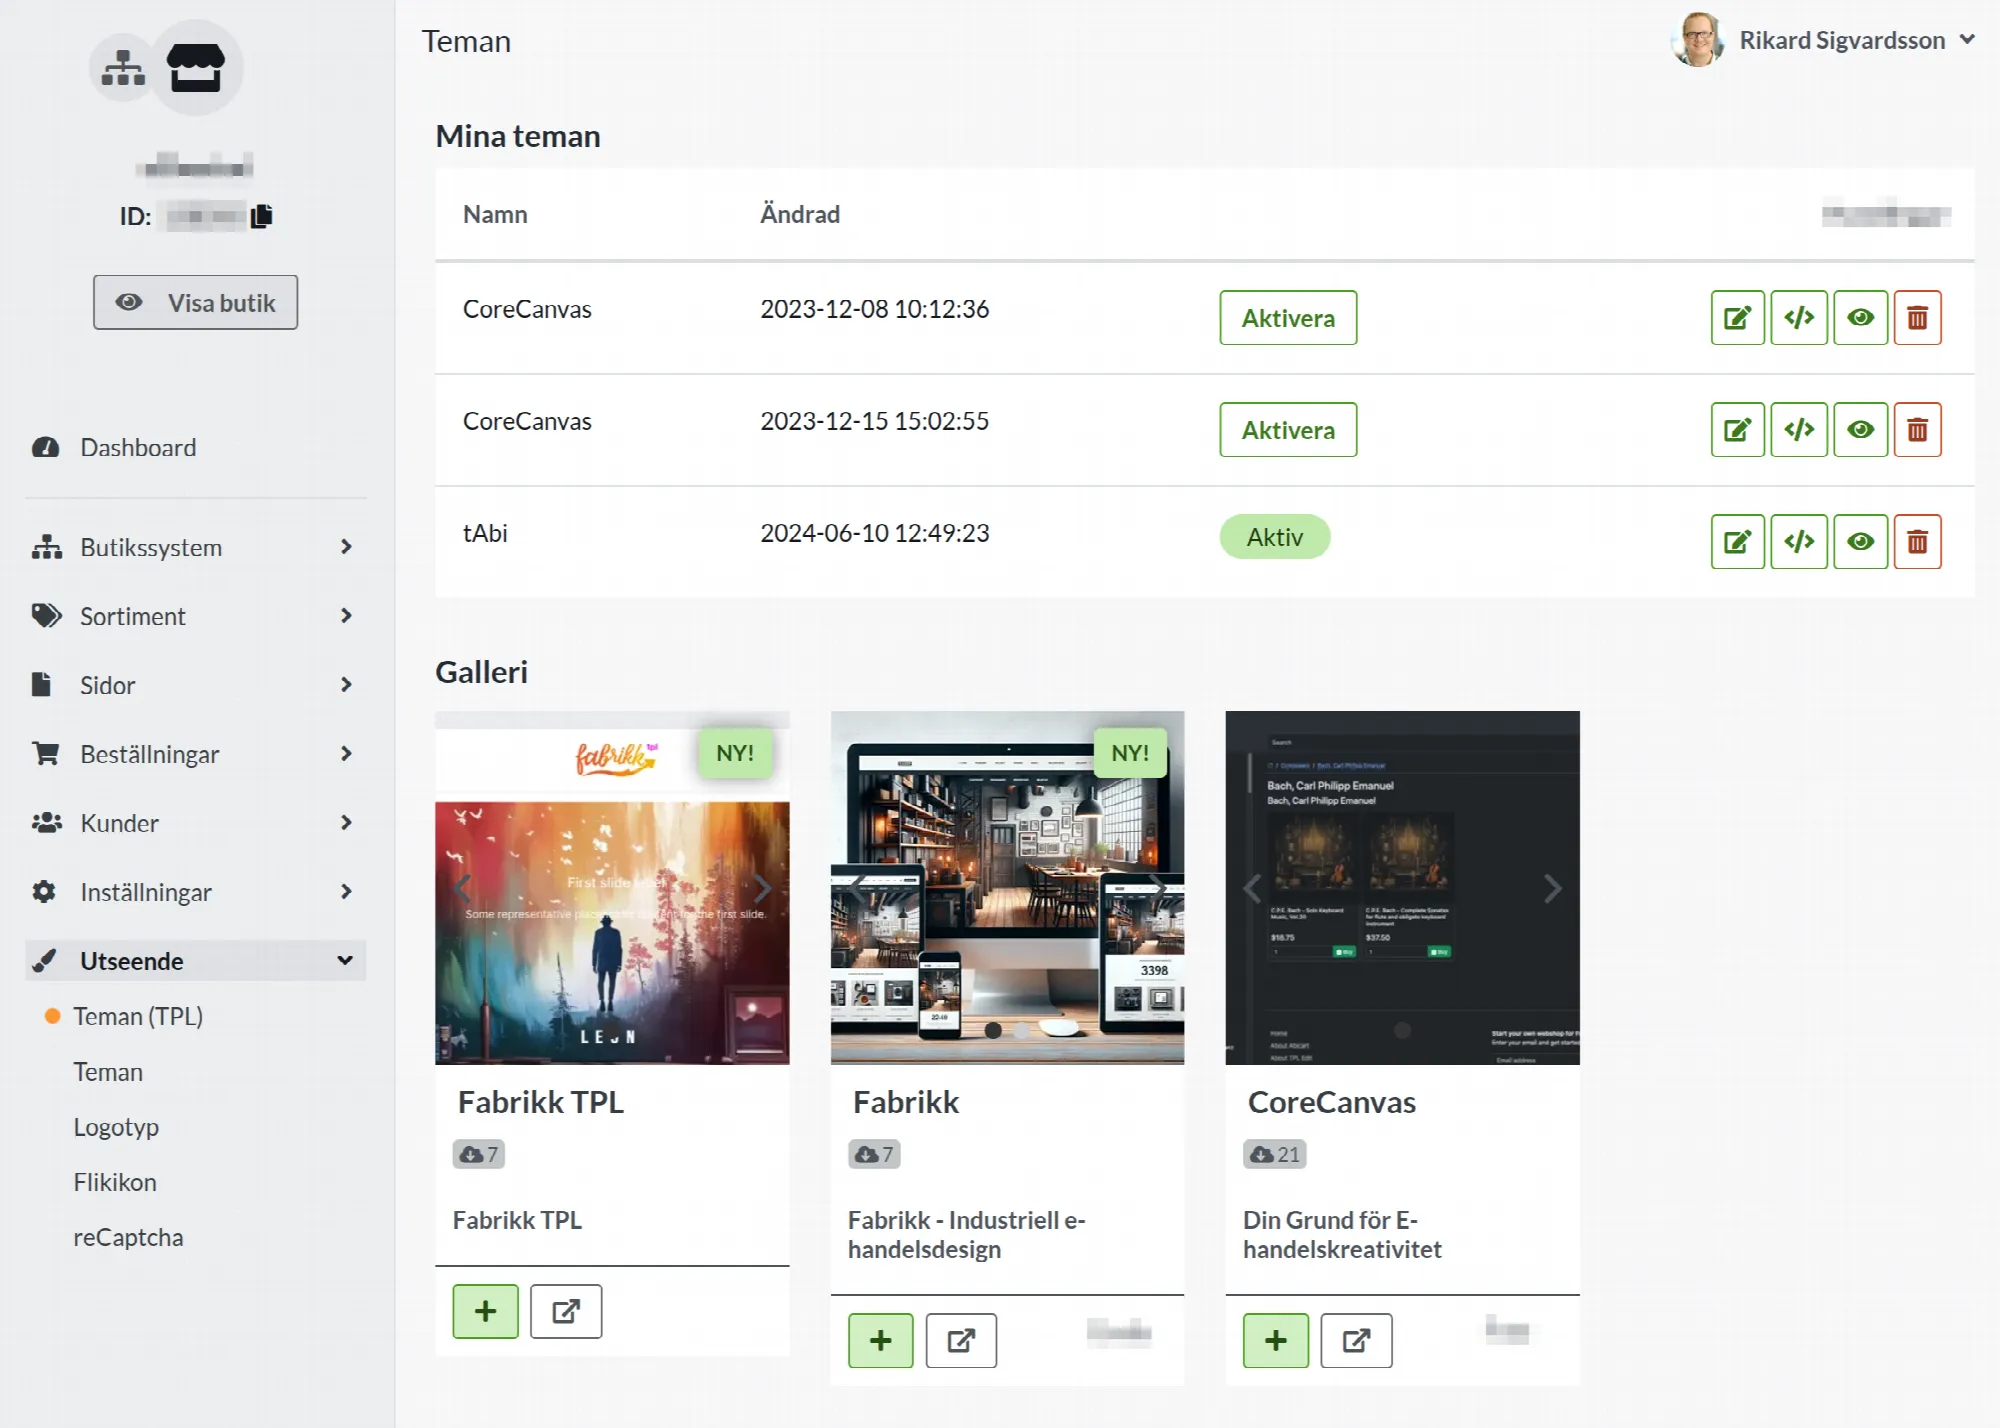
Status update on TPL Edit - Our new theme engine for the future of e-commerce
18 Dec 2025
This is a report on where the TPL Edit project stands today and what you can expect in the future. We go through our timeline and future steps, current projects and client collaborations, the work we've done so far, and what parts we're working on right now. Our goal is to give you a picture of where the project stands today and what's coming next.Timeline and future stepsWe have some customers who will need to have accessible websites as of 28 June 2025 as required by law. As this means some changes to our existing themes, we will make these changes in our new TPL themes. These themes will be available to all customers. However, we do not have a "hard" launch date but will roll out the updates gradually.We have put a lot of effort into developing TPL Edit to identify the right requirements. Since the start of the project, we have explored different technical solutions and decided on the path that best meets, for example, our performance and availability requirements, but also the company's internal needs. We have also tested and adapted the platform in real customer projects to ensure that TPL Edit meets actual needs rather than just theoretical specifications or wish lists. So we will continue to work for a while longer, at least over the summer, to make sure we build the right solution.After the summer, the next milestone is a closed evaluation with more customers involved, and then an open beta, and development of more themes. We don't have a date for when the closed evaluation and open beta will happen - it depends on the feedback we get along the way.Current projects and client collaborationsRight now we have two active projects where we use TPL Edit to build pages. The first project is a simple website for one of Textalk's other products, Prenly. The goal of this project was to get basic technology in place and tested in the real world, without having to spend time on webshop functionality.Our second project is a real webshop with a lot of customization for a customer with unique needs. The goal of this project is to make sure that TPL Edit is flexible and versatile and doesn't have to stay within the confines of a standard solution. This theme does not have an editor, but is customized as needed. More information about this customer will be available once the project is launched.We are now in the starting blocks for our third project. In parallel, we are now developing a tool to make settings in the theme without code, as well as a default theme that will be available to all customers.Through these projects, we ensure that TPL Edit is of high quality and adapted to real needs.Interface development and technical benefitsWork on developing a good editor for themes is in full swing. One requirement we have for our new theme editor is that you should be able to see the results of your changes immediately, meaning that every time you make a change to the theme, you will immediately see how it affects your store. A graphic editor is a prerequisite before we can start opening up TPL for Abicart to more customers.For those who are curious about the technical side, we can tell you that the new themes are more traditionally web-based, which means that it will be much easier for you to customize HTML and CSS without having to understand the inner workings of the theme engine. You'll have direct access to the source code via your browser, and you'll be able to edit themes using knowledge of HTML, CSS and a simple templating language called Twig. You don't need to know technologies like JavaScript, SCSS, React or other frameworks.ConclusionWe look forward to offering you a more powerful and flexible platform with TPL Edit. However, there is still some way to go before it will be visible to the outside world. Stay tuned for more updates and don't hesitate to contact us if you have any questions or concerns. We have worked hard to ensure that TPL Edit meets all modern requirements and your needs, and lays a good foundation to stand on for many years to come.
-
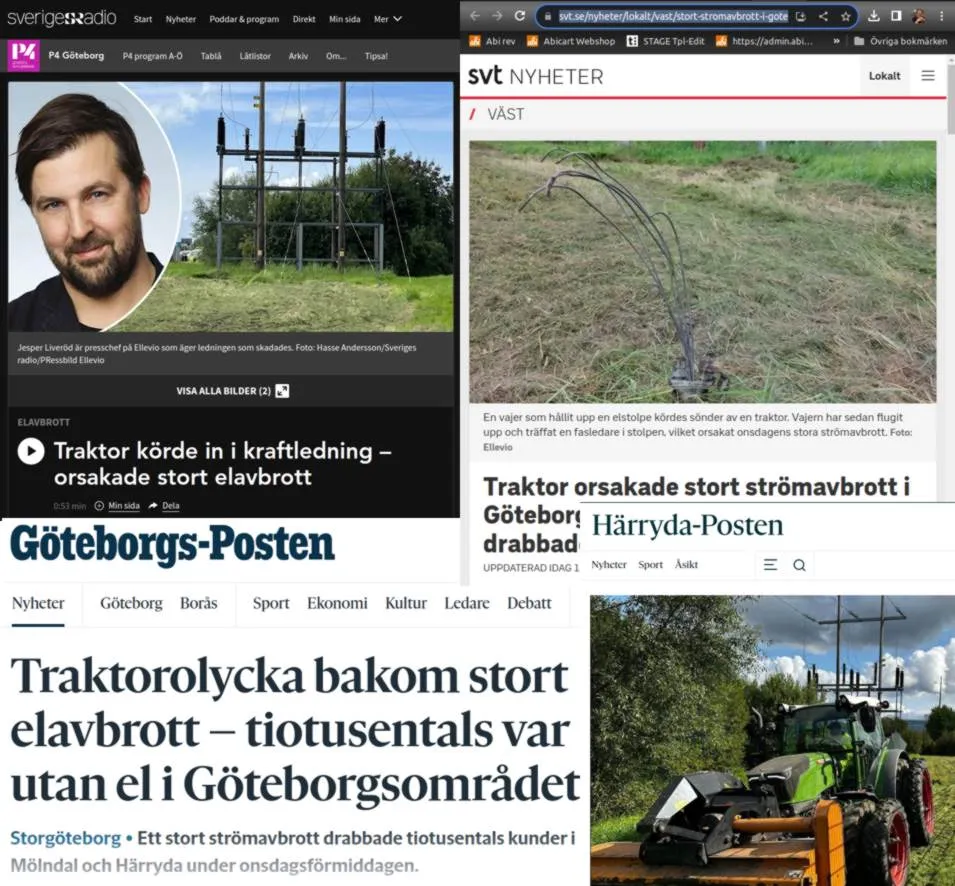
Info on disruption 2023-08-30
18 Dec 2025
Some days simply don't turn out as planned. We are extremely relieved to announce that the system is now back in full operation.Let's not joke about it - we have experienced an almost unbelievable series of events that we could hardly have imagined where it all started with a tractor hitting the power grid and knocking out the power in 3 municipalities (for 20,000 households) but we managed to do this thanks to our redundant power supply.The problem arose when the power came back on because our network provider inadvertently applied 270 volts instead of the standard 230-240 volts. As a result, several critical hardware components were burned and stopped working. We have therefore during the afternoon, in parallel with the start-up of our systems, more or less emptied electronics stores in the Gothenburg area of the necessary hardware.Sure, we have redundant fiber lines, servers and even a large diesel generator for electricity supply (which by the way worked fine earlier today and smoked so much that the fire department came to visit). But this was a situation we have certainly never encountered before.To ensure that we are even better equipped for the future, we have decided to sign a partnership with a provider of "co-location" operating services. This means that going forward we will distribute additional parts of our operations to several independent geographical locations - of course within Sweden's borders and with our own servers.We have also decided to improve our customer support flows. Soon you will see a new approach that allows you to reach us in more ways, without the need to log in. We are really looking forward to sharing these exciting news with you.Thank you for your understanding and perseverance during this challenging day. We sincerely apologize for the inconvenience this interruption has caused.Wishing you a great evening!Jens HalvarssonCEO Textalk
-

A major e-commerce innovation is on its way: Abicart TPL Edit.
18 Dec 2025
Prepare to take your e-commerce into the future. At Abicart, we are proud to announce a new feature that we believe will renew your approach to web design: Abicart TPL Edit.This future-proof template editor will offer a wide range of modern themes, developed by us and our partners, ready to be used immediately. Themes that are designed with the latest trends in web design in mind and are search engine optimized to give your online store the best possible visibility.Abicart TPL Edit is based on the Twig template language and data from the Abicart API, which means you have all the tools you need to create a fully customized, user-friendly and unique online store. And with full freedom to use any CSS library you want - whether you prefer Bootstrap, Tailwind or any other framework - the flexibility is great.But we go further than that. If you have a unique vision for your online store and want to create something truly special, Abicart TPL Edit allows you to build your own theme from scratch. You can customize every detail of your online store and if you need help, our Abicart Experts team or your own web agency is ready to assist.Besides being user-friendly and flexible, Abicart TPL Edit is also prepared for upcoming AI services. This means that your online store will not only be ready for the challenges of today, but also for the opportunities of the future.Abicart TPL Edit is more than just a template editor. It is a tool that gives you complete control over your online store and its appearance. It's something we're incredibly excited about and we can't wait for you to discover it.We are working hard and intensively to launch TPL Edit for our customers soon. Stay tuned - Abicart TPL Edit is coming soon, ready to take your e-commerce to the next level.By Textalk for AbicartBehind the development of TPL Edit is Textalk, Abicart's parent company. With their deep roots and broad expertise in CMS development, Textalk has created a powerful and flexible template editor that can be used across several of their CMS tools.Abicart TPL Edit is a special edition of TPL Edit, specifically designed for building online store solutions. With its ability to create customized and user-friendly design options, Abicart TPL Edit allows online store owners to create unique and professional customer experiences, adapted to the specific needs and challenges of e-commerce. This makes Abicart TPL Edit an invaluable tool for anyone looking to take their e-commerce to the next level.Screenshots from the dev team:
-
Optimizing your Abicart store: 11 tips to increase your conversion rate
18 Dec 2025
Do you dream of turning your e-commerce into a conversion machine? You are not alone! Competition is fierce, but with the right strategies you can outperform your competitors and increase your conversions. Here are 11 great tricks to take your webshop to new heights:Capture customers' attention with FOMO (Fear of Missing Out): Create a sense of urgency and entice customers to act immediately by offering limited quantities or time-limited offers on your online shop. This can be crucial to drive sales and increase conversions.Strengthen your social media presence: Link your online shop to your social media profiles and use platforms like Instagram to create inspiring content and encourage customers to buy directly from your posts. Social media is an important channel to increase your online shop's visibility and engage your target audience.Enchant your customers with captivating product titles and descriptions: Give them all the information they need to make a purchase decision on your webshop. Well-written and informative product descriptions can make a big difference in the customer's decision-making process.Put your online shop in the spotlight by optimizing your product titles and descriptions with keywords: Attract more traffic and customers to your online shop by using keyword strategies that help you achieve higher rankings in search engine results.Show how much your customers love your products through social proof: Customer reviews on your online shop build trust and make new customers want to try your products. Focus on collecting and displaying positive reviews from satisfied customers.Adapt to the mobile world with a responsive website design: Provide a smooth shopping experience for customers using their mobiles. A mobile-optimized website is essential to retain visitors and increase conversions.Refine your online shop with high-quality product images and videos: Showcase your products in the best possible way and make your customers' hearts beat a little faster. Invest in professional images and videos that really bring out the best in your products.Make your visitors stay and shop by increasing the speed of your online shop: make sure they don't get frustrated and leave without buying anything. A fast and efficient online shop is essential to keep visitors interested and reduce drop-out rates.Make it simple and easy for your customers to find their dream products: Offer an easy-to-use navigation on your webshop with clear categories, subcategories and product filters. A well-structured webshop makes it easier for customers to find what they are looking for and leads to a better shopping experience.Provide your customers with a seamless and secure checkout and payment process: Offer multiple payment options and minimize the number of required fields in your online shop registration form. A smooth and secure payment process increases customers' trust and reduces the risk of them abandoning their shopping carts at the last minute.Win back abandoned customers: Send engaging emails with discounts and offers, or surprise them with pop-ups and exclusive discount coupons on your online shop before they leave. Abandoned shopping carts can help you recover lost sales opportunities and increase your online shop's conversion rate.Follow these 11 inspiring tricks and turn your online shop into a conversion dream. By adapting and experimenting with these strategies, you will not only increase conversions, but also give your customers a great experience that makes them want to come back again and again. So take the opportunity to give your online shop the attention it deserves - it's time to create an e-commerce platform that really stands out and allows you to achieve unprecedented success!
-

AI can revolutionise e-commerce: how your business can be impacted and benefit from AI
18 Dec 2025
Get started with artificial intelligence and revolutionise your e-commerce! With AI, you can benefit from improved customer experiences, increased efficiency and enhanced marketing. Discover how AI can impact your business and take your e-commerce to the next level! Contact us today to find out more.One specific use of AI in e-commerce is to automate the creation of product descriptions. Abicart is an example of a company that offers this through their autogenerated article texts. These texts are automatically created using AI and are designed to be unique and user-friendly. This way, e-tailers can save time and effort on creating product descriptions and focus on other aspects of their business instead.E-tailers can use AI as a tool to streamline their work in many ways. For example, AI can be used to automate customer service, improve marketing and help make business decisions.AI is likely to have a major impact on digital business and e-commerce in the future. Here are some of the most likely developments:Personalised recommendation: AI can be used to create more personalised recommendations for customers, based on their past purchases and search history.Automated customer service: AI chatbots and virtual assistants can be used to help customers with everything from answering questions to managing orders.Predictive analytics: AI can be used to perform predictive analytics on data from the e-commerce platform to help businesses make better business decisions.Enhanced security: AI can be used to identify and block fraud and other undesirable behaviour on the e-commerce platform.Merchandise distribution: AI can help plan and optimise merchandise distribution by using data on customer demand and sales to predict future demand and keep inventory at optimal levels.Overall, AI will help e-tailers gain a better understanding of customers and their behaviour, which in turn will lead to better marketing and increased sales.
-

"My strong point is baking and certainly not computers"
18 Dec 2025
So this Christmas time it's busy for e-tailers and for Maria, who runs Kitchen One 90, it's also busy in the kitchen! Here she offers both Christmas recipes and talks about her path to e-tailers. Visit Kitchen One 90!
-
Increase sales with gift cards
18 Dec 2025
As an e-merchant, you have many advantages during the gift-giving season. Customers don't have to queue, crowd, or run around shops. And if you sell digital gift cards, you have a substantial competitive advantage. With our Plus subscription, you can access gift cards, discount schemes, and more! Read more about our subscriptions!10 reasons to offer gift cards:The gift card carries your brand with it as a personal recommendation from the buyer. It is very possible that the recipient will become a new customer of yours by visiting your store to "get their gift".Don't limit your customers to physical products with thresholds such as geographical distance, delivery time and shipping cost. Pay now - buy later. The money is secured before the holidays while the gift recipient visits your store after the big shopping days with the chance of more sales during the off-season.The chances are high that the recipient will buy for an order value higher than the gift card because the custom add-on is perceived as less money in the context.Frequent repurchases. The risk of people returning their gifts and taking advantage of open sales after the holidays is high - with gift cards you minimise refunds from your store.Gift cards are a secure card. If your customers find it difficult to choose a suitable gift from you, they may choose something else instead. If you offer gift cards, there is a much higher chance of sales.You can offer gift cards as an alternative refund within the repurchase period and also to create goodwill for late return attempts.Perfect last-minute gift - around the clock! Planet thanks you because gift cards more rarely lead to wrong purchases and returns.Your customers are your best ambassadors, let them spread the word about your business!
-

Exclusive offer from Redcarpet!
18 Dec 2025
Redcarpet helps clients increase their conversions profitably and effectively by driving relevant traffic to their site, regardless of digital channel - and by capturing the traffic that comes to your website. They have broad expertise with years of experience on the Abicart platform. They have a wealth of knowledge and can help you with your online search advertising and brand building strategies.Just now - till you with web shop at Abicart: Take advantage of Redcarpet's tailored package offer at an unbeatable price, exclusively for you as an Abicart customer. Get world-class digital marketing at an unbeatable price!Read more about your offer!
-

Small business with big plans?
18 Dec 2025
Have you nominated yourself or someone else for this year's Klarna Growth Awards? A growth package worth a total of SEK 18M awaits in the prize pool!✨ Klarna's fantastic jury will select winners in the four categories: Rising Star, Innovation, Sustainability & Small Business. We at Abicart are proud sponsors of the Small Business category and hope that many of our talented e-tailers will be nominated in that category :)...is the total value of the prize packages.As a winner of the Klarna Growth Awards, you get access to our new growth package. The prize packages contain Klarna's latest services and products such as advertising in the Klarna App and on Klarna's social media, influencer marketing AI tools, the newly launched virtual shopping service and much more. In short - everything you need to expand and give your growth journey a real boost.Nominate now!
-

From hobby to full time - today Matilda lives on her e-commerce
18 Dec 2025
A desire to control one's own timeDo you also dream of making a living from your hobby? With her webshop Organic Knitters, Matilda Kruse does just that. Abicart had a chat with her where she tells us how it all started, why she also opened a physical shop and what her recipe for success is.Matilda Kruse, founder of Organic Knitters.Matilda is 35 years old and lives in Mariestad with her partner and two dogs. The idea for her e-commerce business was hatched through her interest in knitting. She knitted a lot in her spare time and felt that she was missing the creative part of her day job. With the desire to learn something new seasoned with a large portion of curiosity, she tried to open a webshop.I had a desire to control my own time and start something where I could realise my own ideas. In the beginning, I didn't have a clear goal, but since it was fun and the company was growing slowly but surely, I decided to continue," says Matilda.The result was Organic Knitters, which Matilda herself describes as an online shop and now also a physical shop with carefully selected yarns in natural materials, a large proportion of which are eco-certified yarns.From cardboard boxes in her apartment to a physical shopToday, she works full-time in her shop and makes a living from it. She runs it all on her own with good help and support from her family. For the first few years, I worked full-time in Social Services while starting up the business in the evenings and on weekends. Then I went down to part-time and a few years ago I decided to quit my job and focus on the business," says Matilda.In the autumn of 2020, she took the next step and opened a physical store. Partly because it was getting crowded with all the boxes in the apartment and partly because it was getting lonely working from home.In the beginning, the warehouse was small and fit into a couple of boxes in a spare room in the apartment. The warehouse grew and grew, eventually taking up all the closets and storage space in the home. That's how I had it until last September when I finally signed a lease for a retail space. The storage space is still small but a lot fits on the shelves in the shop part itself.It's thanks to the e-commerce that the business is running though, she doesn't have the physical shop just to increase profitability. No, exactly. The reason I chose a retail location, rather than an external warehouse for example, was because I wanted a pleasant place to work and to see customers during the day. It was getting lonely working from home! However, it is the online shop that carries my business, as Mariestad is a small town, the customer base is not enough for such a niche yarn shop as Organic Knitters. I have loyal customers all over the country and many of them have visited the physical shop already. I hope even more people will come here when the restrictions are eased and we can move more again," she says.Knit-alongs have made a good impactAlthough Matilda humbly finds it difficult to talk about the success of her business, she can agree that she has done well and come a long way. Yes, of course she has. One of my big goals has been to be able to work full time and make a living from the business, which is where I am now! The key has been to let it take time, to slowly but surely build up a clientele with many satisfied and returning customers.A part of her success, she says, is her work with social media - and so loyal customers of course. A big key has been working to engage customers in activities, called knit-alongs, that have taken place on social media and have further spread my designs and my brand. My customers are amazing! I almost never get any complaints and have very few returns. I make sure to always have a friendly and service-oriented approach in all customer contacts. Somewhere I read the tip to see every customer contact as a chance to build trust and make a personal connection. I've taken that with me.How do you stand out and reach out to customers? I'm personal in my communication via social media and in my monthly newsletter to customers. Organic Knitters is not only a brand and a shop, it is also largely me, the person behind it. Matilda's top three tips for successWe asked Matilda to give some tips to you who might also be thinking about turning your idea into reality and starting up an e-commerce business:Choose a field that you are passionate about, where you have the opportunity to constantly innovate and develop.Customize and build the business according to how you want your work situation to look. For example, is it important to be able to work from home? Use an external warehouse. Is it more important to meet your employees or customers? Choose a different solution.Go all out when it comes to customer service! And try to create customer engagement. This not only brings more sales, but also a lot in return in the form of positive feedback.Finally, how do you see the future? What is the goal? The goal right now is to be able to free up more of my time for pattern design, marketing and to continue developing the brand. One hope is that in time I will be able to hire a person to help with a lot of the practical bits, packing orders, helping customers in the shop and so on. At the same time we are expecting our first child and a big challenge in the near future will be to combine business with parental leave and family life.We thank Matilda for the chat and wish her every success with both the business and the addition to the family! If you're curious about Organic Knitters, you can visit their website here.
-

How to earn your first 10 000 SEK!
18 Dec 2025
Ten tips on how to get your webshop up and running Do you dream of being successful in e-commerce? Here are our top ten tips on how to earn your first 10,000 crowns from your webshop as quickly as possible!Start! The very first step - and for many, one of the most difficult - is to actually take the plunge and get started. You have to dare to win and try to learn. At Abicart, you can also start up and test your webshop for free for the first month - if that's not for you, you can just quit. So, are you sitting on a good idea? Go!Spread the word. Of course, to succeed with your e-commerce, others need to know you exist. Why not start with a method that doesn't cost a penny - contacting and using your network? Tell family and friends, ask other acquaintances, ask them to tell others. Use the social media you're on, share as much information as you can and ask others to help you pass it on. You can also look for Facebook groups of like-minded people. Let's say you sell seed bags for home planting, join gardening groups and participate in threads, ask questions and give tips about your shop. However, keep a good tone, be humble and don't overdo the sales pitch.Create your own channels. Start a Facebook page for your business where you tell people about your stuff, showcase what you sell and invite everyone you know to like the page. Perhaps it would also be wise to have a page on LinkedIn? Or on Instagram? Try to figure out where your target audience is. Many people use social media to look for specific products and services, especially on Instagram this is common. So tag your posts with appropriate hashtags so that more people can find you. However, remember not to just start up a bunch of accounts on different platforms if you don't have the time or ability to keep them alive. Accounts with few updates that don't respond when potential customers ask questions will have the opposite effect - it's better to have just one specific account that you can actually manage well.Contact media and seek collaborations. Is your start-up business of interest to the local press? It costs nothing to contact them and tell them, if you're lucky you'll get some free media space there. Are there other players you can contact to get coverage? Anything from podcasts to others in the industry may be relevant to you. Maybe you can get a collaboration with someone like-minded where you push for each other's channels on your platforms? Or maybe you can send some free sample to some influencer? Think outside the box and remember that it's free to at least ask the question!Organisation and order. Make sure your webshop is easy to use with a clear structure, good texts and good images. This will enhance the user experience and help you rank higher in Google's search results. Put some extra effort into making your webshop as professional as possible.How do others do it? Spend some time on an analysis of the world around you, and you'll be better equipped to do as good a job as possible yourself.How do others do it? Spend some time on an analysis of the world around you, and you'll be better equipped to do as good a job as possible. Look at how other similar e-tailers are doing and how your competitors are doing. How do they communicate? What do they do well and what do they do less well? What platforms are they on? Is there something they're missing where you could even gain ground? Also look at what words and phrases are being searched for on Google, so you know what words to use in your headlines and texts in your webshop.Optionalise your keywords. Something that can certainly take some time, but is also completely free, is to search engine optimize your webshop. If you're brand new and starting from scratch, you're also in a golden position because you can do it right from the start. A good search engine optimised website is not only good for how you appear on Google, but often the user experience itself goes hand in hand with this. You can read more about how to search engine optimize your webshop here.Advertise. If you want an extra boost, it might make sense to spend a few bucks on advertising. Both on social media and through Google Ads, you can get a relatively good reach within your target audience without it costing much. If you advertise correctly and smartly, you can go a long way with little money!Ask for references.Have you had a customer who was satisfied with their purchase from you? Ask them if it's okay if you ask a few questions and publish the answers on your website. Few things have as much marketing power as when another person recommends your product or service. If you get the opportunity to ask a few questions, be smart, ask questions that will give you the answers you want - that is, answers that will convince other customers. We're toying with the idea that you sell hand-painted glass. One worry factor for potential customers could be the delivery itself, fearing that some glass will be edge-damaged or even broken when it arrives. Then ask a question about how the satisfied customer felt about the delivery - hopefully they'll say it went really well, that the glasses were very well packaged and that they were delivered whole and beautiful.ask for feedback. Ask others what they think! Ask those around you to take a look at your webshop and have their say. Do they find it easy to use? Do they understand how to navigate? Does anything seem complicated to them? Try to include people who are part of your target group. In other words - if you sell dog toys, it makes sense to ask dog owners, for example. Learn from their opinions and improve on what should be improved!So, that's our top ten tips! Are your fingers itching to get started with your very own webshop? It's just a click away.
-
Expert advice: start your own online marketplace!
18 Dec 2025
E-commerce with retailers in your cityIt's no secret that with the rise of digital, it's becoming increasingly difficult for physical stores to meet new customers, not least in smaller towns. The solution? A digital marketplace, of course! Abicart's own expert Raoul Hess tells us more about how it works.Pandemitism and requests from businesses who wanted to reach out online gave birth to the idea of Your Marketplace. Many businesses either want to get started with some form of e-commerce or online shop, or gain greater visibility online to reach out better. Often they may not have the ability to run the line on their own, or it may just feel very scary to take the plunge. That's where Your Marketplace comes in, where businesses can come together and form a common platform that benefits everyone involved.What is a digital marketplace?Just as shops can sometimes and buy an ad page in the local paper to make a joint effort where each gets to showcase their current offerings ahead of the weekend's window display Sunday, the digital marketplace works in much the same way. The difference is that it's online, you can reach many more potential customers and you can sell your products and services directly online. You can think of it as a shared web shop where everyone shares the space, plain and simple. Sort of like a mini-Blocket!"All it takes is a product"So what does it take to get started? Well, first and foremost, of course, you need commitment - both from local traders and vendors, but also from some kind of coordinating force that can push it forward. It could be a business person within the municipality, a business network or even a private actor.For the trader who wants to be part of the marketplace, all that is really required is a product. In fact, it doesn't have to be more difficult than that. You can choose whether you want to sell your product directly from the digital marketplace, i.e. as an e-retailer, or whether you just want to use the platform as a shop window to attract visitors to your physical store.How do you start a marketplace? Let's go through the steps!We play with the idea that you have a good collaboration between a number of businesses in your locality. You might even have a couple of networking meetings a year where you get together and share experiences with each other. You agree that a digital marketplace where you can share space to attract more customers would be a great solution. So, how do you do it?It is very important that you have a good coordinator for the collaboration. You need someone who knows a bit about e-commerce and has the commitment to drive the process. For the sake of simplicity, let's call the coordinator Anna in this case.Anna will be responsible for the platform and then also its owner. She will decide, in consultation with the retailers, on the forms of cooperation around the marketplace, what payment solutions will be available, how you will share costs, what it will cost for the retailers to be involved, etcetera. Should she get stuck, we at Abicart are of course just a phone call away!Anna coordinates the merchants and sellers who want to be part of the cooperation and together we approve Anna's proposal for the set-up, cost sharing, etc. Anna then contacts us at Abicart to set up the marketplace.We help Anna get started, known as "boarding". All the features are put in place, the look and feel is adapted to the preferences and all merchants get their own logins and profile pages. Because the platform is so easy to use, the merchants themselves don't need to have any previous e-commerce experience.We play with the idea that one of the merchants runs an electronics store, we call him Hakim. Hakim gets a login to the marketplace where he can post his products. He prices the goods, enters current promotions, fills in stock balances and tidies up his profile page. Pling! Suddenly a customer has bought a wireless bluetooth speaker, half an hour later the customer picks up the speaker in Hakim's shop - the payment has already been made online!Maj-Lis on the other hand doesn't sell electronics, she runs a hairdressing salon. Like Hakim and all the others, she has a login to her profile page, where she lists the services offered in the salon. Just as Hakim has just sold a speaker, Maj-Lis has got a booking for the next day, what a cut!When you are up and running with your marketplace, it is very important to think about marketing it. Contact the local press, get involved in social media and put up signs in the shops that are participating. With the right digital marketing, you can also reach even more customers, such as visitors to the city who are passing through. If you need help with, for example, search engine optimisation of the marketplace, we are here for you.Your Marketplace is constantly improvingYour Marketplace is our latest addition here at Abicart and was launched in autumn 2020. Today we have around ten marketplaces up and running and we are constantly working to make the platform as easy to use and functional as possible. We listen to our customers to meet their needs. Please get in touch if you have any questions or concerns!How do others do it?The first place to start a marketplace with us was Torsby. At the time of writing, a dozen shops have joined their platform. Customers can easily see the full range, sort by product or store and shop from the stores online. A great example of why Your Marketplace really makes a difference was recently when a passing party wanted a coffee, found the local patisserie via the marketplace, ordered and paid online and picked up the pastry shortly afterwards. How easy would it have been for the patisserie to reach the potential customer without the marketplace?Please visit Handla i Torsby and take a look! Three quick tips to get started with your marketplaceIf you're thinking of starting your own digital marketplace, here's a list of the three most important things to consider:Make it simple, start small. It's better to start small and then scale up than to start too big and not be able to handle the whole thing!Have a driven person/player, preferably with an understanding of e-commerce, who can drive the project and coordinate.Tut and go! Dare to take the plunge - and when you have, spread the word about your new marketplace. Market it!Good luck and remember that we at Abicart are here for you throughout the journey!
-

Svenskt Avlopp - "E-commerce helps us to build customer understanding and trust"
8 Dec 2025
Svenskt avlopp is Sweden's largest e-commerce and national supplier/installer of sewage systems for private households and commercial properties. They have over 20 years of combined experience in sewage and treatment systems in their organization and they are the price leader in the sewage industry. Friends Mikael and Johan started up Svenskt avlopp in 2017. Before starting their company, they worked as one-man installers of individual sewers. Over the years, as the internet developed, the idea grew that they too should be able to digitise parts of the service and in 2017 they took the plunge and started their own business. If you are in need of an individual sewer, it is a long and expensive process to complete. By creating a webshop, their customers can firstly get an idea and trust in them by seeing previous customer reviews, and secondly they can read up on both the products and the process itself as a whole. Svenskt Avlopp has been awarded the Recos "Recommended Company" award two years in a row thanks to their customer service, fast deliveries and sharp prices. Michael Töråsen tells us more about their business:"E-commerce helps us build understanding and trust with the customer"What do you sell in your webshop?E-commerce works mostly to support the customer in seeking information at an early stage. Here they can getinformation about the process itself and they can read about our different products. Ithelps us build understanding and trust with the customer. Replacing or acquiringan individual sewer is a rare commodity and a large investment, so it is important that the customer gainsconfidence in us. We use the online shop as a sales support but we also sell products directly fromthe site such as spare parts, septic tanks, accessories and consumables and more.It is a long process when you need a single sewer and they have to be replaced when theyare not up to scratch anymore according to the municipality. When you find yourself in this situation, we help customersby first doing a VA survey, where we tell the customer how they need to install theirsewer. Then we go to the customer's home to look at ground conditions, accessibilityetc. to determine the best solution for the customer. Then we take care of the application from the municipality so that we get the go-ahead to carry out the work. After that, we hire an excavation company to come anddig for the sewer, which we then put into operation. So we help the customer with the whole process, fromthe moment their sewer has been condemned by the municipality until it has a new individual sewerinstalled.Why did you choose Abicart as your e-commerce platform?Abicart was easy to set up with, the process was quick as it is easy to get to grips with and isuser friendly. The platform works great, it is easy to manage products and it workswell to manage many products in your online store.We recommend Abicart mainly because it is easy to get started and it is easy tostart on a smaller scale and then scale up the business. It is also very easy tomanage products in different categories in Abicart's platform.What is the best thing about running your own business and online store?The best thing is probably the freedom you get and that all your choices and actions have an effect right away. You quickly get a receipt of what you do and you see what works well and what worksless well.Do you have any tips for others who want to start an online store?My tip is that you should not rush a launch, but make sure that all products that you wantto have are included from the beginning. Write a proper description and make sure the SEO is in place withMETA text and H1s. The risk of starting on the sly with a weak website is that you may losecustomers from the start because the website doesn't appeal to them and those customers may not come backif their first impression of the website is poor. So the tip is to hurry slowly and do it right andproperly from the start.Which subscription of ours do you use and why?We have the Plus subscription with you and it suits our business well, we have what we need.We use the theme of Fabrikk. When we started up we took help from Webfolket who nowwork at Abicart with the design. They chose that theme because it fits when you have as manyproducts as we have. Since then, we've kept going with it, but we've made some changes and updated the website over the years.Visit Svenskt Avlopp online!
-

Humlegårdens Ekolager (Hops farm) - "I didn't have a thought of starting the company in the first place"
8 Dec 2025
Humlegårdens Ekolager was not only the first in Sweden to bring in products for breweries, they have also influenced the entire Swedish development of small-scale beer brewing. Since its inception, they have been the leader in their market in Sweden and have made an incredibly awesome journey. Below you can read Svante Ekelin's story about Humlegården's journey:From hobby business to market leader What do you sell in your shop?We sell high quality raw materials, equipment and literature for advanced home brewers and small breweries. In the beginning when we started our company, there were less than 10 breweries in Sweden and very few individuals brewing beer as a hobby. But over the last 10-12 years, a lot has happened, both brewing and homebrewing as a hobby has grown enormously and it has been very cool that we have been able to be part of that journey. Today there are around 500 breweries in Sweden and the homebrewing hobby has grown enormously in recent years.You only sell your products on the web, have you ever thought about setting up a physical store in addition?We have considered offering our customers a physical store as it can be nice but our niche and market caters to a rather small target group that is spread all over Sweden. This has led us to the conclusion that an e-commerce is a better fit for our products. However, if you live nearby, our customers have the option of coming to our customer reception and picking up their order from our warehouse. So we don't offer shelf sales but you can at least choose pick up from our warehouse as a delivery method. In the beginning we took orders via email given that the web was not that developed yet and after a few years I found a shopping cart solution that we used. But it had some shortcomings, for example it didn't keep track of the stock balance so every day we had to manually upload a new file to maintain the stock and customers could only pay by invoice and postal advance.What is the best thing about running your own business and online store?The best thing about running your own business is that you can influence your own life and you can work with your interest. In our case, we also got to influence the whole Swedish development in small-scale beer brewing and it has been a very fun and interesting experience. For me it started as a hobby, I discovered that you could get really good beer by brewing it yourself. I didn't have a thought of starting the company from the beginning but when we discovered that there was a shortage in the market, it was my wife Eva who came up with the idea that we should start a company and offer this niche to the Swedish market. We started our company back in 1992 so we were very early, this was before the web took off which meant we had to be persistent in the beginning. But the positive thing about it all was that we were the first in Sweden with this niche, which I think has contributed to us becoming as big as we have become.Why did you choose Abicart as your e-commerce platform?When we wanted to invest in a more advanced webshop solution in 2009, we did thorough research to find the platform that suited us best and we ended up using Abicart. The reason we chose you was because it is an extremely affordable platform and we had just started using Specter as our business system and Abicart offers an integration that connects Specter and Abicart. This means that everything sold on the website automatically changes in the stock balance in real time, which we appreciate very much. This connection between Abicart and Specter was an important element for us and one of the reasons why we chose Abicart as our e-commerce platform. Another integration we use is Trustpilot and that is very important to us. We are very happy with Abicart as a platform and we have had it since 2009 without wanting to change.Which of our subscriptions do you use and why?We use the Pro subscription at Abicart and we have had it since the beginning I think. We've grown big in the last few years so for us it's absolutely essential to have that subscription to drive our business forward and to be able to use the integrations that we want and we get a lot for the money. Until now we have had a common online store for the homebrewers and for the small breweries but now we are creating a multi-store system. Abicart is helping us to develop a sub-store that will be entirely focused on breweries. So in a few weeks we will be running two webshops on Abicart's e-commerce platform, one for private customers and one for businesses. It will be exciting to see how this develops going forward.Svante's best tips for others who want to start an online store:My tip is to find something you are interested in and good at. You will benefit in the long run and your work will also be more fun if you have a genuine interest in what you are selling. If you combine that with products and a niche that is not so common so there are few established companies on the market, there are very good chances of establishing a large e-commerce business. Another important thing to consider when running an e-commerce business is customer service. You should always aim to keep the customer happy, especially when you are working towards a niche market. You are often unknown to new merchants and it is important to show that you are a company you can trust, for example by sharing your reviews on Trustpilot. This provides reassurance to new visitors and customers. Take a look at Humlegården's cosy online store!
-
The Museum of Modern Art (Moderna Museet)
8 Dec 2025
You will find art and design products, posters, postcards, catalogues and over 3000 book titles. We sell Moderna Museet publications and exhibition catalogues as well as literature and products related to the current exhibitions. When you shop in our stores, you support Moderna Museet's activities. To the Moderna Museet shop
-
Speedparts
8 Dec 2025
SPEEDPARTS is a company located in Ingelstad, just outside Växjö in the Småland forests. Managers at Saab & Volvo Since 1999 we have sold spare parts to SAAB, in 2018 we also started to sell parts to Volvo. The business is run over the internet and we are continuously working to improve our online store. A big focus of our work is to make it easier for our customers to find the part they need. With a 3000m² warehouse, always at least a million units on the shelves and over 7000 unique items, we mark ourselves as one of the largest specialists in Swedish cars on the market. In addition, we have one of the world's widest ranges of accessories, spare parts, tuning and upgrades for SAAB. Welcome to SPEEDPARTS!
-
Ullared Lantmän
8 Dec 2025
Welcome to Ullareds Lantmän - Experts in Home Furnishings, Workwear Outlet and Forestry and Farming. Shop Online in our E-shop now. You will find everything within Outlet Workwear such as Helly Hansen, Protect work jackets, work trousers, work shoes, rainwear peltors, etc. As well as a wide range with saws, dog and cat food, home furnishing mints, candelabras etc. All at cheap prices in Ullared. Visit our store or shop online in our online shop today. Visit us at www.ullaredlantman.se. Here you can buy cheap workwear online. Ullared Farmers offers a wide range of Home Furnishings, Workwear Outlet and Forestry and Farming. Lantmännen Ullared has been in business for over 100 years and is located along the large parking lot of GeKås. Welcome to Ullareds Lantmän
-
Adyen Checkout
8 Dec 2025
What is Adyen Checkout? Adyen Checkout works for all types of e-commerce and digital payments, for all businesses and industries. In the checkout support for credit cards, bank transfers, payment vouchers, electronic wallets, mobile payments and subscriptions.Order Adyen CheckoutContact Adyen on their websiteIn which countries does nets Adyen Checkout work?Adyen Checkout works in most of the world's countries and supports many different currencies. Adyen activates the currencies you want to manage in their portal.Add Adyen Checkout to the storeGo to Settings -> Payment methods -> Add new payment method. Select "Adyen Checkout" from the list and then click "Add".You then get to the page with the settings.StatusActiveTick the box to activate and make the payment method visible in the store.PreselectedA setting to make the payment method default at checkout.Make available only to the customers or customer groups where I specify.If you do not want all customers to be able to use this payment method, you can disable it for non-logged-in customers through this setting. You then go to the respective customer group to activate the payment method there.Available for customer typeMan kan ställa in att betalmetoden endast ska vara tillgänglig för en kundtyp eller alla. Require the buyer to enter a personal/organization numberTick to make personal/organization number mandatory at checkout.Send payment status confirmation to store ownerA setting to enable to send a separate email about the payment status of this payment method to the store owner.Turn off purchases of gift card products using this payment methodActivate a setting that makes the gift card product type unpurchasable with this payment method.AccountThe next block contains fields for Adyens data found in the Adyens portal.API keyThe API key is generated in Adyen's portal under Developers -> API Credentials.A tip is to open a new tab in the browser and log in to Adyen's portal there so that you have easy access to both the store's admin and Adyen's portal.You should then have received API credentials from Adyen and then they will be listed in the field on the right. Click on the key.Scroll down to the "Server settings", click on the "API key" tab (1), then on "Generate API key" (2) and then on the copy icon (3).Go back to Abicart admin and paste the key in the API key field.Client keyGo back to the Adyen portal, to the same page as above. Scroll down to "Client settings". Click on "Generate client key" (1) and then on the copy icon (2).Switch back to Abicart's admin and paste the key in the Client key field.Merchant accountThis information is retrieved in Adyen's portal under Settings -> Merchant Accounts. Copy the name of your account listed on the right under "Account code".Go back to Abicart's admin and paste it in the "Merchant account" field.API URL prefixYou can find this prefix in Adyen's protal under Developers API URLs. Click the Copy button to the right of the prefix box, then paste it into the API URL prefix field in the store.Activate test modeIf you want to test the payment method before you go live, check this box and enter your test information in the fields above.Webhook URLIn Adyen's portal under Developers -> Webhooks, click on the blue Webhooks button at the top right.Find the one called "Standard notification" and then click "Add".On the top line, you should enter a name in the description field. Click on the pencil icon on the right and enter a name, for example the name of the store. At "Server configuration", paste the following URL:https://admin.abicart.se/backend/adyen/webhookAlso check that Events is set to "Default events enabled".In the next box, Security, we need to enter the data for "Basic authentication" as well as an HMAC key.You can find the information for "Basic authentication" in Abicart on the payment method.Copy the username and password and enter these in Adyen.Then we need to generate an HMAC key. This key is only shown when you have generated it, so you have to copy it and put it in the store's settings directly. Click on "Generate" (1), then on "Copy" (2) and finally "Apply" (3). Then paste it into the HMAC key field in the store.Add the shop domain in AdyenOne last thing you have to do is enter the store's domain name in Adyen's portal. Go to Developers -> API Credentials. Edit the credentials you created earlier and then scroll down to "Client settings". A bit down in the box is the heading "Add allowed origins". Here you must add all the domains you have entered in the store.Remember to enter the domain both with and without www. If you have different domains for each language, these must also be entered with and without www, for example abicart.no, www.abicart.no, abicart.com, www.abicart.com, etc.Now Adyen Checkout is ready to be used at checkout.
-

EasyCashier
8 Dec 2025
Synchronised online and in-store stock balances. The integration between the EasyCashier POS system and Abicart means that you automatically have a complete overview of the stock balance both in your online shop and in your POS system. Avoid incorrect purchases As stock balances are always kept up to date, you avoid the risk of selling a product that is out of stock. Less administration As the online store's stock is automatically adjusted based on purchases made in the store - and vice versa - you don't need to make manual adjustments to always show the correct stock balance to your customers. Get started with EasyCashier
-

Froda
8 Dec 2025
Affordable business loan in collaboration with Froda. Together with Froda, we have developed an affordable offer with market-leading terms for small and medium-sized companies. Now you don't have to choose between flexible and affordable when you choose a business loan. With Froda, you get access to external capital at the best price and terms on the market - in a fraction of the time and hassle compared to the traditional bank. With Froda, you always borrow at a fixed price based on your company's sales. Easy repayment via direct debit to avoid unnecessary administration. If you want to change or pay off the loan earlier, you can always do so, at no extra cost. Read more about Froda on their website. Get started with FrodaMarket-leading terms in no time, with 10% discount for Abicart customersWith Froda's digital business loans, you don't have to choose between convenient and affordable, but get market-leading terms without long lead times.Loan up to 2 million with satisfaction and lowest price guaranteeWe at Froda want you to always get the lowest possible price. This means that if you get a lower price from someone else, we'll match it*.Always a fixed price on your loan, with no hidden costs or feesWe have no late fees or reminder fees. You always get a fixed price for your loan with no surprises or extra costs.
-

Hygglig
8 Dec 2025
A more decent payment solution for your e-commerce. Hygglig Checkout is part of Marginalen bank and is completely free of commitment time, start-up and monthly fees. Instead, a transaction fee is charged per purchase. How much you pay in transaction fees depends on how much your e-commerce business turns over. Cozy included when you start a webshop with Abicart. Get started with HyggligNo hidden feesSole deal for Abicart customers; No start-up cost, monthly fee or commitment period.You only pay a transaction fee when a purchase is made in your webshop. How much you pay in transaction fees depends on how much your e-commerce turns over.Pricing plan, cost per orderStartup: 2,25%Pro, for those who turn over at least 1 MSEK/month: 1,95%Corporate, for those who turn over at least 5 MSEK/month. Price on request.Everything you needAll the most popular payment methods are included. Examples: Swish, invoice, instalment and card payment. You also have the option to customize the look of the checkout to match your brand.
-

Swedbank Pay
8 Dec 2025
Payment solutions for all occasions. Swedbank Pay is a newcomer, but certainly not a beginner. With the best of Babs, Swedbank Card Services and PayEx - as well as one of the leading banks in the Nordics behind it - Swedbank Pay was formed to offer secure and easy payments where sellers and buyers meet - both in-store and online. Whether you have a start-up webshop or are already up and running, Swedbank Pay Checkout is for you if you want a user-friendly and easy way to pay online. Get started with Swedbank PayFreedom of choiceSwedbank Pay helps you as an e-merchant to charge wherever your customers are - online, in store or on the go. No matter which bank you and your customers have.Checkout recognises the customerCustomers can save details like card number, phone number and address in the Checkout so they don't have to fill them in for every purchase. If they don't want to save their details, they can skip that step, and those who choose to save can easily delete or change their details afterwards.More purchases completedThe smoother the experience is for your customers, the more likely they are to make a purchase. By offering multiple payment methods and the ability to save details, you won't lose purchases to unnecessary hassle.
-

Fortnox
8 Dec 2025
Sweden's most widely used cloud-based financial system. Fortnox accounting software is the hub of your Fortnox and simplifies your everyday business life. By easily creating a completely digital way of working, you save time and can take care of your bookkeeping wherever you are. Thanks to the clear reports, you can see how your business is doing in real time. Up-to-date accounting gives you the basis to make the right decisions to drive your business forward. Get started with FortnoxSmart and easy bookkeepingOrganise supplier invoicesWork where you wantWork at your own pace
-

Accessibility support and WCAG guidance
28 Nov 2025
Build a webshop that works for everyone – and performs better while doing it. With Abicart, accessibility is not an add-on or an afterthought. Our platform and services are designed to help you meet WCAG 2.1 guidelines and local regulations, while creating a smooth, enjoyable shopping experience for all your customers.We support you throughout the whole journey – from planning and design to launch and continuous improvement. Our team can help you understand what WCAG means in practice for e-commerce: structure and semantics that work with screen readers, clear navigation, sufficient color contrast, readable typography, alternative texts for images, accessible forms and checkout flows, and keyboard-friendly interaction patterns. Using Abicart and our accessibility guidance, you can: build a webshop that aligns with WCAG 2.1 and relevant legal requirements create a shopping experience that works with assistive technologies avoid common accessibility pitfalls in design, content and custom code strengthen your brand by showing that you take inclusion seriously Accessibility is also good business. A webshop that is easier to use converts better, reduces friction at checkout, and is more future-proof as standards and expectations evolve. When you choose Abicart, you get both a powerful e-commerce platform and a partner that helps you make your store accessible, usable and ready to grow.
-

Onboarding: getting started with Abicart
28 Nov 2025
Launching a new webshop can feel big – but it doesn’t have to be complicated.With Abicart, you can either set up your store step by step on your own, or let our onboarding team guide you through the process and help you with the look and structure of your shop.Our goal is simple: make it easy for you to start selling online as quickly and smoothly as possible.Easy to get started on your own Abicart is built so that you can launch a professional webshop on your own by following a few clear steps. Inside the admin area you’ll find guides, manuals and video tutorials that walk you through the most important parts of getting started, such as: Create product groups (categories)Start by setting up your product groups – these become the main menu of your store and help customers find the right products. Add your productsAdd products manually or import them from a file. You choose what suits your business best. Choose and customize a themePick a theme you like and adapt it with your own colors, fonts, images and layout so the store reflects your brand. Set up payment methodsConnect the payment providers you want to use so customers can pay in a secure and convenient way. Set up shipping methodsAdd your delivery options and carriers, and decide how you handle shipping costs and destinations. Add terms and customer informationUse the built-in templates as a starting point for your store’s terms, return policies, delivery information and other important pages. Handle GDPR and agreementsSign the necessary agreements and follow the guidance to make sure your store handles customer data correctly. Connect your domainPoint your own domain to the store to build trust and make your webshop easy to find. Go live with your storeWhen everything looks good, you publish the shop with a few clicks and start selling. You can follow these steps at your own pace, and always return to the guides whenever you need more detail. Get an extra boost from our onboarding team Even though it’s easy to do it yourself, you don’t have to be alone in the process.Our onboarding team is happy to help you shape the look and structure of your store, based on your own wishes and brand. Together with you, we can for example: Define the visual style of your storeHelp you with logo placement, colors, fonts and overall layout so your webshop feels coherent and professional. Set up menus and navigationStructure product groups and menus so that your customers quickly understand where to go. Design a strong start pagePlace images, texts and content blocks in a way that highlights your offers and leads visitors towards buying. Review payment and shipping setupMake sure your chosen payment and delivery options are activated and clearly presented to customers. Make sure legal info is in placeHelp you use and adapt the built-in templates for terms, policies and other key information pages. Prepare your store for launchGo through a simple checklist so that your webshop is ready to be made public. How the onboarding usually works You tell us about your business and goalsWe talk about your products, your brand and what kind of shopping experience you want to offer. We help you shape the storeBased on your input, we support you in setting up design, structure and key settings in Abicart. You learn how to manage everythingWe show you where things are in the admin and how you can continue to update products, pages and design on your own. You launch – with confidenceWhen you’re ready, you go live knowing both your store and its basic setup are in good shape. Ready to start? Whether you prefer to follow the built-in guides step by step yourself, or you’d like a helping hand from our onboarding team, Abicart makes it easy to get your webshop up and running.
-

Stock locations and internal stock transfers
28 Nov 2025
For merchants managing stock across different physical spaces, Abicart offers features to help keep track of where every product is located and how stock moves internally.Designate Stock Locations for Efficient Picking Every product can be assigned a specific storage location name directly within your admin panel. This simple tagging is highly valuable for improving efficiency during order fulfillment. [cite_start] Fast Location Lookup: Store the name of the storage location on the product itself[cite: 538]. [cite_start] Optimized Pick Lists: The stock location name is included in your system for easier sorting when generating picking lists[cite: 538]. This helps staff locate items quickly and minimizes picking errors. Maintain Accurate Records with Stock Management When coupled with Abicart’s robust inventory features, tracking stock location ensures that your digital records accurately reflect physical availability. [cite_start] Enable Stock Management: To utilize location tracking and manage availability, the "Enable stock management" setting must be active on the product[cite: 532, 588]. [cite_start] Manage Variants: If you use product variants (like size or color), the stock balance for each individual selection is managed on the "Customer selections" tab[cite: 532]. By effectively managing stock locations, Abicart provides the detailed internal visibility you need to speed up processing times, especially important for growing businesses with expanding inventories.
-

Pop-ups and on-site campaign messages
28 Nov 2025
In the fast-paced world of e-commerce, capturing a visitor's attention instantly is crucial. Abicart provides sophisticated tools to deploy dynamic on-site campaigns, ensuring your most important messages and offers are seen at key moments in the customer journey. Pop-up Dialog: Strategic Messaging for Conversion Our flexible Pop-up Dialog feature allows you to deliver targeted, high-impact messages without requiring complex coding. Whether you need to promote a limited-time sale, encourage newsletter sign-ups, facilitate a quick login, or present a mandatory legal notice (like cookie consent or age verification), a pop-up offers a direct line of communication. Customizable Content: Easily use the built-in editor for simple text and forms, or utilize the "custom" HTML block option for complete design freedom. Best Practice Ready: Abicart helps you implement pop-ups in a way that respects user experience and search engine optimization (SEO). You can avoid intrusive, screen-covering pop-ups on mobile and set up polite triggers like displaying the pop-up only after a user scrolls or attempts to exit the page ("exit intent" on desktop). Text Banner: A Constant Promotional Topline For promotions that need to be visible across your entire site, the customizable Text Banner is the ideal tool. This subtle but effective bar sits at the top of your shop, ensuring visitors immediately see urgent news like free shipping offers or seasonal sales. Persistent Visibility: The banner remains visible on every page, offering continuous reinforcement of your key offer. Call-to-Action: You can include optional button text and link the banner directly to a relevant product, product group, or custom page, driving traffic immediately to the promoted items. The banner is dismissible by the user, and that choice is remembered for a smooth shopping experience. Klarna On-site Messaging: Boost Average Order Value If you use Klarna Checkout V3, you gain access to the powerful Klarna On-site Messaging integration. This tool is a dynamic conversion booster that seamlessly integrates payment information into your product pages, cart, and throughout your site. Payment Transparency: Inform customers about flexible payment options—like installment plans or "pay later" choices—at the crucial moment they are considering a purchase, before they even reach the checkout. Dynamic Messaging: Messages are automatically tailored based on the specific product price or total cart value, helping shoppers understand their buying power and potentially increasing both conversion rates and average order values. Flexible Placements: Choose to display these informative messages in high-visibility areas such as the header, footer, product pages, and cart pages to maximize customer engagement. By thoughtfully combining pop-ups, text banners, and advanced on-site messaging, you can ensure your promotions are noticed, make key information accessible, and guide customers efficiently toward completing a purchase.
-

Product monitoring
28 Nov 2025
Avoid missed sales opportunities when popular products are temporarily out of stock. With Abicart’s Product Monitoring feature, you can easily keep customers engaged and informed when their favorite products are back in stock. A smooth and customer-friendly feature that makes your online store more attractive and encourages repeat visits.With Abicart’s Product Monitoring feature, you give your customers a simple reason to return to your online store. When a product is out of stock, customers can choose to watch it and automatically receive an email as soon as the item is available again. This reduces the risk of lost sales and increases the chances of turning interest into completed purchases. The feature is activated in your Abicart admin and replaces the buy button with a “Watch” button when a product is out of stock. Customers simply enter their email address and receive an automatic notification once the product is back in stock. The feature is included at no extra cost in the Abicart Plus and Pro plans—an easy way to improve the customer experience and boost sales.
-

Maximize sales in your webshop with Abicart's multi-store and multi-shop system
28 Nov 2025
One click away from becoming the e-commerce king of your industry? Time to put the spotlight on your success with Abicart's multi-store system! Dream big, aim high and let your online empire expand to new horizons. Plunge into the digital landscape with our cost-effective, flexible and powerful platform that allows you to successfully navigate multiple online stores under the same umbrella. Imagine a centralized administration, tailored branding and a world of opportunities for both consumers and retailers. Get on the e-commerce throne and start building webshops with Abicart!Do you dream of expanding your online business, reaching multiple audiences and optimizing your business processes? Abicart's multi-store system is the perfect solution for you! With this powerful and flexible tool, you can easily run multiple online stores under one roof, while streamlining administration and minimizing costs.Click here and start your webshop - Free demo! Abicart's multi-store system / multi-shop is included in Abicart PRO and each subshop costs as Plus. Read more about Abicart PRO Why choose Abicart's multi-shop system? Cost efficiency: Run multiple online stores within the same system, reducing costs compared to having separate PRO subscriptions for each store. Centralized administration: By using the multi-store system, you can easily manage all orders from your different online stores in one place. This saves you time and effort, as you don't have to manage multiple separate systems. Flexibility and customization: The multi-store system allows you to choose whether a sub-store uses all or part of the range, as well as customize payment and delivery methods for each individual sub-store. This gives you full control over the products and services offered in each store and how they are presented to customers. International sales: If you sell to several different countries, you can create a sub-store for each country to customize the range, languages and currencies according to their specific needs. This makes it easier to offer a localized shopping experience for your international customers. Retailers and private customers: The multi-store system is great for businesses that sell to both private individuals and retailers. You can create your own sub-store for retailers with customized prices, offers and terms. Personalized branding and design: Each sub-store can have its own unique look, theme, and domain name, giving you the ability to create a tailored and professional presence for each store and brand. Scalability: Abicart's multi-store system is designed to grow with your business. As your business expands and evolves, you can easily add more sub-stores to reach new markets and target groups. Click here to start your online shop - Free demo! Note that the multi-store system is designed for a business that wants to have several different stores under the same organization. If you have several separate companies and want to have different stores for each company, it is not recommended to use the multi-store system. Instead, you should consider creating individual stores for each company. Things to consider before activating the multi-store system: Revocation: once the multi-store system is activated, there is no way to undo it and revert to a single store. Make sure you are absolutely sure that you want to use the multi-store system before activating it. If you are unsure, you can create a demo shop and test the multi-store system first, at no extra cost. Merging existing stores: Please note that you cannot merge existing stores into a multi-store system. You need to activate the feature in one store and then create all new stores in this multi-store system. You can hide sub-stores that should no longer be active, but you cannot delete them. To activate the multi-store system, contact Abicart support and we will help you with the activation.With Abicart's multi-store system, you get a powerful, flexible and cost-effective solution that allows you to run multiple online stores simultaneously and effectively manage your online business. It gives you full control over your business and the ability to customize each store to your specific needs and target audiences. Invest in Abicart's multi-store system today and take your online business to the next level!Read more in the multi-store system manual:https:// www.abicart.se/om-abicart/manual/flerbutikssystem/flerbutikssystem-oversikt Example:Merch-Ants Sthlm AB (same backend and multiple stores) PC Gamer Hellacopters Backyard Babies Erik Grönwall Super 8 Skid Row - Official European Store Apocalypse Orchestra The Unguided Hardcore Superstar True Metal Merch Multiple online stores under one roof - Try it for free!If you haven't started an online store with Abicart yet, it's time to discover the amazing possibilities that await you. With Abicart's user-friendly and powerful platform, it's easy to get started and create a successful online business. You can start by trying Abicart for free and exploring the various features, including our unique multi-store system that allows you to run multiple online stores under one roof. Don't hesitate - take the plunge today and experience how Abicart can help you reach new heights in your online sales and grow your business. Remember, trying Abicart is completely free and there is no risk in testing. We are confident that you will love our platform and the opportunities it gives you to create a successful online store. Click here and start your webshop - Free demo!
-
Integration with Mailchimp
28 Nov 2025
The Mailchimp integration simplifies your email marketing efforts by synchronizing essential store data directly from Abicart.This feature is a valuable tool for effective customer relationship management and promotion, included at no extra cost in the Abicart Plus and Pro subscriptions. What Synchronizes with Mailchimp? The connection ensures that your Mailchimp lists and campaigns are always working with the most current data from your webshop: Customer Data: New customer registrations and updates to existing customer cards in your Abicart customer register are automatically exported to Mailchimp. Product List: New products and updates to existing items are sent to Mailchimp, ensuring your campaigns feature the correct product information. Order Data: New, completed orders and changes to orders (such as being marked as shipped or paid, or if they are canceled) are transferred. This allows for targeted campaigns like abandoned cart recovery, purchase follow-ups, and segmentation based on buying behavior. Getting Started To establish the connection, you must first have an account with Mailchimp and ensure that your store information (email, address, country, postal code) is correctly filled out in the Abicart admin under Settings > Store information, as this is required for secure mailings. The setup involves linking your Mailchimp account in Abicart under Settings > External Connections > Mailchimp and configuring which data events (customers, products, orders) should trigger an immediate update to Mailchimp. You can then begin leveraging Mailchimp's campaign tools using your synced data.
-
Gift card
28 Nov 2025
Sell digital gift cards that can be used to shop in your online store.With Abicart, you can easily offer digital gift cards that are delivered automatically by email. A perfect way to boost sales, attract new customers, and make it easy for shoppers to give a appreciated gift that can be used immediately in your online store.
-
Meta Pixel (Facebook)
28 Nov 2025
The Facebook pixel helps you measure customer actions, create audiences and unlock optimisation tools.
-
No transaction fees
28 Nov 2025
You only pay for your chosen shop package. Abicart does not charge any transaction fees. (Transaction fees for payment solutions may apply, depending on which ones you choose) Read more about versions and prices
-
How to Add Your Abicart Product Feed to Google Merchant Center
27 Nov 2025
This is a two-step process: Prepare your product feed in Abicart Add the scheduled feed to your Google Merchant Center account Step 1: Prepare Your Feed in Abicart Mandatory Prerequisites Make sure each product in your Abicart store has these fields filled out: Product number Product name Description and/or introductory text Product group Price GTIN (Global Trade Item Number) Google Taxonomy code If you need additional attributes (e.g. store code, store address, certificates), go to Catalogue → Settings → Product attributes. Let's break down Google Product Taxonomy, since it's the single most important factor for your products to appear in the Google feed. Even if every other mandatory field is filled out, a missing Google Taxonomy code will prevent that product from being included in your feed. What Is Google Product Taxonomy? Google Product Taxonomy is a hierarchical list of predefined product categories that Google uses to organize every item in its Shopping ecosystem. Think of it like nested folders, from broad categories (e.g. "Electronics") down to very specific ones ("Electronics > Computers > Computer Accessories > USB Hubs"). Why It Matters Better visibility & targetingAssigning the correct Google Product Taxonomy ensures your items show up for the most relevant searches. When Google understands exactly what you're selling, it can match your products to shopper queries like "USB hub for MacBook" rather than generic "electronics." Consistent classificationUsing the official taxonomy prevents mismatches from homemade labels. Everyone, retailer, Google, and end-user, refers to the same category names and numeric IDs, which reduces errors and disapprovals in Merchant Center. Simplified reporting & biddingOnce your items share a standardized category, you can group them in Merchant Center and Google Ads for bulk reporting, bid adjustments, and campaign structuring. For example, you can raise bids on "Electronics > Audio > Headphones" as one unit instead of tweaking each SKU individually. Accurate tax calculationIn regions like the U.S., certain product categories carry specific tax rates. Providing the right taxonomy code lets Google automatically apply the correct sales tax rules, ensuring compliance and avoiding surprises at checkout. How to Add or Update Google Taxonomy in Abicart Catalogue → Product groups → Edit product group Assign one taxonomy code to the entire group. Catalogue → Products → Edit product Under Product category, enter a taxonomy code per product to override the group. Catalogue → Import Create an import file with product_number and google_taxonomy columns and import for bulk updates. Generate Your Feed URL Go to Settings → External Connection (Apps) → Product feed → Google feed Select Country, Language, and Currency Copy the final Feed URL that Abicart generates. Note: Shipping info is only included if you select a delivery country here. If you prefer to set up shipping in Google Merchant Center directly, you can skip that selection. Step 2: Add the Feed to Google Merchant Center Open Google Merchant Center Go to https://merchants.google.com and sign in. Navigate to Feeds Click Tools & settings (wrench icon) in the top right, then choose "Data Source". Create a Scheduled Fetch Click the + button and select Scheduled fetch. Enter Feed Details Feed name: e.g. "Abicart Daily Feed" Country of sale & Language: match your Abicart settings Fetch URL: paste the URL you copied from Abicart Set Fetch Schedule Choose Frequency (Daily, Weekly, Monthly) Set the Time (in your account's time zone) Review & Create Click Create Feed. Google will fetch your feed at the next scheduled time. Tips & Troubleshooting Verify URL access: Open your feed URL in a browser to ensure the file loads. Monitor Diagnostics: Check the Diagnostics tab in Merchant Center for errors or warnings. Automatic Updates: Any changes in Abicart will be picked up at the next scheduled fetch. With these steps, your Abicart product feed will be automatically synchronized with Google Merchant Center and kept up to date.
-
Google Ads Enhanced conversions
27 Nov 2025
Now we're sending you user parameters to help you set up enhanced conversions via Google Tag Manager.To set this up, follow these steps:Step 1Log in to Abicart admin:Store design >> Themes >> Edit >> Addons >> Google >> Google Tag Manager.Enable the Enhanced Conversion option, as shown in the image.Step 2.Configure Enhanced Conversions in Google Tag Manager:Log in to Google Tag Manager. Make sure you are in the right container linked to your website.Create a new tag for Enhanced ConversionsActivate Enhanced Conversions and enter your Conversion ID and Label from your Google Ads account.Map your Data Layer variables.Use the Enhanced Conversion settings to map your user data (that we already send) with your Data Layer. Make sure the data from Abicart matches the fields required by Google Tag Manager.Set up triggers.Add a trigger for when a conversion event occurs (such as on the purchase confirmation page). This ensures that the tag is executed at the right time.Test and publishUse Preview mode in Google Tag Manager to test your enhanced conversion tag. If everything looks good, click Submit and publish your changes.Google supportFor basic guidance on how to set this up, see information from GoogleSetting up enhanced conversions for the web with Google Tag Manager
-
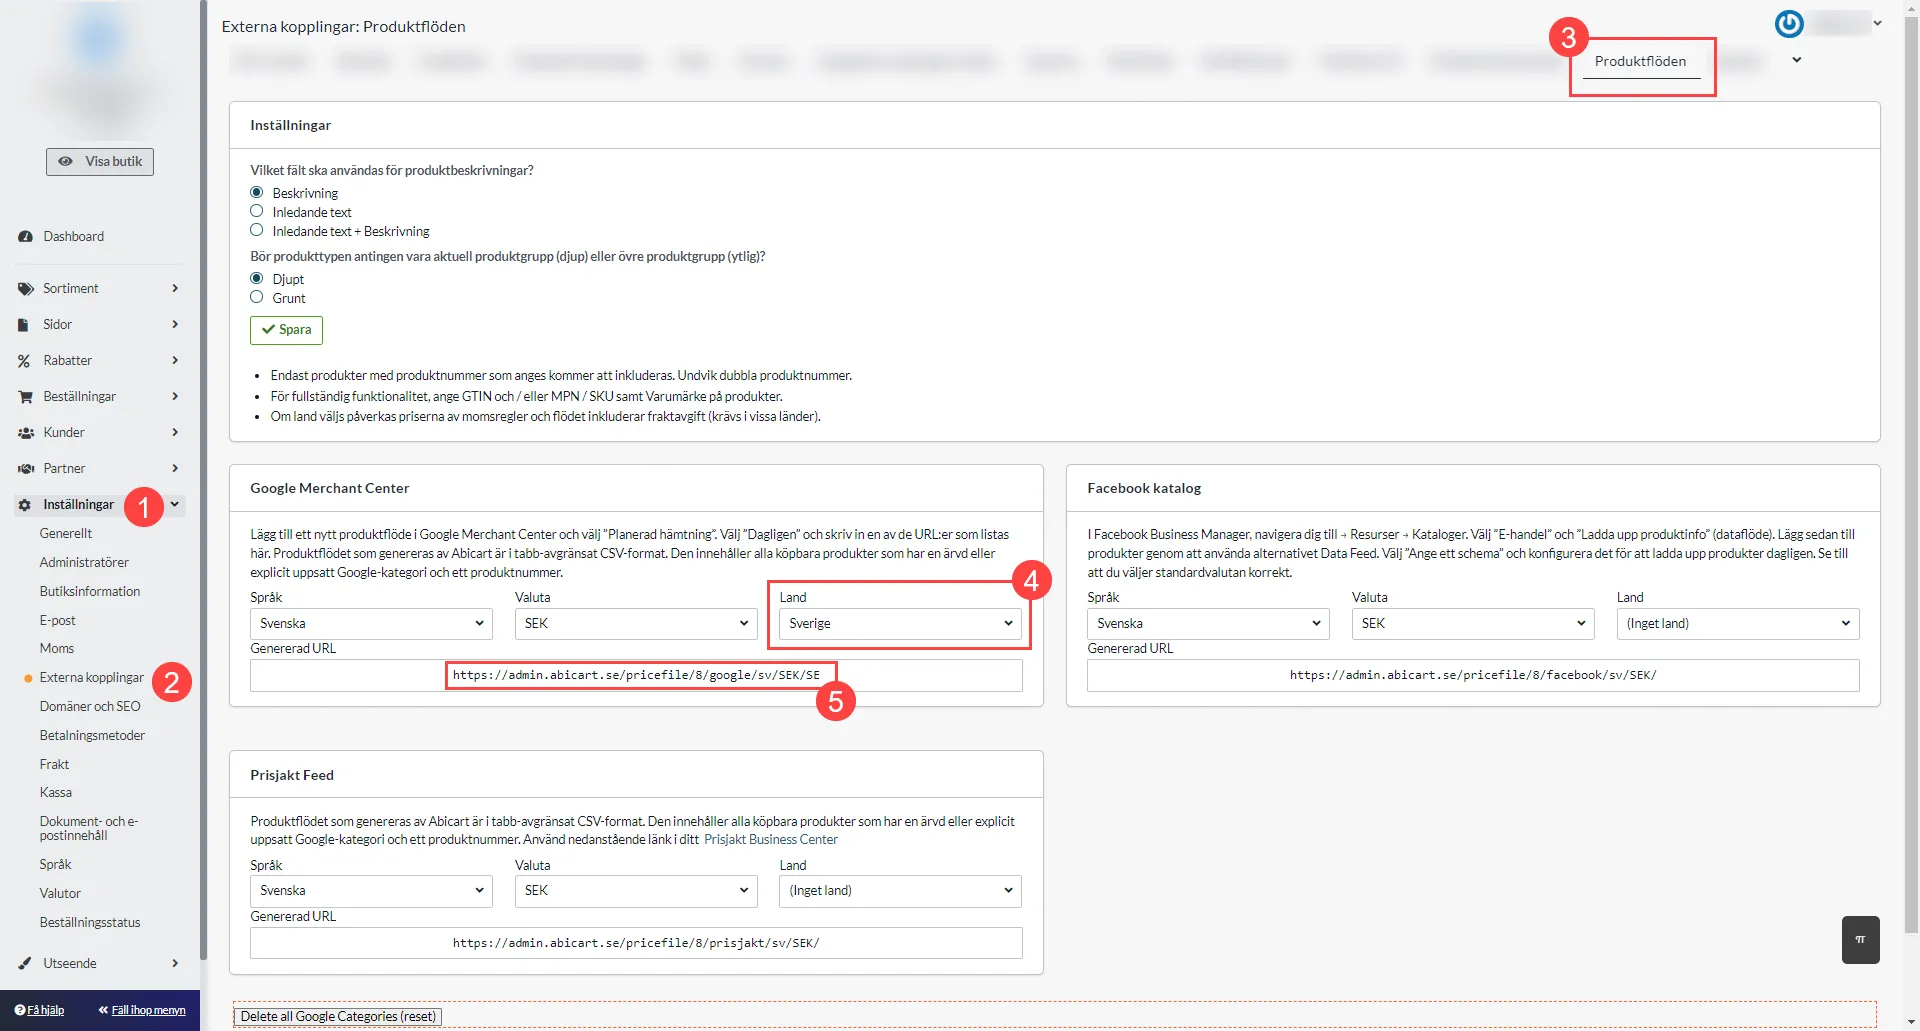
Exporting product URLs
27 Nov 2025
Product URLs can be exported via product feed.Here's how to do it1. Go to Settings in the left menu2 Click on Apps3. Click on Product feed4. Select the country (and the language you want to export the URLs in).5. Copy the URL as in the box below6. Paste the URL in your browser's search bar/URL field.Now a price flow file in .tsv format will be downloaded and saved on your computer.7. Open the file in e.g. "LibreOffice Calc" which can be downloaded here.*.tsv = tab separated file8. You can now see the URLs of the products in the column titled "link".
-
Mailchimp newsletter signup form
27 Nov 2025
How to Add a Mailchimp Subscription Form to Your Abicart Website Newsletter pop-up subscription forms are a great way to grow your email list and reach more customers. By adding a Mailchimp subscription form to your Abicart website, you can easily collect email addresses from your site visitors.Follow Mailchimp's guide below to create and publish a sign-up form. Then come back here and follow the steps for Abicart: Mailchimp's guide:https://mailchimp.com/help/add-a-signup-form-to-your-website/ How to put the form in Abicart Once you have created your form in Mailchimp and received your code (embed code or pop-up code), insert it into your store as follows: Log in to your Abicart administration. Go to Appearance → Themes → Edit → Add-ons. Paste the code in the Custom Content field in HEAD (if Mailchimp specifies that the code should be placed in the section). Save the changes. Note! Always check in Mailchimp's guide where the code should be placed (e.g. in or in the page content), as this may vary depending on the type of form you choose. Once the code is saved and published, the form should appear in your store according to the settings you made in Mailchimp.
-

Edit "My profile" in admin
27 Nov 2025
Edit My Profile Update My Profile by logging into admin >> Clicking on your name at the top right >> My Profile >> Edit details >> Save Select the correct customer type Limited company = Select Company Sole proprietorship = Select Private individual *If you have the wrong customer type, you will receive an error message about the wrong postal code when you try to cancel the subscription with payment method card payment. For example, if you have "Private individual" (i.e. sole proprietorship)
-
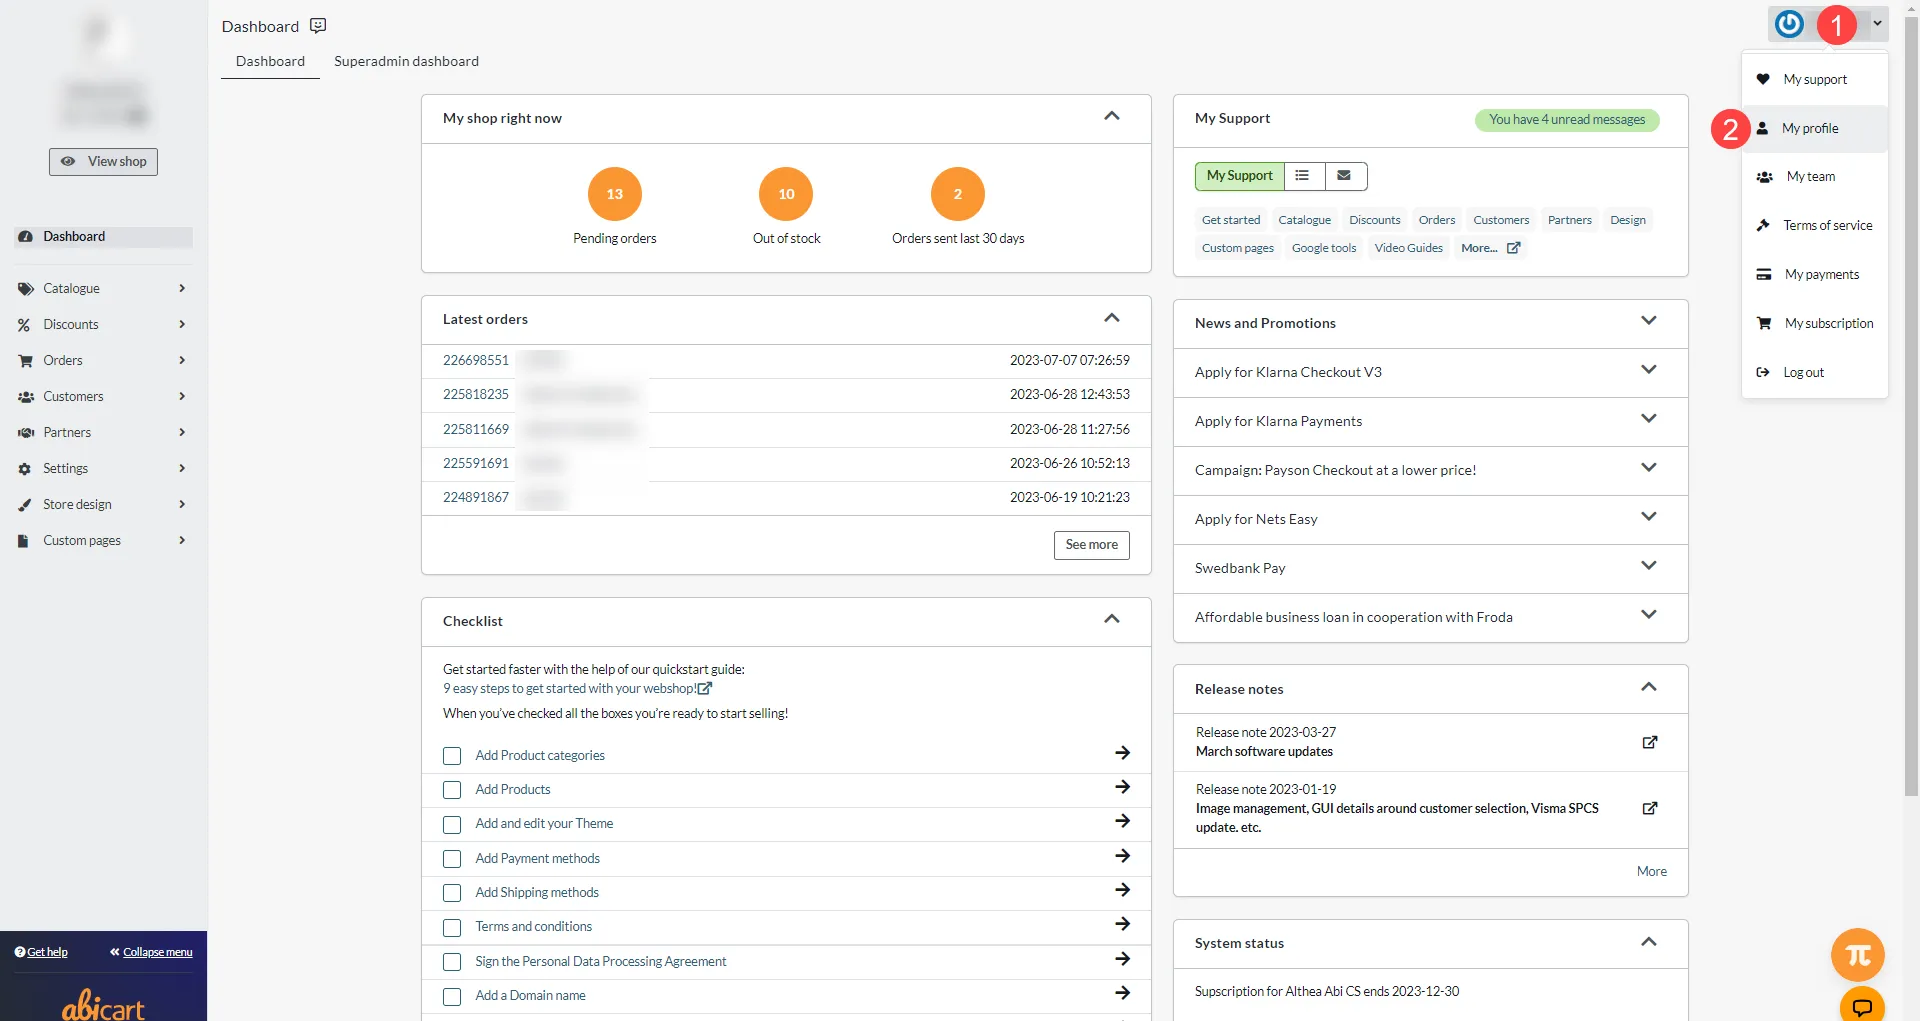
Edit the organization number in your webshop
27 Nov 2025
Here you can read about which places in the admin you should check if you want to edit/change the organization number (org.nr.) in your webshop.Edit the org. number here:1. my profileThe shop administrators need to log in and update "my profile". It is important that the owner has the correct org.no. as that admin account extends the shop's subscription.Log in >> Click on your name in the top right corner >> My profile >> Edit the data >> Save.2. settings >> Store informationGo to Settings >> Store Information >> Edit Company Information >> Save3. payment & delivery methodsContact your payment and delivery methods and update/renew your agreement with the correct org.no. Also find out if you need to update your contact details in the respective platform - e.g. Klarna merchant portal.*If you get a new username & password (API keys) for your payment method, they need to be entered in Abicart (Settings>>Payment methods>>Respective payment method).4. Other free textReview other text fields where you may have entered the organization number manually.For example.- Own pages such as Terms & Info - link to manual: Create own pages- Product groups used as custom pages - link to manual: Create "Custom pages" with product groups and subgroups.- Settings >> Document and email content Tip: In the shop's theme, there is a setting to show the organization number at the bottom left of the footer (Content >> Footer).Link to manual: Footer
-
Klarna Payments
27 Nov 2025
What is Klarna Payment?Klarna Payments is a payment solution provided by Klarna. It is a flexible platform that enables various payment options for businesses and their customers.How do I get started with Klarna Payments?Contact Klarna on their website and get a subscription.Add Klarna Payments to your storeGo to Settings -> Payment methods -> Add new payment method. Select "Klarna Payments" in the list and then click "Add". (If Klarna Payments is not available in the list, contact support and we will activate it for you. )You will then be taken to the settings page.Your statusActiveCheck the box to activate and make the payment method visible in the shop.DefaultA setting to make the payment method default at checkout.Make available only to those customers or customer groups where I specify it.If you do not want all customers to be able to use this payment method, you can disable it for non-logged-in customers through this setting. You then go to the respective customer group to activate the payment method there. Available for customer typeYou can set the payment method to be available only for one customer type or all. Require buyer to enter personal/organization numberCheck to make the personal/organization number mandatory at checkout.Send payment status confirmation to the shop ownerA setting to enable a separate payment status email for this payment method to be sent to the shop owner.Turn off the purchase of gift card products with this payment methodEnable a setting to make the gift card product type not available for purchase with this payment method.AccountThe next block contains fields for the Klarna data provided by Klarna.Username - Information provided to you by Klarna.Password - Data provided by Klarna.Frame color - Setting to affect the color of the Klarna payment window.Selected color - Setting to affect the color in the Klarna payment window.Color point list - Setting to affect the color in the Klarna payment window.Text color - Setting to affect the color in the Klarna payment window.Test mode - Enable for test modeAllow gift cards - Check toallow customers to combine gift card payments with this payment method. Name and DescriptionThe nameEach payment method has a name that will be displayed in the checkout, but if you want to modify this, you can enter a new name in this field. An optional field that can be left empty.Detailed descriptionA field to enter a text that informs the buyer about how the payment method works. Can be left empty.CurrenciesIf you have several active currencies in your shop, you can limit these for each payment method. The default setting is "All active currencies in the shop" but if you check "Specific currencies", all active currencies will be displayed and you can choose to disable those that should not apply to this payment method.CountriesThe default setting of the payment method is that it applies to all countries to which the shop offers delivery (Settings -> Shipping). If you want to limit a payment method to only certain countries, you can check "Specific countries" and then specify the countries that can use this payment method. Order statusIf you want orders placed via this payment method to have a specific order status, you can enter it here. Select the status from the list. Restriction on the order totalA setting to limit the amount that a payment method can handle. If you choose to limit the amount between two intervals, it is always the total order value including shipping and other fees. Fee added at checkout when placing an orderA function to add an extra fee to the purchase, such as a handling fee.
-

Integration with Mamut
27 Nov 2025
How does the integration with Mamut work?You need to download and install a Windows application under Settings -> External connections -> Mamut. Once this is done, you can use that application to send information between the systems.The software for integration between Textalk Webshop and Mamut mainly performs the following functionsfunctions:Retrieve new customers and transfer them to MamutRetrieve new orders and transfer them to MamutUpdate stock status (transfer stock status from Mamut to Textalk Webshop)Update prices (transfer prices from Mamut to Textalk Webshop)Transfer item registers between Mamut and Textalk Webshop (both ways)In addition, an existing customer register in Mamut can be transferred to Textalk Webshop.System requirementsTo be able to use the program for Integration of Textalk Webshop and Mamut BusinessSoftware you need a computer with the following software:Mamut Business Software
-
Integration with Fiken
27 Nov 2025
-

Tip: Recalculate currencies in Google Sheets with the GOOGLEFINANCE function
27 Nov 2025
Abicart supports automatic currency conversion via the European Central Bank (ECB). This means that when a customer makes a purchase on the platform, the price of the product can be automatically converted from the currency used by the seller to the currency in which the customer wishes to pay. Exchange rates are taken directly from the ECB and are updated regularly to ensure that prices are up-to-date. Although this feature is available, it is sometimes necessary to recalculate currencies in your own files before importing. The quickest way is probably to use Google Sheets and the GOOGLEFINANCE function: GOOGLEFINANCE can be used to convert currencies in csv files. To do this you can use the formula GOOGLEFINANCE together with the parameter "price" and specify the currency you want to convert from and to.This is what the formula looks like:=GOOGLEFINANCE("CURRENCY:" + from_currency + to_currency, "price")Where "from_currency" is the currency you want to convert from (e.g. "USD" for US dollars) and "to_currency" is the currency you want to convert to (e.g. "EUR" for Euros).Here is an example of how you can use GOOGLEFINANCE to convert a currency in a csv file:Open a new Google Sheet and import your csv file with the currencies you want to convert.Add a new column in the worksheet where you want to display the converted currency.Type the formula =GOOGLEFINANCE("CURRENCY:" + A2 + B2, "price") in the first cell of the new column, where A2 and B2 are the cells that contain the currency you want to convert from and to.Press Enter to see the result of the conversion.Drag the lower right corner of the cell to fill the formula in the rest of the column.Please note that GOOGLEFINANCE can only retrieve financial information in English and may be limited to certain financial information depending on your location. It is also important to remember that financial information may be subject to delays and may be inaccurate or incomplete, so it is important to verify the information before making decisions based on it.Read more about GOOGLEFINANCE here https://support.google.com/docs/answer/3093281?hl=en
-

Add new product group to be displayed in the sub-store (Multi-store system)
27 Nov 2025
When you create a new product group at the top level of your multi-store system, you need to choose to include it in the product selection of your sub-store. If you do not check the product group in the sub-store product selection, it will not be visible to the customer.This is how you do it:First create the new product group (Link to the product group manual)1) Go to Store System >> 2) Stores >> Properties of the sub-store you want to display the product group in 3)4) Click on Product selection5) Check that the product group should be visible in the store6) SaveNote! If you have a customer login in any of the stores, you also need to edit product selections for the customer groups that should have access to the product group.Link to the manual for multi-store systems.
-
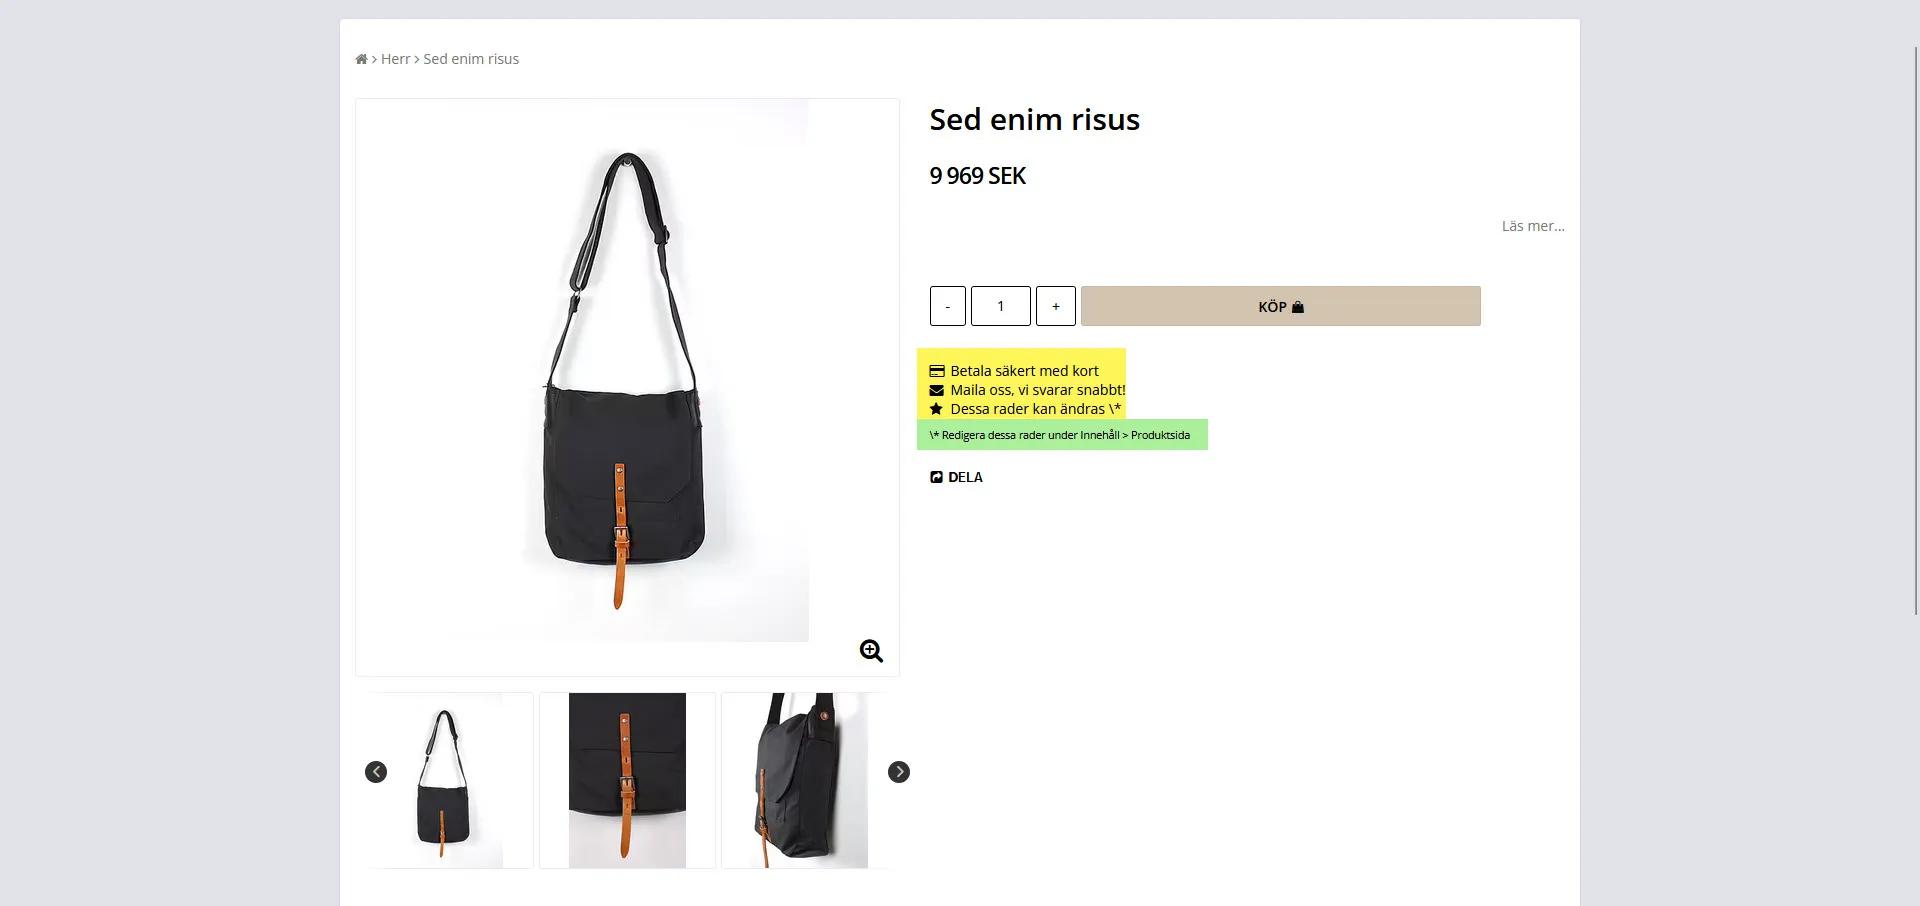
Editing unique selling points (USPs)
27 Nov 2025
Unique Selling Points (USP) can be found in several places in your theme and can be easily customized.Unique Selling Points (USP) available:Home pageHeaderProduct pageCheckoutHere's how you do it:Go to Design >> Themes >> Edit active theme >> Click on any of the above headings, e.g. Product Page >> Locate Unique Selling Points on the page >> Edit symbol, text & placement >> Save at the top of the page.Then you can click "View Store" and see how your changes look in the store.See image of how USPs are edited under "4. Checkout" further down this page.Take the opportunity to edit/delete the example text in the "Disclaimer" field while you're here editing. This example text is available on the product page and in the checkout.Example of USP on the product page:Yellow = USPGreen = DisclaimerScreenshots from adminHome pageHeaderProduct pageCheckout1. Start page2. Heading3. The product page4. Checkout1) Change symbol2) Edit text3) Add to add new + repeat steps 1-2.4) Save with the green button on the top rightTake the opportunity to edit/delete the example text in the "Freewriting" field while you're here editing.
-
Some tips on the road to your successful webshop
27 Nov 2025
Want to start a webshop? Here we go through some things you need to consider about your new online store and e-commerce. If you're involved in sales in any way, starting a webshop is probably your first choice today. With a professional online store, you can always sell, no matter what time of day, and to entirely new markets. Here are some tips to consider when starting an e-commerce business. Your webshop is more than an ordering function! It is one of the most important meeting places for you and your existing and new customers. It is becoming more and more popular to use your physical shop as a showroom or shop window and let customers order from your online store. This allows your customers to feel and touch, try and see, and then order from home at their leisure.It may be easy to think that setting up an online store costs a lot and requires a lot of investment. But if you use Abicart to start your webshop, it's actually the other way around! An online shop with us only costs a few hundred euros a month. Check our prices here.Things to consider when choosing a domain:You've probably spent a lot of time thinking about domain names for your online store. It's wise to choose a domain name that is the same as your business name. This will make it easy for your customers to recognise your web shop. It's also good if the name is easy to remember and easy to spell and pronounce. Always use Google and check if there are competitors or similar companies using the same or similar domains. Thinking of selling in different markets with different languages? Check what your company name and domain name mean in different languages, it can save you some trouble. Another line you can take is to use a domain name that contains important keywords for your e-commerce business. For example, mopedrenovering.se if you sell parts for renovating mopeds.Google Ads Keyword Planner and Google Trends are two really good tools that you can use to check which keywords your customers are googling for when they are looking for products or services that you offer in your webshop. Maybe you need multiple domain names? Maybe a shorter one that you want to use for promotions or on social media? Also check if there are similar domain names that might be worth buying to protect you from competition or misspellings. Also consider buying domains on several different top-level domains. If you have a .se domain, a competitor might register a .com domain. The most common domains in Sweden are .se, .com, .nu - but there are lots of different top level domains. I usually use Webb.se to search for domains.What do you want your webshop to look like?Under the hood, many online stores are quite advanced with integrations to business systems, payment solutions, advertising tools and social media. This makes it extra important to use a simple design that is easy to use for everyone who visits your online store. If you choose Abicart as your e-commerce platform, there are several ready-made themes that are stylish and super easy to use. You can easily be tempted to equip your webshop with lots of smart functions and features, as there are so many functions that are easy to connect to. But the most important thing is that your online store is easy to use and clear. A successful webshop attracts with its products and offers rather than with technical solutions. But of course it's good to use all the smart features if you need them. An example might be a feature that allows visitors to save products in a favourites list. Another good feature might be to save abandoned shopping baskets that you can use in promotions to your visitors. Of course, your online store should always be up to date and current. An effective way to keep your stock balance and other details up to date, is to connect your webshop with your other systems, such as warehouse systems and business systems.Abicart offers ready-made integrations to leading business systems. You can read more about it here.How will you get your visitors to stay on your webshop?Your prospective customers don't just come to your online store to shop. Often they are looking for information, checking availability and prices of goods and services they are interested in. This pattern is particularly evident around so-called lifestyle products that attract customers who identify with certain brands or products. Here you have good opportunities to promote new products and services, using those you already have and sell a lot of. Making your webshop interesting is the key to driving additional sales and attracting repeat visits. Be generous with information and stories about your products. For example, if you sell moped parts, feel free to blog about your and your customers' mopeds and refurbishment projects or why not make a film. An active and interesting online store also needs to be visible on your social media channels, such as Facebook and Instagram. If you are active on social media, you can attract more visitors to your online shop. Use Google's toolsIf you want to rank high on Google with your webshop, it is important that you actively work with keywords and content that make your webshop interesting for the search engines. To measure and analyse this, Google has great tools that are completely free to use. With Google Ads Keyword Planner you can see what your customers are searching for. Customize the texts and information on in your online store to cover your important keywords.Another really great tool is Google Trends, which I mentioned above. With Trends you can check which keywords are popular. For example; how many people are searching for "eggnog" at the end of December? Are people more likely to search for "summer dress" around Midsummer or around Easter?It can be super effective to keep up with words that are trending in searches on Google. But you have to keep up, because trends come and go. Be clear with important information about your companyFor your webshop to sell well, it is important that it is perceived as safe and serious. Be clear with information about your company, how to contact you and what to do with any complaints. In Abicart's themes, it is very easy to create a clear footer that contains all the important information about your business. When you run an online shop, you also need to inform your visitors about cookies - such a function is built into Abicart, so it's easy for you to comply with data protection laws and GDPR if you use Abicart as your e-commerce solution! An important thing to remember is to be clear about the payment and shipping options you offer. You can read more about the payment solutions available in Abicart here. Being clear about the shipping method, shipping cost and inventory is also important to create a trustworthy webshop. Here you can read about Abicart's solutions for shipping, warehousing & logistics.Of course, there are some rules you need to adhere to when conducting e-commerce. The most important ones are the E-Commerce Act and the Act on Distance Contracts and Contracts Away from Business Premises.Good luck with your online shop!Rikard Sigvardsson, Textalk (we who run Abicart)Ps. And you... if you don't already have an account in Abicart, it's free to start a webshop with us. The first 30 days you don't pay a penny. And after that, it's also incredibly private. Give it a try! - It's both free and fun :-) Try it for free here
-

The law on distance and off-premises contracts
27 Nov 2025
When your business sells goods or services at a distance, for example over the internet or at a location outside your business premises, the law on distance contracts and off-premises contracts applies. Among other things, the law requires your business to give the consumer certain information before you sell something. It also gives consumers the right to cancel their purchase without giving a reason. Read more at konsumentverket.se
-

Video guide: delivery methods - managing shipping and delivery in your Abicart webshop
27 Nov 2025
-
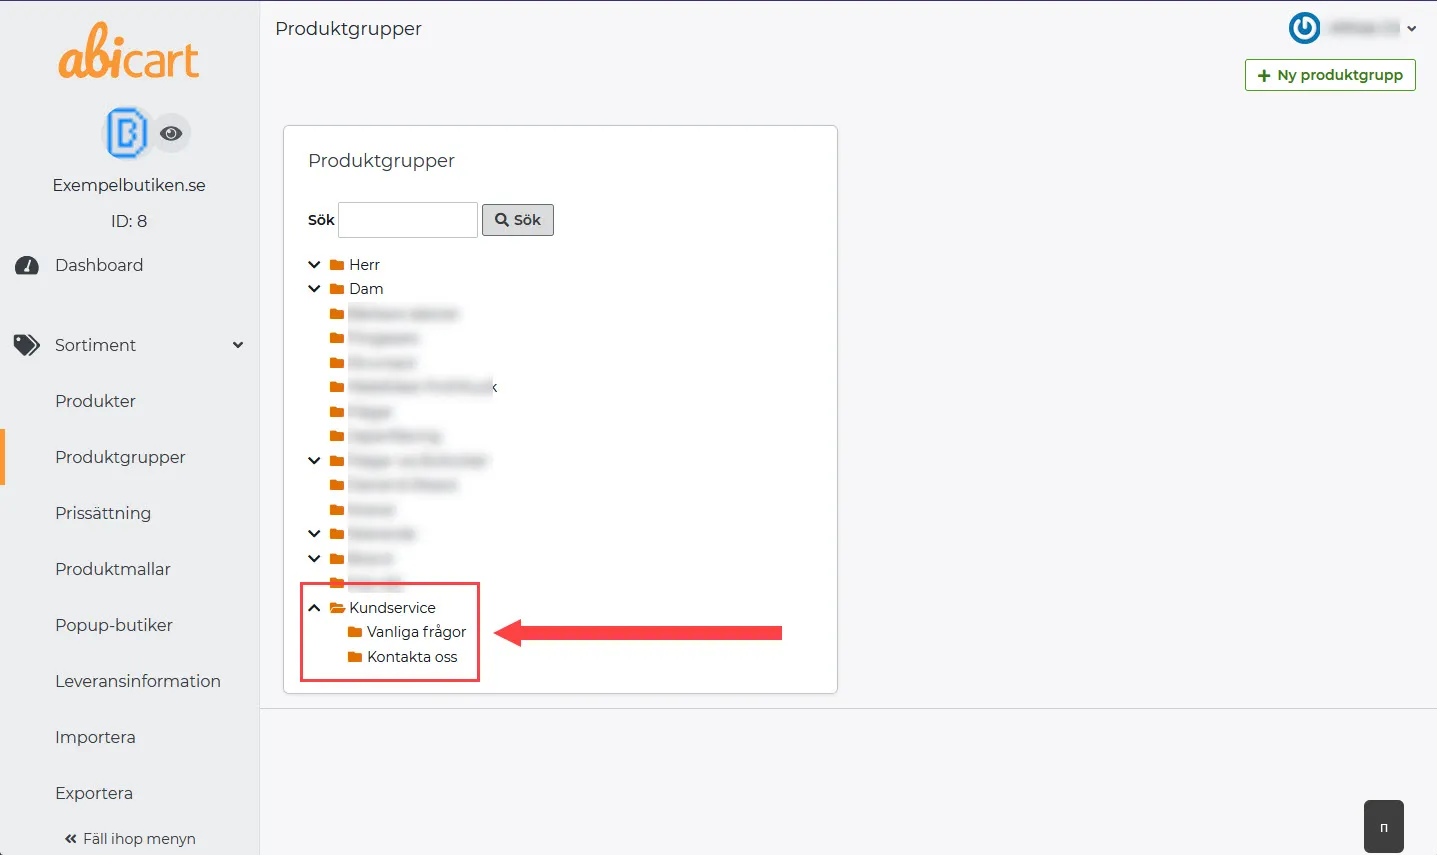
Create Custom pages with product groups and subgroups
27 Nov 2025
A creative way to use Abicart as a CMS tool is to build content pages as product groups. As an e-commerce platform, Abicart is of course optimized for building product structures with assortments, but with a little imagination you can actually use Abicart to build any web. A good example is this website - abicart.se is built entirely with Abicart - and only with standard components. If you want to set up your own pages as a menu item with multiple subpages, you use product groups.Custom pages and product groups work almost exactly the same way. The differences are that product groups can be set up as a main group with subgroups, and custom pages can only be standalone.So it can be useful to put your custom pages as product groups if you want to have custom pages under one menu item:Here's what you do:1) Go to Assortment >> Product groups2) Click on New product group & give the group the name you want as a menu item >> Save by clicking on Add.This will be your "main group" - Now you just have to create the subgroups! 3) Click on the main group >> Then click on New subgroup in the box on the right.4) Name the subgroup >> Save.5) Type the information into your "custom page" or copy the existing custom page and paste its content into the new subgroup.You can enter the text in the field for "Image and text in product group table" or under Optional text/image "Custom look" for a more customized page. Learn more about, custom look here: Link to the manual - Product groups6) Now you just have to add the menu item - Link to the manual: Add a menu item
-
Sendify
27 Nov 2025
Cooperation with the transport service SendifyWhat is Sendify?We have no integration with Sendify, but you use the service independently from Abicart.Sendify is a logistics tech company that offers small business owners a simple and cost-effective shipping solution - so less time and money can be spent on logistics and more on driving business. Uniting technology with logistics, Sendify offers, since 2015, a TransportManagement System (TMS) that brings together business-critical logistics functions on a single web-based platform. The aggregated buying power of over 6,000 companies allows Sendify to offer competitive pricing, a free TMS, access to competitive contracting, and small business owners only pay for what they ship. With Sendify, business shipping simply doesn't have to be that difficult.You can then use Sendify to compare the costs of different transport companies.For more information about Sendify and our partnership, click here.
-
Google: Add Search Console to your theme
27 Nov 2025
Connect Google Search Console to the store. What is Google Search Console? Google Search Console is one of Google's free tools for managing search engine optimisation for a website. Among other things, you can see the indexing status and optimize your website's visibility in the search engines. What do I need to do to get started? You first need to enter some data in Search Console and then you need to verify your site by adding some code to the store's theme.Adding the domain in Search ConsoleLog in to Google Search Console.In Google Search Console, under Home page, there is a field for "Website". Enter your store's address (domain) in that field. Then click on the "Add property" button.Once you click on "Add property" you will see two tabs, "Recommended method" and "Alternative methods". Click on the "Alternative methods" tab and select "HTML tags".You will now see a meta-tag that looks something like this:<meta name="google-site-verification" content="xXxXxXx" />.It is the content contained in "content" that we need and will put into the theme. Copy (CTRL + C) only the content inside the quotation marks in content.Do not click on "Verify" yet.Add the code to the shop's themeOpen a new tab in your browser and then log in to the store. Go to Appearance -> Themes -> select theme, edit -> Add-ons tab -> Google -> Google Search Console.Paste the code in the Google Search Console field.Make sure that only the content inside the quotation marks in "content" is included.Save.Verify in Google Search ConsoleGo back to the Google Search Console tab in your browser, then click the Verify button. You've now verified your domain in Google Search Console. Great job! :-)
-

How does the buy x, pay for y discount work?
27 Nov 2025
Buy 3, pay for 2, etc.Discounts work by deducting the value of one or more products at checkout. The discount only appears at checkout for the buyer. If you want to show a discount directly on the product page, you should enter the extra price of the product instead. If you want to discount the total at checkout, use gift cards instead. If there are several active discounts, the system will select the best discount for each product. You can only get one discount per product. Discounts are included in the Abicart Plus and Pro subscriptions. Create a "Buy X, Pay for Y" discount Click on Discounts -> New Discount -> “Buy X, Pay for Y” discount. Name Enter a name for the discount. This name will appear in the admin panel, at checkout, and on the order confirmation. In our example, we’ll enter “Buy 3, pay for 2.” Discount Settings There are two options here. "Buy (quantity):" is the number of items the customer must have in their cart for the discount to be applied. In our example, we’ll enter "3" in this field. In the “Pay for (quantity):” field, we’ll enter the number of items the buyer will pay for. In our example, we’ll enter “2” here. This discount applies to all products within the discount’s product selection. This means you can mix different products as long as the “Allow mixing of products within the product selection” setting is checked. If you do not want to mix products, uncheck the setting. Scheduling If you want the discount to apply only during a specific time period, you can specify a start and end date. Keep in mind that a day begins at 12:00 a.m. and ends at 11:59 p.m.For example, if you want a discount to be valid for one day, enter January 1, 2022, at 12:00 AM as the start time and January 1, 2022, at 11:59 PM as the end time. Codes If you want customers to enter a discount code to activate the discount, check the "Use codes" box. Existing codes for the discount are displayed at the bottom of the box. To create a new code, click “Add Code.” In the “Code” field, you can enter your own discount code. If you click the “Generate” button, a code will be created automatically. Number of times the code can be used If you want to limit the code to a specific number of purchases, enter a number in the field. Otherwise, the code is unlimited. Product selection Here, you can specify which product(s) the discount applies to. If the discount should apply to all products, check the box to the right of "Entire assortment." You can also search for a specific product by entering the name or item number. It’s also possible to select entire product groups. NOTE:If a product belongs to multiple product groups, you can now choose whether the discount should apply only to the product’s primary product group—which is the default setting—or to all product groups to which it belongs. You can configure this setting under Product Range -> Settings -> Product Group Settings. Customer Selection Here you can control which customers have access to the discount. You can choose between “All customers,” “All customers who are not logged in,” “All logged-in customers,” or a specific customer group.
-

Sale of downloadable files
27 Nov 2025
You can sell downloadable files with Abicart. These can range from software and documents, to music and video files. If the buyer has a login account, they can log in to the store, where they can see all their previous orders and download files they have already purchased. As a shopkeeper, you can decide how long a particular file should be available to the customer.By default, the maximum space is 20 MB per file. For customers with a PLUS subscription, we now offer a maximum of 50MB. PRO customers can get access to upload a maximum of 100MB files. If you need more space than that, you can put the files on a dedicated server. We protect your files from public access using an encryption method. The maximum size per file here is 300 MB. Larger files must be split into several smaller ones.Please contact customer service if you need to change the upload size, and if you have an active PLUS/PRO subscription.The downloadable file is emailed to the customer when the order is marked as paidIf the "Downloadable files" tab is not visible in the admin, please contact customer service and we will activate the feature for you.Create a downloadable itemFirst create a product as usual under Products -> New product. Note that you must create the product before you can add files.Then click on the "Downloadable files" tab, and then on "New file".There are two ways to use this feature:Upload a file - Select a file from your own computer and click "OK". The file will then be uploaded to the product. The maximum file size is 10 MB/file.Enter a URL (external link) - If you want to upload files from your own server, enter the full address (URL) of the file, e.g. http://min-domän.se/filer/nedladdningsbar_fil.pdf. The file must be available on the server for download without password protection. When the customer buys this file, we will encrypt the real URL.Limit the time the file is downloadable - If you want to limit the time the file is available for download after purchase, enter it in this field. You enter an integer from one (1) upwards for the number of days the file will be available for download.
-
Product export
27 Nov 2025
You can export all your products, and their properties, in your store to a text file. This is useful if, for example, you want to update several products at the same time, or if you just want to have a backup of all products.Product export is a function to save all products in a text file. You can choose to export all properties, or just selected ones.How do I use product export?Go to Products -> Export. Here you can choose which properties you want to export. Once you have made your selections, press the "Export" button located in the top right corner.Now you have a text file with the properties you selected, which you can use for whatever you want. The file can be opened in spreadsheet programs such as Excel, Numbers, LibreOffice Calc, etc.NOTE! Remember to always export the art.nr property. It is the primary key used to identify each item. The item number must be present in order to import the file again.A more detailed instruction on this can be found further down in the article.You can generate art.nr automatically using the setting under Catalogue >> Settings >> Product numberThings to keep in mindBefore exporting, you should review the store's export settings. These can be found under Settings -> General -> Export settings.Here you can choose how the file will be saved, you can choose for example "Delimiters" and "Character encoding". DelimiterThere are three different "Delimiters" to choose from: commasemicolontabIf you choose "comma", the file will be saved with the extension .CSV.If you choose "semicolon", the file will be saved with the extension .SKV. If you choose "tabulator" the file will be saved with the extension .TAB. All these three formats can be opened in any spreadsheet program. The most common way is to save the file with "comma" and get a text file with a .CSV extension.Character encodingA character encoding is a way of representing, encoding, a selected set of characters, of binary digital encoding used in communication and data storage in computers. There are two character encodings to choose from:ISO-8859-1 (Latin 1, Western European)UTF-8 (universal)Most commonly, Windows uses "ISO-8859-1 (Latin 1, Western European)" and Mac and other operating systems use UTF-8. Exporting a fileGo to Assortment -> Export.This displays all properties that can currently be exported. Select the properties to be exported, and also tick the box "Include column headings in first row" at the bottom left. Then click on the export button in the top right corner. Then you just have to wait a bit. Normally it takes 5-10 seconds for the file to generate if you have 500-1000 products. If you have more products, it may take much longer. Open the file in the spreadsheet programOnce the file is exported, we open it in our spreadsheet program. Remember to open the file after the export settings we made above. If we saved the file with file extension CSV and character encoding UTF-8, the file must be opened this way in the spreadsheet program for it to be correct. Once the file has been opened, check it quickly and make sure the contents are in their columns. Also check that special characters such as å, ä, ö are correct.If something is not right, do not save the file now. It will not be possible to use it again. In that case, close the file without saving. Tips and troubleshootingBelow are examples of common errors that can occur if you have opened the file with the wrong delimiter and/or the wrong character encoding.The examples shown below are made in the free program "LibreOffice Calc" which can be downloaded here.File opens incorrectlyIf everything is "all over the place" and not column by column when you open the export file, you have chosen the wrong delimiter. If å,ä,ö and other letters have been replaced by "strange" characters and symbols, the wrong character encoding has also been chosen. In the example below, both the delimiter and the character encoding are wrong.There are two ways to solve this:- Review the export settings (settings > general) and change the delimiter and character encoding. Then re-export the file. Now it should open correctly.- Choose how the spreadsheet should open the file. In Calc you will always be asked how to open the file.Choose the character encoding.Select delimiter.Preview what the file will look like when opened.In this case, you can already see in the third box that the information is not in columns and that the text "Purchase price" in the first line contains incorrect characters.To open the file correctly in this example, we need to change:character encoding to "UTF-8"the delimiter to comma.Now we see in the preview that it looks correct.Then when we open the file, it looks good:Price with decimal point instead of commaFor the Swedish language, commas are used as decimal separators in prices. In English, for example, it is a period instead.If you open the export file and the decimal separator of the prices is a dot instead of a comma, you need to change the separator in the export settings. If you use a semicolon as the delimiter, the comma will be used as the decimal separator. If you use a comma as a delimiter, the decimal separator will be a dot.In the example below, "comma" is selected as the delimiter.In the example below, "semicolon" is chosen as delimiter.First zero disappears in some columnsSometimes item numbers and/or other fields start with a zero followed by other numbers. Some spreadsheet programs automatically interpret fields containing only numbers as numbers and the leading zero disappears when the file is opened. To prevent this from happening, we need to tell the program to interpret the columns as text and then the zero will remain. We do this before opening the file in Calc.1. Click on the column heading containing leading zeros to select the column.2. Then select "Text" from the drop-down list.When the file is opened, the leading zeros will remain.
-

Customer import
27 Nov 2025
Customer import is a function to easily add many customers to the customer register via an import file. Please note that customers must give their consent to be placed on a customer register. Therefore, you must not simply collect email addresses and other customer information and import it into the store's customer register. This is illegal under GDPR. Something to consider Customer import does not work in the same way as product import where you select property/column, but here there are 20 predefined properties (21 properties in multi-store systems). All properties listed under Customers -> "Import Customers" must be in the file and be in exact the column order for the import to work. Properties that can be imported The following properties must be included in the import file, one property per column in exactly the order listed under Customers -> Import Customers in Store. First name - Customer's first name Surname - Customer's last name Email - Customer's email address (only one email address per customer card). Company/Organisation - The name of the customer's company. Left blank for private persons. Person/organization no - Customer's social security number or organization number (May be left blank.). Adress - Customer's address (May be left blank.). ). Postal code - Customer's postal code (May be left blank.). City - Customer's postal location (May be left blank.). Country - Customer's country. Country must be in English. If the field is left blank, the customer gets Sweden as country. Phone day - Field for phone number (Can be left blank.). Phone evening - Field for phone number (Can be left blank.). Customer group - Enter name of customer group if the customer is to belong to one or more customer groups. Otherwise, the field is left blank. If the customer belongs to several customer groups, enter them one by one separated by commas. Username- Enter a unique username. We recommend entering the customer's email address. If the username is left blank, the customer will not be able to log in and be an "approved buyer". They will only be able to receive newsletters. Password - Field for password. Approved Buyer - Should the logged in customer be able to shop. Enter a one (1) for "Yes" and a zero (0) for "No". Priority supplier - Enter supplier name (Partner function), otherwise leave blank. Customer type - Enter customer type, private for individual and company for corporate customer. If this field is left blank, the customer type will be set depending on the choice made at import, "If a customer is not of a certain type, do you want to import the customer as a business or private customer?" Store codes (multi-store system only) - To import customers in the customer register in a multi-store system, you must also give them access to a sub-store. Specify the sub-store's store code in this column. To import a customer in multiple sub-stores, enter the store codes in the same column separated by a comma. The store code column should not be included in the import file for a "regular" store. For multi-store system imports only. Unique customer number - Enter a unique customer number for all customers. No two customers can have the same customer number. Want newsletter - Should the customer receive the newsletter. Enter a one (1) for "Yes" and a zero (0) for no. Language - Enter the language of the customer, e.g. sv or swe for Swedish, en or eng for English. A complete list of all languages can be found at the bottom under Customers -> Import customers. Customer import: step by step If you have a file with customers that you want to import, open the file in your spreadsheet program (e.g. LibreOffice Calc, Excel or similar). Make sure the file looks okay, that the properties are in one column, that the å, ä, ö and other special characters look correct. If the content does not look correct in the file, it must be closed immediately without saving. Instructions on how to open the file correctly in Excel Download our sample file here Prepare the file for import If the column order does not match the properties listed under Customers -> Import customers into your store the columns need to be rearranged to match. When the columns are in the correct order, the following steps need to be taken: Delete the first line of the file if it contains column headings. The first line in the file must be a customer. Remove blank lines in the file. A tip is to sort the file on the email column. Then all empty lines will disappear. The file must be saved as a text file in the CSV format. The column delimiter in the file must be a semicolon. To save the file as a CSV with a semicolon delimiter, do the following (example from LibreOffice Calc). Go to File -> Save As. To resave the file in a different file format, click on "File Format" to bring up a list of different formats. Select "Text CSV (.csv)". Then click in "Edit filter settings" and "Save". The following window will appear. Character set - Select "Unicode (UTF-8)". Field delimiters - Select semicolon (;). String delimiter - Make sure there is a quotation mark (") in that field. Then click "OK" and the file will be saved on your computer. Import the file Go to Customers -> Import Customers. Under "Select the file you want to import", click on the "Select file" button and select the import file to be imported. Below this is a box called "Import settings". Here there are two choices that you have to make. If the customer's username or customer number is already in the customer register - If there are already customers in the customer register, a check will be made to see if the customer is already in the customer register. The check is done on the username and customer number. If there is a match, you have to choose whether to update the customer card with the data that is in the file (Update information) or not to change the customer (Ignore). If a customer is not of a certain type, do you want to import the customer as a business customer or private customer? - If the customer type field is empty in the import file, here you choose which customer type the customer should be imported with, Private or Business customer. All done. Click the import button in the top right corner. The import can take anywhere from a few seconds up to a minute depending on how many customers are in the file. If the file is correct, text will be displayed with the result. If something is wrong with the file, a message in red text appears instead, similar to this: First, it prints out which line is wrong and which properties are wrong. This error message is the most common error you will get and it occurs when you have forgotten to delete the first row of column headers in the file. However, it displays a clear error message as to which row and property is incorrect. Correct this and re-import the file. If you get a message in red then the import is aborted completely and no customers are imported. I only have the customer email address, how do I import it? If you have a text file that only contains email addresses you can import this, but all the properties listed under Customers -> Import customers must be included in each column in exactly the right order in the file. The following fields must contain data in order for the file to be imported: first and last name (private person), or company name (business customer) email (must be unique) approved buyer (1/0) customer number (must be unique) approved buyer (1/0) newsletter (1/0) language If you only have e-Newsletter (1/0) then you postal addresses, you can enter the e-mail address as a first or last name (or company name) as well as an e-mail address. If the customer also needs to be able to log in, the username and password must also be included and then the email address can also be entered in these columns. You must also enter values for "approved buyer" and "want newsletter". There, a one (1) means "yes" and a zero (0) means "no". If you want the customers to be "approved buyers", you must also enter "username", otherwise the customers will not be able to log in. A tip then is to enter the email address as the username. All customers must have their own customer number and if you don't have it, you can generate it in for example Libre Office Calc and Excel. Two customers must not have the same customer number but all customers in the customer register must have unique customer numbers. You also need to import a language for the customer, e.g. sv or swe for Swedish, en or eng for English etc. A full list of all languages can be found at the bottom under Customers -> Import customers. If you do not have information for the other fields (those that are not mandatory), leave them blank but the columns must still be included in the file. Example of what a file might look like. In this example we have two customers that we want to import into the customer register. On line 2 there is a private person who should only be able to receive newsletters. We only have one email address for this customer and therefore enter the email address in the last name and email fields. The customer type is "person" and we enter a customer number. Note that "approved buyer" is set as "No" (0) and newsletter is set as "Yes" (1). On line 3 there is a business customer who should be able to log in and shop but does not want newsletter. We only have the customer's email address and then enter this email address in the Email, Company, Username and Password fields. The customer type is "company" and we enter a customer number. Note that "approved buyer" is set as "Yes" (1) and newsletter is set as "No" (0). Don't forget to delete the top row if it contains column headers before importing. The first line must be a customer. Also remember to resave the file as a semicolon-separated CSV file.
-

Customer groups
27 Nov 2025
Customer groups is a feature to give logged-in customers different prices and/or access to a different product range. What are customer groups? A customer group is a container for customers, customer-specific product selection and customer-specific prices. Customer groups are included at no extra cost in Abicart Plus and Pro subscriptions.How to create a customer groupGo to Customers -> Customer groups -> + New customer groupWhen you create a new customer group, you go directly to the "Properties" tab. Here you give the customer group a name. You also choose which payment methods will be available at checkout when customers in this customer group are logged in. NameName the customer group, for example "Retailer". Payment methodsThis lists all available payment methods for the store. If you want to restrict a payment method to one or more customer groups, select the payment method here and make sure that the setting "Make available only to those customers or customer groups where I specify it."PricingIf you use the new price list feature, you will also see a block where you can select price lists for "Regular price" as well as "Extra price". The price lists are created under Products - Pricing. You can also select price lists for the customer groups under Products -> Pricing -> tab "Usage". Select product selection on a customer groupWhen editing a customer group, two tabs appear at the top, "Properties" and "Product selection and prices". Under the tab "Product selection and prices" you select which products will be displayed for logged in customers belonging to the selected customer group. If you are using the old system for prices, you will also be able to set a different price for the products in the selected customer group here.In the "Product selection" field, the product range selected for the customer group is displayed. "All products in the store" is selected by default and below it all product groups in the store are displayed at the top level.To customize the selection you can check in and out the product groups. To select individual products in a customer group, click on the arrow in front of the product group name, which will then drop down. Then tick "Customize by product within the group" and then select the products to be displayed to logged-in customers belonging to the selected customer group. Products belonging to multiple product groups will only be displayed in their primary product group. Adding customers to a customer groupWhen you create a customer group, it is empty.Customers are placed in a customer group in two ways:You create a customer yourself and choose that the customer should be in a certain customer groupThe customer creates an account and is placed in a customer group.Create a customerGo to Customers -> Customer Register -> Click on "+ New Customer" in the top right cornerYou fill in the customer details yourself and then give the customer a username and password.Customer creates account yourselfHere's how to set up your customers to create an account:Go to Customers -> Customer settings -> New customersYou need to choose a customer group that all new customers will fall into. One tip is to create a customer group called "Unapproved Customers". Then select it here.Create a customer group for unauthorized customersNow we will create a customer group called "Unapproved customers".Go to Customers -> Customer groups -> + New customer groupName the customer group as "Unapproved customers". If you want them to be able to shop, choose which payment methods they see in the checkout:Once saved, click on the "Product selection and prices" tab:If you want the unauthorized customers to see all items, tick it off. Save.
-

Image import
27 Nov 2025
If you have a lot of products, and don't want to manually add images to each product, you can use image import. Images can be imported at the same time as other product properties (price, description, product group, etc.).Video guideHow does the image import work?You cannot add an image directly to the import file, instead you must enter a file name or URL for the image. The image must be available on a server at the time of import and it works to import images from an FTP server or a web server. The images will be downloaded and placed on the respective product at import time.After the image import is complete, the images can be deleted from the server.Web serverFor imports where the images are on a web server, enter the full URL of the image in the image column of the import file.FTP serverFor imports where the images are on an FTP server, you need to enter the login details (server, username and password) for the server in step 1 of the import (Products -> Product import).In the import file, enter the file name of the image in the image column.To import the file into Abicart, fill in the fields for FTP settings.Go to Products -> Import. Enter the server, username, password and directory.Importing multiple images on the same productIf you are adding multiple images to a product, you must create a new line in the import file for each new image.The product number (Column A) is repeated for each new image and then you place the new images in the correct row in the image column (Column C).In the example below, the soccer ball will have two images and the lego will have three images.
-
Hygglig Checkout
27 Nov 2025
Here you will find information about the payment solution Hygglig Checkout from Marginalen Bank.Hygglig Checkout is a checkout solution where the customer can choose how to pay for the purchase. The payment methods the customer can choose from are:CardSwishPartial paymentInvoiceDirect bank paymentThe ability to choose the payment method that the customer wants increases the likelihood that your customers will complete their purchase and return to your online shop. With Hygglig Checkout, all payment methods are included at no extra cost.What does it cost to use Hygglig Checkout?You only pay a transaction fee when a purchase is made in your webshop. No other costs are added. How much you pay in transaction fees depends on how much your e-commerce turnover is.Price plan, cost per orderStartup: 2.25%Pro, for those with a turnover of at least 1 MSEK/month: 1.95%.Corporate, for those with a turnover of at least 5 MSEK/month. Price on request.How do I apply for Nice Checkout?You apply for Hygglig Checkout via a form on their website. They will contact you within 24 hours with more information.Add Hygglig Checkout to your shopGo to Settings -> Payment methods -> Add new payment method.Select "Hygglig" in the list and then click "Add". (If Hygglig is not available in the list, contact support and we will activate it for you. )You will then be taken to the settings page.StatusActiveCheck the box to activate and make the payment method visible in the store.DefaultA setting to make the payment method default in the checkout.Make available only to those customers or customer groups where I specify it.If you do not want all customers to be able to use this payment method, you can disable it for non-logged-in customers through this setting. You then go to the respective customer group to activate the payment method there. Available for customer typeYou can set the payment method to be available only for one customer type or all. Require buyer to enter personal/organization numberCheck to make the personal/organization number mandatory at checkout.Send payment status confirmation to store ownerA setting to enable a separate payment status email for this payment method to be sent to the shop owner.Turn off the purchase of gift card products with this payment methodEnable a setting to prevent the gift card product type from being purchased with this payment method.AccountThe next block contains fields for Hyggligs data found in the Hyggligs portal.Merchant key - Your ID given to you by Hygglig.Checkout secret - Information provided to you by Hygglig.Use sandbox environment - Enable test modeName and DescriptionNameEach payment method has a name that will be displayed in the checkout but if you want to modify this, you can enter a new name in this field. An optional field that can be left blank.Detailed descriptionA field to enter a text that informs the buyer about how the payment method works. Can be left empty.CurrenciesIf you have several active currencies in your shop, you can limit these for each payment method. The default setting is "All active currencies in the shop", but if you check "Specific currencies", all active currencies are displayed and you can choose to disable those that should not apply to this payment method.CountriesThe default setting of the payment method is that it applies to all countries to which the shop offers delivery (Settings -> Shipping). If you want to limit a payment method to only certain countries, you can check "Specific countries" and then specify the countries that can use this payment method. Order statusIf you want orders placed via this payment method to have a specific order status, you can enter it here. Select the status from the list. Restriction on the order totalA setting to limit the amount that a payment method can handle. If you choose to limit the amount between two intervals, it is always the total order value including shipping and other fees. Fee added at checkout when placing an orderA function to add an additional fee to the purchase, such as a handling fee.Order managementEvery time you receive an order via Hygglig Checkout, you need to activate the order when you send it to the customer. Go to the order in the store's order list, in the "Perform actions" box, make sure the "Charge (Hygglig Checkout)" checkbox is selected and then click on the "Perform selected actions" button.When this is done, the order is activated at Hygglig and the customer is charged.It is also possible to activate the order in the order list. To do so, click on the icon with a lightning bolt on the far right.
-

Add a new administrator
27 Nov 2025
If there are several of you working with the shop, you will need several admin accounts. The owner of a shop can add an account for a new user.Adding an account for a new userClick on Settings -> AdministratorsEnter the new administrator's email address, then click Submit.
-

Lock payment method to currency and country of delivery
27 Nov 2025
In this manual, we'll walk you through how to lock a payment method to currency and country of delivery. This allows you to control which payment method is available to customers from other countries.In the following example, we will add that customers from abroad cannot shop in SEK when they choose Klarna V3 at checkout.Here's what you do:1) Click on Settings2) Click on Payment methods3) Klicka Välj betalningsmetod välj betalningsmetoden i listan - här väljer vi Klarna Checkout V3.4) Click Save5) Go through the payment method settings and fill in the API keys you received from the payment method. Link to manual: 9 easy steps to get your store up and running! >> Add payment methods6) Save7) Select the currency for which the payment method should be available, in this case SEK8) Select the country for which the payment method should be available, in this case Sweden9) Save again10) Repeat steps 3) to 9) and create a delivery method for each currency/country restriction you want in the store.You use the same API keys for each payment method you recreate. The example shows 5 pcs of Klarna Checkout V3 with exactly the same keys. Only the currency/country separates them. If you have different payment methods against different countries, add currency + country to each payment method. For example, you might want Klarna for Sweden & Europe, Nets Easy for Denmark and Paypal for the US.Payment methods that can be set up multiple times with the same API keys are e.g. Klarna Checkout V3, Nets Easy & Svea Checkout. If you want to use e.g. Swedbank Checkout or you need to sign an agreement for each country.Example:Here you can see that we have locked different Klarna Checkout V3 to the target groups Sweden, Denmark, Norway, USA & Europe:When a customer selects the USA as the delivery country, only Klarna checkout - USA will appear at checkout. The customer can therefore only shop in USD.
-

How does the audience selector work?
27 Nov 2025
You can create target groups for different languages, currencies and delivery countries for visitors to choose from. Previously there were different language and currency options in the stores, but now we've built a new updated version. This means that as a store owner you can create different target groups and pre-define language, currency, price display with or without VAT and delivery country, and for example customers can see how much they have left for free shipping regardless of which delivery country they are shipping to.Why should I use the audience selector?There are many ways to use this function.If your store delivers to different parts of the world, you can create different audiences for different countries, for example. For example, you can create a target group for the USA where you set English as the language, USD as the currency, display the price excluding VAT and the country of delivery USA.If you only sell within Sweden, you can create two target groups, for example, one for private customers showing prices incl. VAT and one for business customers showing prices excl. VAT.Example of how the target group selector can look like in minimized mode. Only language and currency are shown here.Example of how the target selector can look in unfolded mode. When the customer clicks on the targeting selector, it unfolds and they can modify the settings for language, country of delivery, currency and VAT as they wish.Settings in the themeUnder Appearance -> Themes -> select theme, edit -> Content -> Audiences.There are two buttons, Add External Link and Add Audience, and two blocks, Button Options and Show Selection.Button optionsChoose what information to display in the audience selector. Current target group name, Language, Use the full name of the language instead of the 2-character code, Show currency name and Show VAT. You simply choose which options to display. In the picture above, only Language and Show Currency Name are selected.Show optionsYou can choose whether customers should only see your predefined target groups or whether they can change individual settings themselves.Create a target groupGo to Design -> Themes -> select theme, edit -> Content -> Audiences and click on the Add new audience button. There are several different fields here:NameEnter a name for the target group, for example "Sweden", "Private person - Sweden" or similar.IconSelect an image/icon of a flag or motif. If you want to use your own icon, you can upload the image to the file archive (Appearance -> File archive) and then link to the image by entering the image's URL.LanguageSelect the language to be used by the target audience. All active languages of the shop are displayed in the list. If you want to activate more than one language, go to Settings -> Languages.Country of deliverySelect a delivery country to be managed for the target group. The store's delivery countries are shown in the list. If you want to deliver to more countries, activate this under Settings -> Delivery methods.CurrencySelect the currency to be pre-selected for the target group. All active currencies of the store are shown in the list. If you want to activate multiple currencies, do so under Settings -> Currencies.VAT selectionSelect whether the prices should be displayed including or excluding VAT.Then repeat this step to create different target groups, for example for different countries and or individuals/businesses.
-

Preview themes in mobile view
27 Nov 2025
Here we go through how to preview themes in mobile view for different browsers. Most browsers have tools that resize the window to mimic the look of a mobile or tablet. Since many end customers make purchases on mobile and tablet, it can be interesting to preview a new theme you've created, for example, so that you also know how the look of the store will look to those customers.Previewing with Firefox, Google Chrome and EdgeWhen previewing an active or inactive theme under Appearance>Themes, do the following to open the inspection tool in the browser:Firefox: Ctrl + shift + MGoogle Chrome: F12 and then Ctrl + shift + MEdge: F12 and then Ctrl + shift + MNow the inspection tool is running, you can then choose to widen the height or width of the view itself , or choose one of the preset sizes to mimic how it would look for a number of different devices.Previewing with SafariWhen previewing an active or inactive theme under Appearance>Themes, do the following to open the inspection tool in your browser:1. Safari menu> Preferences> Advanced2. Tick the box for "Show develop menu in menu bar"3. "Develop" is now an option in the menu bar in Safari. Click on Develop-> "Responsive design mode"Now the inspection tool is running, you can then choose to widen the height or width of the view itself, or choose one of the pre-set sizes to mimic how it would look for a number of different devices.To preview with Safari you need to go through a few more steps, so we recommend using a Firefox, Chrome or Edge in the first instance for mobile view previews.
-

Product templates / article templates
27 Nov 2025
Create a product template with sizes and colours and then link the template to multiple productsWhat is a product template?If you have many products that have the same options (for example, trousers that have the same sizes and colors) and you don't want to specify this manually, one by one on each product, you can create an article template. Product templates are only available in Webshop Plus and Webshop Pro subscriptions.What settings are available on a product template?There are three different properties that can be activated on a template and they are:Properties (attributes)Customer choice (sizes/colors)Related productsCreate a product templateGo to Products -> Product Templates -> Click on + New Product TemplateEnter a name and then click on "Add". Once the template has been created, four tabs are now displayed, template properties, properties, customer choice, and related products. Properties (attributes)For example, if you sell DVD movies and want to list the genre, director, and actor of the movies, product properties are an excellent feature to use. All directors and actors are entered into the template and once you have linked the template, you then select the specific director and actor on each product.For instructions on how to create attributes, go to the "Product Properties (Attributes)" manual page.Customer choice (sizes/colors)Create various choices that customers must then select on the products before they can add it to the shopping cart, such as sizes, colors, materials, options, etc. For instructions on how to create customer choices, go to the "Customer choices (sizes and colors)" manual page.Related productsOn each product page in the store, you can choose to display a list of other products at the bottom of the page, called related products. In the theme, you can choose to activate a feature that automatically displays related products based on what other customers have purchased in combination with the current product and/or product pages they have visited before.This feature allows you to manually create a relationship list, for example for "Accessories" or similar. If the relationship list is created on a product template, this list can easily be applied to multiple products. For instructions on how to create relationship lists, go to the "Related Products" manual page.Adding a product template to a productGo to Products -> select product, properties. Scroll down to the block called "Properties".At the product template, a list of all created templates will be displayed. Select the one you want and don't forget to save it. Sure. Each product can have a product template activated.
-

Shopping lists / Purchase lists
27 Nov 2025
Allow logged-in visitors to save products in different shopping lists.What are shopping lists?It is a feature where logged-in visitors can save one or more products in different lists, which can then be easily added to the shopping basket and checked out.This function is only available in Webshop Plus and Pro. Visitors must be logged in to be able to save products and create and save shopping lists. Enable shopping lists in the themeGo to Appearance -> Themes -> select theme, edit -> Content -> Product page -> Favorites & shopping lists. At "Shopping lists" select "Enabled" and save. How does it work in the shop?Once a visitor has logged in with their customer account, an icon with the text "Add to list" will appear below the buy button on each product page.The first time a visitor clicks on the icon, a box will appear that says "My Lists" and a button to create the first list. Click on the "New List" button and enter a name, for example "Christmas Gifts" and click on the "Create List" button. Then click on the newly created list and the "Add product" button will appear. The product will then be saved in the list. All saved lists are then available under the customer's "My pages".
-

How do I choose the order in which my products appear on product group pages?
27 Nov 2025
Set up automatic or manual sorting on your product group pagesAutomatic sorting on all product group pagesBy default, all product group pages are linked to the sorting selected in the theme (Appearance -> Themes -> select theme, edit -> Content -> Product group page -> scroll down to the section for "Articles" and then Sorting). You can choose from seven different sorting options: name, price, latest, most popular, stock, product number and weight. All items on all product group pages will then be sorted according to the selected sorting above.Change sorting on a specific product group pageIf you want to change sorting on a specific product group page, you can do so. You then have to go to the product group through Assortment -> Productgroups -> select product group, edit -> the tab "Appearance" and click in "Custom appearance". You then get to add a product table and in the product table settings on the right, you choose it to be "Linked" and then a block with "Sorting" appears a little further down. This sorting is a bit different from the theme's sorting but you can choose from the following sorting orders: last modified, last added, cheapest first, product number ascending, product number descending, product name and most sold. The articles on this product group page will then be sorted according to the selected sorting and will ignore the sorting from the theme.Manual sortingIf none of the automatic sorting fits, you can choose to place the items one-by-one in a specific order.Assortment -> Product groups -> select product group, edit -> the "Appearance" tab and click in "Custom Appearance". You then get to add a product table and in the product table settings on the right, you choose it to be "Manual" (instead of "Linked").Now you can select items in each box in any order you like. Move your mouse cursor over one of the boxes in the product table and then press the button with the tick (Select product). Select a product by searching on the name, or by browsing product groups. Click on add and save.One thing to keep in mind when making a product table manually is that new items added to the product group will not be displayed automatically, but you need to go to the product group page and add each new product to the product table manually each time.Note also that a product can only be displayed once on each page. So you cannot add the same product several times in a product table and any duplicates will disappear when you save.
-

Shipping and delivery: how do I create my delivery methods?
27 Nov 2025
Here we explain how to create, set up and edit your shipping and delivery methods. We explain the shipping cost, VAT rate, charge per weight and how to differentiate between shipping countries etc.Video guide (in swedish)Create a delivery methodGo to Settings -> Shipping -> the "New delivery method" button in the top right corner.First choose under "Properties" to name the method, e.g. "Standard delivery" or "Postnord" and then add a descriptive text around the method (optional to do). There are also some settings to go through, such as "Disable for bulky items", "Available for customer type" and "Free shipping over certain purchase amount". Then you save the delivery method.Note that the delivery method becomes active, even if you don't tick the box, and then you need to untick the box and save again if you don't want customers to see it (assuming you've already activated their shop, otherwise it won't matter).First after saving, you can also choose to set that particular method as the default for the customer - so it appears immediately when the customer is about to check out. Freight ratesA freight rate is required if you want to charge a fee for the freight. Under the "Freight tariff" tab, select "Insert new tariff" in the right-hand corner, then enter a name for the tariff (not shown to the customer), e.g. "Sweden". Then you can enter a minimum weight in grams and a fee. A minimum weight is what makes the delivery method kick in at checkout - so if you set 1000 grams, the order must exceed this to appear in your checkout - then you save. Next, the "Set weight range" button appears where you can select different shipping charges for different weight ranges. For example:1-1000 grams = 49 kr1001-2000 grams = 69 kr2001-5000 grams = 99 kr5001... and so on. You can create as many tariffs as you want.Connect tariffs to shipping addressAfter your tariffs are created, it's time to connect them to different countries. There you will first see "Default tariff" where it says "No delivery" as default. You use this only if you want to use the same tariff worldwide, alternatively the same to the few countries/parts of the world and a single country with a different tariff. Under the standard tariff block there are different blocks for different continents, as well as "EU countries" and "European non-EU countries". If you only want to ship to single countries, click on the arrow on the right and set the tariff of the countries to which delivery can be made. You can also see how many individual tariffs are available under each block. It says 0 if you have chosen a Standard tariff. For each country there is also an "Add" link where you can choose to filter by postcode. Connect to customer groupsUnder the tab "Connect to customer groups" you can choose that the created delivery method will only be shown for customer groups that you choose yourself. There you are greeted by "Allow delivery method for" and in the dropdown menu "All customers" is the default. You can instead select "Specific customer groups" and then tick the customer groups to which the delivery method applies. If a customer comes to the checkout and is not in the selected customer group, the delivery method will not be displayed at checkout either. Bulky itemsUnder "Properties" you can click "Disable for bulky items", which means that the delivery method cannot be used by customers who want to order a bulky item. Each item has a checkbox that determines that it is bulky. If you choose to disable a delivery method for bulky items and at the same time sell items that are not bulky, you must also create another delivery method that is displayed to customers who come to checkout without bulky items. Advance by mailAdvance by mail is a shipping method within the Post Office. The "Allow payment by postal advance" option is checked if the customer must pay a fee before the shipment is delivered to the customer. The amount can be the value of the contents and often often the Post Office charges. If you tick Cash on Delivery, you will then be presented with some settings that need to be filled in, as well as the country in which Cash on Delivery will apply. Parcel TemplateThere is a tab under "Delivery Methods" called "Parcel Template". Here you can create different package templates where you enter a packaging weight and can then link a template to a delivery method.Click here to read more about parcel templates.Please note that the shipping fee does not apply......for those items where you have specifically chosen that the item should have free shipping. You do this on the article page under "Assortment". If the customer only comes to the checkout with items where you have clicked on "Free shipping", then no shipping fee will be charged via the delivery method. If the customer comes to the checkout with several items, one of which is set to free shipping but the others are not, the shipping fee will still be charged via the delivery method.
-

Add a logo to your webshop
27 Nov 2025
One of the easiest ways to make your shop more personal is to add your own logo that is visible in the shop. The logo is added to the theme that you use in the shop, go to: Appearance->Themes->Click on "edit" on the active theme->Click on the "Style" tab. Upload your logo here or add your shop name in text if you don't have a logo: You have the possibility to adjust the proportions based on the logo you upload, if you have a square image you choose 1:1 in proportion while for a more rectangular image you need e.g. 5:1. Click here for more information about proportions.You can set the maximum width of your logo to prevent it from being too large or too small: Under Appearance->Logo you can also add a logo. The logo you add there is only visible in documents you can extract from your orders, such as receipts and packing slips.
-

Selling products without price
27 Nov 2025
To enable the sale of products without price:Go to Assortment >> Settings >> Products without price >> check "Products entered without price are available in the store for viewing and ordering" >> Save.Next, enter a price of 0 for the products that should be able to be sold without a price. When the product's price is 0 instead of "no price", the product will be available for ordering in the store: